R
Runes
Guest
Hello OTLanders! As I see great asking for avatars when request threads are made, I tought why wouldn't I teach this people how to make their own avatars!
So let's start this one.
Things you will need:
Image editor, manipulator
You can use Photoshop (if you are lucky like me to have it) or use GIMP which is same as Photoshop but free. Both will do fine.
GIMP download : GIMP - The GNU Image Manipulation Program
Photoshop trial : Adobe - Download free trial version Adobe Photoshop CS6 | Adobe
Brushes (optional)
Brushes are styles that look like certain element. For example there is a abstract brush or a star brush. There are both Photoshop and GIMP ones.
GIMP brushes : Gimp Brushes - Download Free Gimp Brushes at BrushDirectory.com
Photoshop brushes : Photoshop Brushes - Free Downloads at BrushDirectory.com
Nice looking image or render
This is a must, or not if you are trying to make avatar simply using brushes. It's a nice picture that you will use in your avatar. Make sure it's HD.
HD Renders : Planet Renders: Best source for image cutouts
1) Fantasy-light avatar
This is a avatar that is created using light effects and brushes.
STEP 1
Start off by opening your image editor and starting new file with this settings:
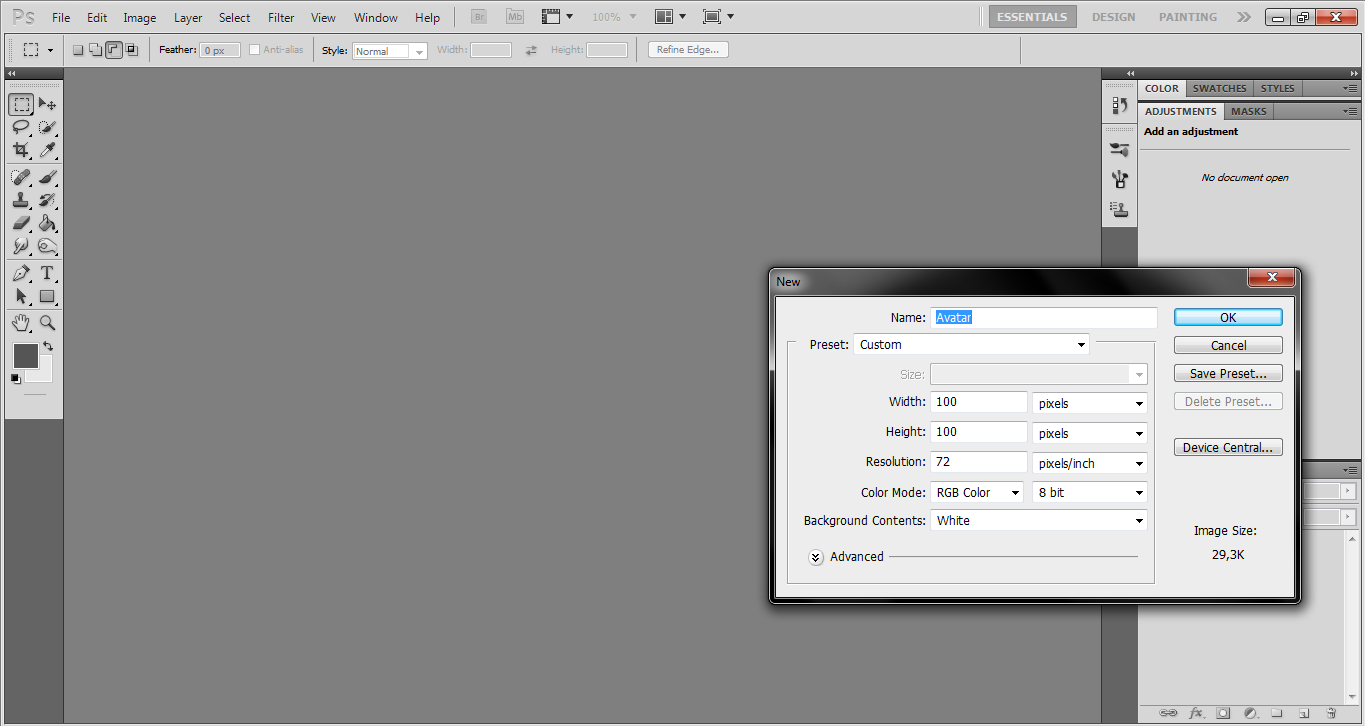
Please note that premium users can use 120x120!
STEP 2
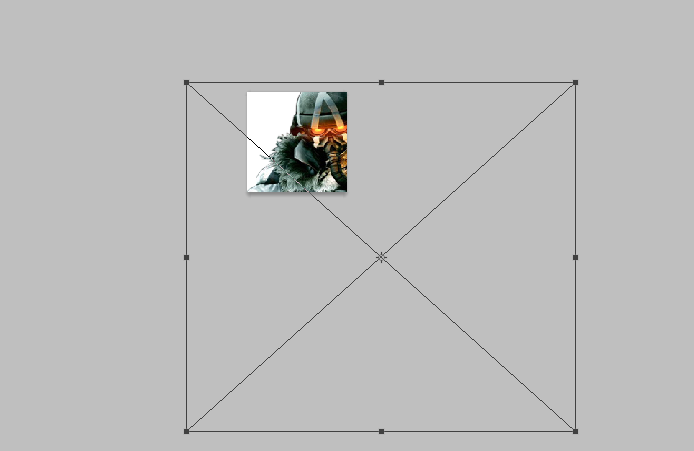
Head over to PLANET RENDERS and find your render. Download it and go to your file. Then go to FILE>PLACE and find your image and use the free transform to place it as you see fit.
STEP 3
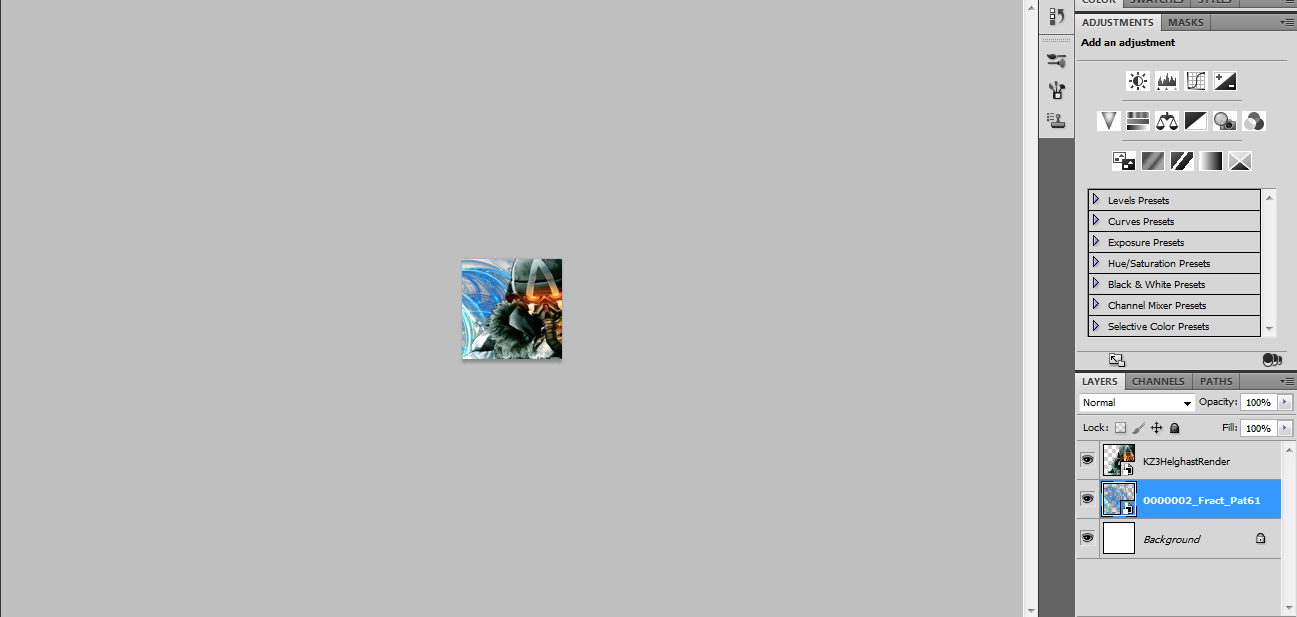
Now is the time to create the background. Create a new layer by using the keys CTRL+Shift+N. Name it brushes. Now you can use the brush tool to make the background or use a abstract render and make it easier for yourself. Just place the abstract render like you did with the first render, and then move the layer down before the first render.
STEP 4
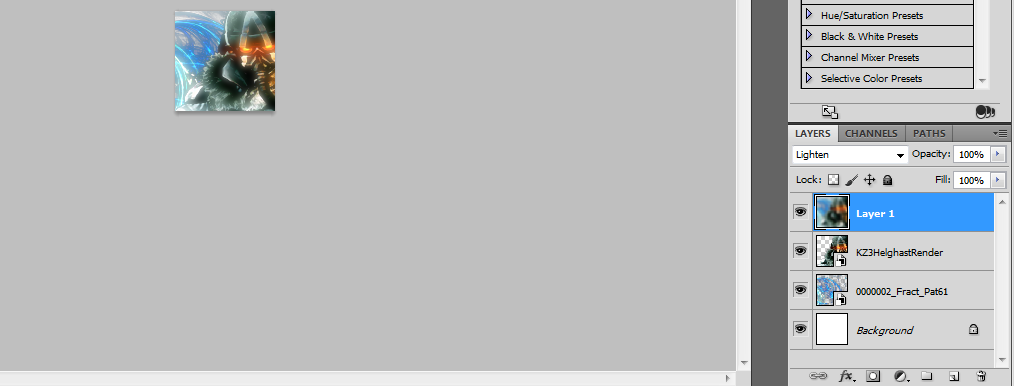
Let's do this THANG! Create a new layer, then CTRL+SHIFT+ALT+E. Now you will get a layer that is made of all elements of avatar. While on this layer go FILTER>BLUR>GAUSSIAN BLUR. This will give you a blurred image. Now at the layer menu select it and at the upper corner set it to "lighten".
It will look something like this:
STEP 5
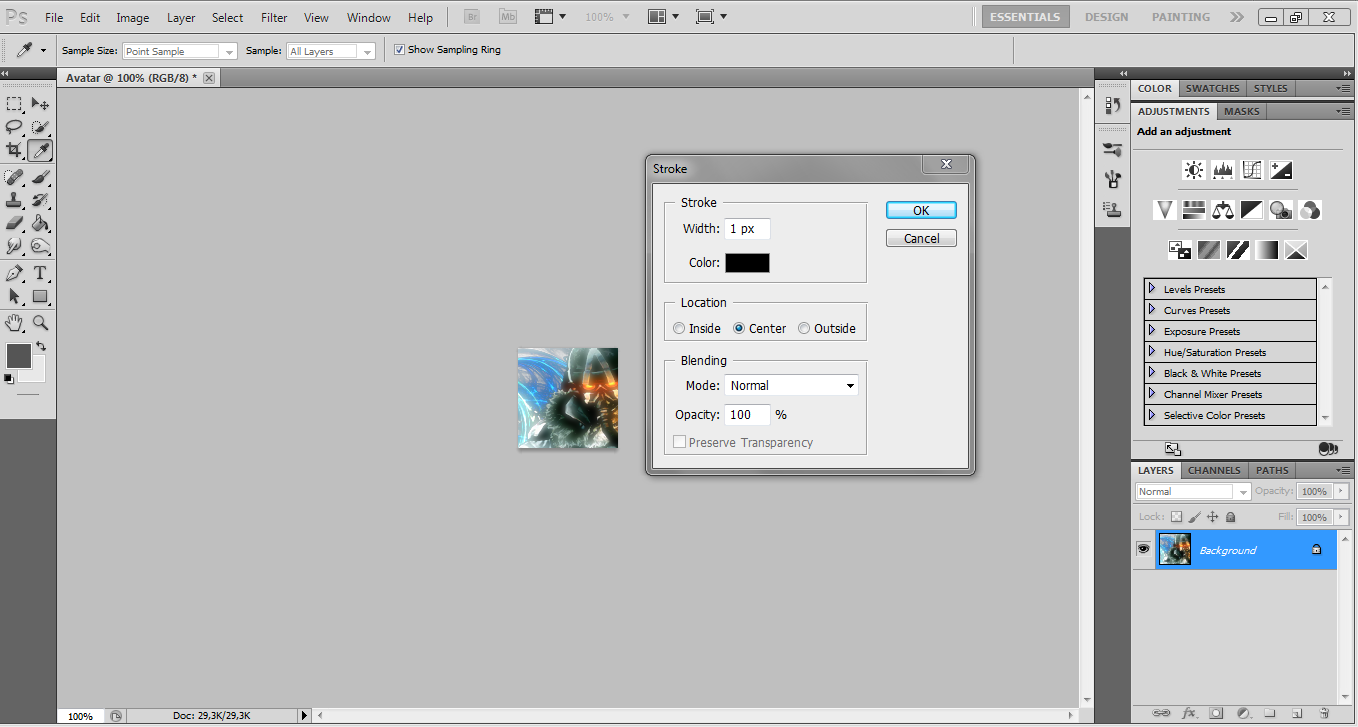
Now the finish. Make a new layer, and use again CTRL+SHIFT+ALT+E to put all the elements into one layer. While on the layer go FILTER>SHARPEN. This will tone the light down a bit, making it more visible. Now right-click on any of the layers and select the option "Merge Visible" from the dropdown menu. Now click SELECT>ALL and then go EDIT>STROKE and use the following options:
That will give your final result. Now you can add text or add your effects.

2) Clear-proffessional avatar
This is a short one, but it looks good.
STEP 1
Use the settings as in the first tutorial to start. Find image and place it as you see fit. But this time you will be using a whole image not a render. This means a image with background.
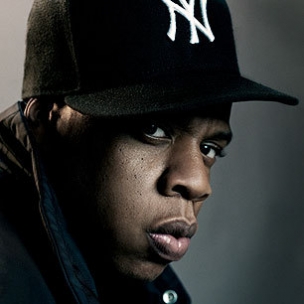
I will be using this image:
STEP 1
As I said this will be a short one. So after you placed the image you will be merging right away. Click on the image at the layer menu and use the "Merge visible" function. Then use FILTER>SHARPEN>SHARPEN. Then SELECT>ALL and go EDIT>STROKE and use the preferences above or your choice. And that will give you your final avatar:

FINAL NOTES:
This is something that I created using brainstorming so it's not that in-depth. I didn't use so much attention while creating the avatars, so I apologize that they are not "OMG AMAZING!". Also IF YOU HAVE ANY QUESTION OR SUGGESTIONG PLEASE POST!
So let's start this one.
Things you will need:
Image editor, manipulator
You can use Photoshop (if you are lucky like me to have it) or use GIMP which is same as Photoshop but free. Both will do fine.
GIMP download : GIMP - The GNU Image Manipulation Program
Photoshop trial : Adobe - Download free trial version Adobe Photoshop CS6 | Adobe
Brushes (optional)
Brushes are styles that look like certain element. For example there is a abstract brush or a star brush. There are both Photoshop and GIMP ones.
GIMP brushes : Gimp Brushes - Download Free Gimp Brushes at BrushDirectory.com
Photoshop brushes : Photoshop Brushes - Free Downloads at BrushDirectory.com
Nice looking image or render
This is a must, or not if you are trying to make avatar simply using brushes. It's a nice picture that you will use in your avatar. Make sure it's HD.
HD Renders : Planet Renders: Best source for image cutouts
1) Fantasy-light avatar
This is a avatar that is created using light effects and brushes.
STEP 1
Start off by opening your image editor and starting new file with this settings:
Please note that premium users can use 120x120!
STEP 2
Head over to PLANET RENDERS and find your render. Download it and go to your file. Then go to FILE>PLACE and find your image and use the free transform to place it as you see fit.
STEP 3
Now is the time to create the background. Create a new layer by using the keys CTRL+Shift+N. Name it brushes. Now you can use the brush tool to make the background or use a abstract render and make it easier for yourself. Just place the abstract render like you did with the first render, and then move the layer down before the first render.
STEP 4
Let's do this THANG! Create a new layer, then CTRL+SHIFT+ALT+E. Now you will get a layer that is made of all elements of avatar. While on this layer go FILTER>BLUR>GAUSSIAN BLUR. This will give you a blurred image. Now at the layer menu select it and at the upper corner set it to "lighten".
It will look something like this:
STEP 5
Now the finish. Make a new layer, and use again CTRL+SHIFT+ALT+E to put all the elements into one layer. While on the layer go FILTER>SHARPEN. This will tone the light down a bit, making it more visible. Now right-click on any of the layers and select the option "Merge Visible" from the dropdown menu. Now click SELECT>ALL and then go EDIT>STROKE and use the following options:
That will give your final result. Now you can add text or add your effects.

2) Clear-proffessional avatar
This is a short one, but it looks good.
STEP 1
Use the settings as in the first tutorial to start. Find image and place it as you see fit. But this time you will be using a whole image not a render. This means a image with background.
I will be using this image:
STEP 1
As I said this will be a short one. So after you placed the image you will be merging right away. Click on the image at the layer menu and use the "Merge visible" function. Then use FILTER>SHARPEN>SHARPEN. Then SELECT>ALL and go EDIT>STROKE and use the preferences above or your choice. And that will give you your final avatar:
FINAL NOTES:
This is something that I created using brainstorming so it's not that in-depth. I didn't use so much attention while creating the avatars, so I apologize that they are not "OMG AMAZING!". Also IF YOU HAVE ANY QUESTION OR SUGGESTIONG PLEASE POST!
")
