Hello and welcome to a tutorial that should have been done a long time ago. I've seen many people asking for a tutorial for compiling RME and here I am to deliver.
Before we start I'm going to assume that you already have some experience compiling programs. If you don't, I recommend you go through my "Compiling TFS 1.0" and "Compiling OTC" tutorials just to get the hang of things. I'm going to abbreviate a few steps and this tutorial is for people who think and can logically deduce that some of the things here are different in their case.
Lets get to work!
We will need the following:
Now lets get started:
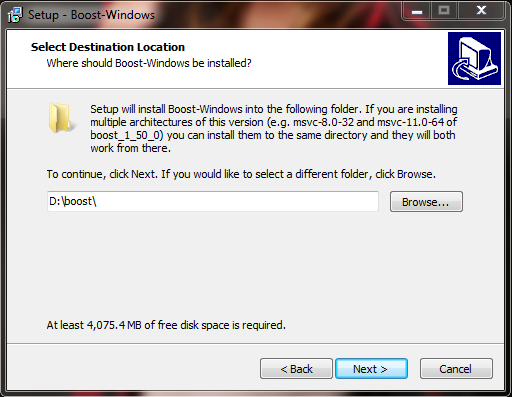
1. Install boost:
2. Next extract the wx folder to your C:/ drive(can be anywhere but in this tutorial I have it there)

3. Download and extract the RME source and open the file RME.sln that is inside of the folder vcproj.
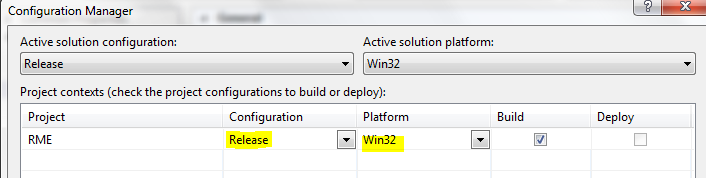
4. We have to set our build type to Release: Leave it at x32, this tutorial is only for compiling it to x32, you can still use it on a x64 system if you have one.
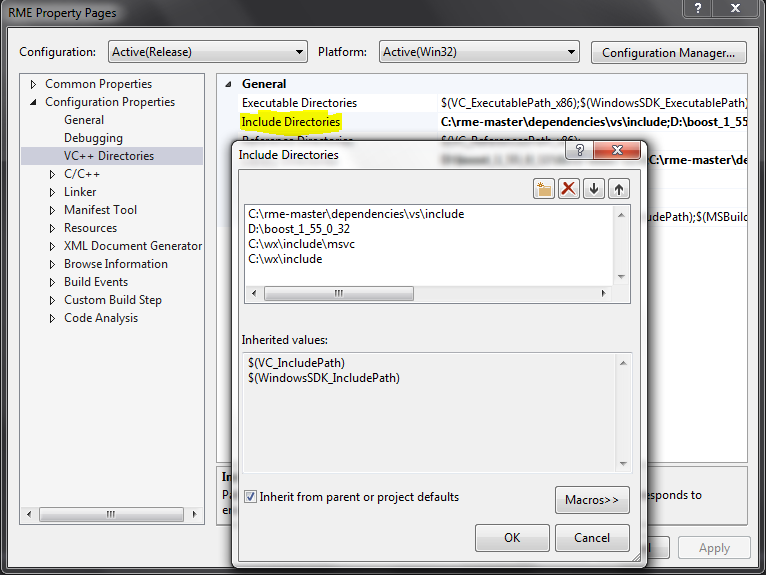
5. Now lets set up our include directories:


8. Then it will be.

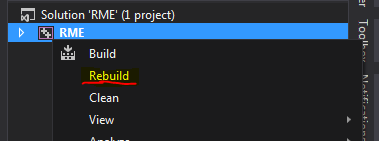
9. Press rebuild and it should compile.
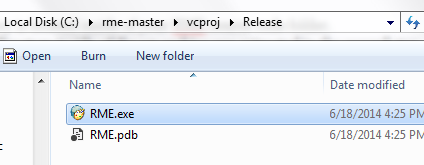
10. When its done you will find the exe file here:
11. You only need one dll file that you can find here.
There you go you have compiled RME developed by @Remere !
Before we start I'm going to assume that you already have some experience compiling programs. If you don't, I recommend you go through my "Compiling TFS 1.0" and "Compiling OTC" tutorials just to get the hang of things. I'm going to abbreviate a few steps and this tutorial is for people who think and can logically deduce that some of the things here are different in their case.
Lets get to work!
We will need the following:
- MSVC 2013. Express will do.
- Next lets get boost for 32 bit programs from here.
- We need to use WxWidgets and since it takes a while to compile I've done it for you, download from here(this is version 3.0.1).
- And of course, we need the RME Source Code.
Now lets get started:
1. Install boost:
2. Next extract the wx folder to your C:/ drive(can be anywhere but in this tutorial I have it there)
3. Download and extract the RME source and open the file RME.sln that is inside of the folder vcproj.
4. We have to set our build type to Release: Leave it at x32, this tutorial is only for compiling it to x32, you can still use it on a x64 system if you have one.
5. Now lets set up our include directories:
- The first listed directory is located inside of your RME source code folder.
- The second one is the place where you installed boost from the fist step.
- The third one is the /include/msvc directory inside of the wx archive you extracted in the second step.
- The fourth is the /include directory of the wx archive you extracted in the second step.
- The first listed one is the place where you installed boost from the fist step + the lib32-msvc-12.0 directory.
- The second listed directory is located inside of your RME source code folder.
- The third one is the /lib directory inside of the wx archive you extracted in the second step.
- The fourth is the /lib/vc_lib directory of the wx archive you extracted in the second step.
8. Then it will be.
9. Press rebuild and it should compile.
10. When its done you will find the exe file here:
11. You only need one dll file that you can find here.
There you go you have compiled RME developed by @Remere !
Last edited:
 .. but i will try to get 64x libs and tell you if i'm done