jo3bingham
Excellent OT User
1) Tibia.dat Structure
The first 4 bytes contains information for the dat version, I think this is used to see which structure to use (7.7+ or 7.6-). The next 2 bytes are item count, the next 2 bytes are outfit count, the next 2 bytes are effect count, and the next 2 bytes are distance count. The next byte starts the flags information for the first item (ID = 100), these flags are indicated by a value between &H0 and &H1F:
Here's a basic byte list including the header information and the information for the first object (100). [x] = byte count:
2) .dat Reader
After studying the .dat structure I was able to make a small, but working program to read the Tibia.dat file and allow you to get information for each object. The program is written in VB.Net and the sources are included.

When you first start the program it will ask you to locate and open your Tibia.dat file. Once this is finished the program will load and the items, outfits, effects, and distance fields will be filled. In the above screenshot I've loaded the 8.40 .dat file. The current structure will work back to version 7.7x I believe. If you want to check the information of an object, place it's ID (ie. gold's ID is 3031) in the Client ID field and click 'Go'. The IDs start at 100, there are 9104 items so the max item ID is 9204, outfits are from 9205-9530, effects are from 9531-9597, and distances are from 9599-9640. If you put a value lower than 100 or higher than 9640 the program will crash because I didn't add any type of error handling. Everything should be self explanatory, equipable is also pickupable, the sprites dropdown box contains IDs of the sprites that the object uses from the .spr file.
If you have any questions please feel free to ask.
Download - http://jo3.knoxstudio.net/sources/dat reader.rar
3) Tibia.spr Structure + link to code
The first 4 bytes contain information for the sprite version(?), like in the .dat file I'm not sure what this information is used for, maybe so the client can make sure you're using the right sprite file(?). The next 2 bytes are the number of sprites in the file. Then starts each sprites information.
Each sprite is offset by 4 and the sprites start 6 bytes from the beginning of the file, because of the sprite version and number of sprites. Also, the first sprite has an ID of 2 so you have to subtract 1 from each sprite ID to get to its offset. The equation used for this is (6 + (spriteID - 1) * 4). Now that we know this let's get back to the sprite information.
From what I understand the first 3 bytes of each sprite is unnecessary when getting the sprite's pixel information, so just skip the first 3 bytes. The next 2 bytes are the size of the sprite, ie. if this returned 36 then the sprite would be 6x6 pixels. The next 2 bytes are the amount of transparent pixels until a colored pixel. Then the next 2 bytes are the amount of colored pixels until a transparent pixel. The next 3 bytes are the RGB value of the colored pixels and the amount depends on how many colored pixels were found. (ie. If 1 colored pixel was found then there would just be 3 bytes [r][g], if there were 2 colored pixels found then there would be 2 sets of 3 bytes [r][g][r][g].) The transparent/colored pixel information is read from left to right (starts at the top-left of the sprite and ends at the bottom-right).
Here's the structure of the first sprite including the header information (spr version and number of sprites). [x] = number of bytes:
You can view code on how to read sprite information for a spriteID from TibiaAPI (SpriteReader.cs - tibiaapi - Google Code).
Jo3
The first 4 bytes contains information for the dat version, I think this is used to see which structure to use (7.7+ or 7.6-). The next 2 bytes are item count, the next 2 bytes are outfit count, the next 2 bytes are effect count, and the next 2 bytes are distance count. The next byte starts the flags information for the first item (ID = 100), these flags are indicated by a value between &H0 and &H1F:
- &H0 = ground tile
- &H1 = on top
- &H2 = walk through (doors etc.)
- &H3 = walk through (arches etc.)
- &H4 = container
- &H5 = stackable
- &H6 = ladder?
- &H7 = usable
- &H8 = rune
- &H9 = writeable
- &HA = readable
- &HB = fluid container
- &HC = splash
- &HD = blocking
- &HE = immoveable
- &HF = blocks missile
- &H10 = blocks monster movement
- &H11 = equipable
- &H12 = hangable (wall item)
- &H13 = horizontal (wall item)
- &H14 = vertical (wall item)
- &H15 = rotateable
- &H16 = light info
- &H17 = unknown?
- &H18 = floor change down?
- &H19 = draw offset
- &H1A = height
- &H1B = draw with height offset for all parts (2x2) of the sprite,
- &H1C = offset life-bar (for larger monsters)
- &H1D = minimap color
- &H1E = floor change?
- &H1F = unknown?
- &H0 = ground tile is followed by a 2 byte value indicating the speed
- &H9 = writeable is followed by a 2 byte value indicating the max text length
- &HA = readable is followed by a 2 byte value indicating the max text length
- &H16 = light info is followed by a 2 byte value indicating the light level then another 2 byte value indicating the light color
- &H19 = draw offset is followed bye a 2 byte value indicating the x offset then another 2 byte value indicating the y offset
- &H1A = height is followed by a 2 byte value indicating the draw height(?)
- &H1D = minimap color is followed by a 2 byte value indicating the minimap color
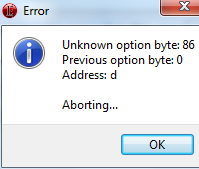
- &H1E = floor change? is followed by a 1 byte value indicating one of these values (86 - openable holes, 77 - can be used to go down, 76 - can be used to go up, 82 - stairs up, 79 - switch) then another 1 byte value that always returns 4
Here's a basic byte list including the header information and the information for the first object (100). [x] = byte count:
Code:
[4] - dat version
[2] - item count
[2] - outfit count
[2] - effect count
[2] - distance count
[1] - ground tile
[2] - speed = 0
[1] - blocking
[1] - immoveable
[1] - blocks missiles
[1] - light info
[2] - light level = 3
[2] - light color = 156
[1] - width = 1
[1] - height = 1
[1] - blendframes = 1
[1] - divx = 4
[1] - divy = 4
[1] - divz = 1
[1] - animation length = 1
[2] - sprite ID = 136
[2] - sprite ID = 137
[2] - sprite ID = 138
[2] - sprite ID = 139
[2] - sprite ID = 140
[2] - sprite ID = 141
[2] - sprite ID = 142
[2] - sprite ID = 143
[2] - sprite ID = 144
[2] - sprite ID = 145
[2] - sprite ID = 146
[2] - sprite ID = 147
[2] - sprite ID = 148
[2] - sprite ID = 149
[2] - sprite ID = 150
[2] - sprite ID = 151
2) .dat Reader
After studying the .dat structure I was able to make a small, but working program to read the Tibia.dat file and allow you to get information for each object. The program is written in VB.Net and the sources are included.
When you first start the program it will ask you to locate and open your Tibia.dat file. Once this is finished the program will load and the items, outfits, effects, and distance fields will be filled. In the above screenshot I've loaded the 8.40 .dat file. The current structure will work back to version 7.7x I believe. If you want to check the information of an object, place it's ID (ie. gold's ID is 3031) in the Client ID field and click 'Go'. The IDs start at 100, there are 9104 items so the max item ID is 9204, outfits are from 9205-9530, effects are from 9531-9597, and distances are from 9599-9640. If you put a value lower than 100 or higher than 9640 the program will crash because I didn't add any type of error handling. Everything should be self explanatory, equipable is also pickupable, the sprites dropdown box contains IDs of the sprites that the object uses from the .spr file.
If you have any questions please feel free to ask.
Download - http://jo3.knoxstudio.net/sources/dat reader.rar
3) Tibia.spr Structure + link to code
The first 4 bytes contain information for the sprite version(?), like in the .dat file I'm not sure what this information is used for, maybe so the client can make sure you're using the right sprite file(?). The next 2 bytes are the number of sprites in the file. Then starts each sprites information.
Each sprite is offset by 4 and the sprites start 6 bytes from the beginning of the file, because of the sprite version and number of sprites. Also, the first sprite has an ID of 2 so you have to subtract 1 from each sprite ID to get to its offset. The equation used for this is (6 + (spriteID - 1) * 4). Now that we know this let's get back to the sprite information.
From what I understand the first 3 bytes of each sprite is unnecessary when getting the sprite's pixel information, so just skip the first 3 bytes. The next 2 bytes are the size of the sprite, ie. if this returned 36 then the sprite would be 6x6 pixels. The next 2 bytes are the amount of transparent pixels until a colored pixel. Then the next 2 bytes are the amount of colored pixels until a transparent pixel. The next 3 bytes are the RGB value of the colored pixels and the amount depends on how many colored pixels were found. (ie. If 1 colored pixel was found then there would just be 3 bytes [r][g], if there were 2 colored pixels found then there would be 2 sets of 3 bytes [r][g][r][g].) The transparent/colored pixel information is read from left to right (starts at the top-left of the sprite and ends at the bottom-right).
Here's the structure of the first sprite including the header information (spr version and number of sprites). [x] = number of bytes:
Code:
[4] - spr version = 1228754556
[2] - number of sprites = 28729
[3] - ?
[2] - sprite size = 512
[2] - transparent pixels = 397
[2] - colored pixels = 4
[3] - RGB value = [0][0][0]
[3] - RGB value = [0][0][0]
[3] - RGB value = [0][0][0]
[3] - RGB value = [0][0][0]
[2] - transparent pixels = 27
[2] - colored pixels = 5
[3] - RGB value = [0][0][0]
[3] - RGB value = [12][84][17]
[3] - RGB value = [18][145][21]
[3] - RGB value = [8][88][12]
[3] - RGB value = [0][0][0]
[2] - transparent pixels = 3
[2] - colored pixels = 1
[3] - RGB value = [0][0][0]
[2] - transparent pixels = 22
[2] - colored pixels = 6
[3] - RGB value = [0][0][0]
[3] - RGB value = [16][98][28]
[3] - RGB value = [17][199][21]
[3] - RGB value = [21][169][28]
[3] - RGB value = [9][104][15]
[3] - RGB value = [0][0][0]
[2] - transparent pixels = 2
[2] - colored pixels = 4
[3] - RGB value = [0][0][0]
[3] - RGB value = [115][180][44]
[3] - RGB value = [0][0][0]
[3] - RGB value = [0][0][0]
[2] - transparent pixels = 19
[2] - colored pixels = 8
[3] - RGB value = [0][0][0]
[3] - RGB value = [157][8][13]
[3] - RGB value = [235][30][31]
[3] - RGB value = [8][174][17]
[3] - RGB value = [13][105][26]
[3] - RGB value = [157][8][13]
[3] - RGB value = [237][27][35]
[3] - RGB value = [0][0][0]
[2] - transparent pixels = 1
[2] - colored pixels = 4
[3] - RGB value = [0][0][0]
[3] - RGB value = [4][57][8]
[3] - RGB value = [115][180][44]
[3] - RGB value = [0][0][0]
[2] - transparent pixels = 19
[2] - colored pixels = 12
[3] - RGB value = [0][0][0]
[3] - RGB value = [6][62][10]
[3] - RGB value = [6][60][10]
[3] - RGB value = [12][152][17]
[3] - RGB value = [13][97][26]
[3] - RGB value = [6][62][10]
[3] - RGB value = [6][62][10]
[3] - RGB value = [1][40][5]
[3] - RGB value = [0][0][0]
[3] - RGB value = [4][69][9]
[3] - RGB value = [33][169][45]
[3] - RGB value = [0][0][0]
[2] - transparent pixels = 21
[2] - colored pixels = 11
[3] - RGB value = [0][1][0]
[3] - RGB value = [5][61][10]
[3] - RGB value = [13][174][18]
[3] - RGB value = [26][189][35]
[3] - RGB value = [12][84][25]
[3] - RGB value = [1][40][5]
[3] - RGB value = [8][95][13]
[3] - RGB value = [16][169][21]
[3] - RGB value = [0][0][0]
[3] - RGB value = [0][0][0]
[3] - RGB value = [0][0][0]
[2] - transparent pixels = 20
[2] - colored pixels = 9
[3] - RGB value = [0][0][0]
[3] - RGB value = [0][1][0]
[3] - RGB value = [7][55][12]
[3] - RGB value = [25][188][32]
[3] - RGB value = [19][234][23]
[3] - RGB value = [22][132][29]
[3] - RGB value = [7][61][10]
[3] - RGB value = [6][61][10]
[3] - RGB value = [0][0][0]
[2] - transparent pixels = 1
[2] - colored pixels = 5
[3] - RGB value = [0][0][0]
[3] - RGB value = [119][187][45]
[3] - RGB value = [0][0][0]
[3] - RGB value = [0][0][0]
[3] - RGB value = [0][0][0]
[2] - transparent pixels = 17
[2] - colored pixels = 8
[3] - RGB value = [0][0][0]
[3] - RGB value = [0][0][0]
[3] - RGB value = [6][42][8]
[3] - RGB value = [15][148][20]
[3] - RGB value = [18][231][23]
[3] - RGB value = [19][184][23]
[3] - RGB value = [16][86][22]
[3] - RGB value = [0][0][0]
[2] - transparent pixels = 1
[2] - colored pixels = 6
[3] - RGB value = [0][0][0]
[3] - RGB value = [0][0][0]
[3] - RGB value = [1][35][4]
[3] - RGB value = [5][82][9]
[3] - RGB value = [131][205][49]
[3] - RGB value = [0][0][0]
[2] - transparent pixels = 17
[2] - colored pixels = 14
[3] - RGB value = [0][0][0]
[3] - RGB value = [115][180][44]
[3] - RGB value = [1][9][3]
[3] - RGB value = [15][103][20]
[3] - RGB value = [17][224][22]
[3] - RGB value = [30][192][38]
[3] - RGB value = [20][105][27]
[3] - RGB value = [0][0][0]
[3] - RGB value = [0][0][0]
[3] - RGB value = [1][22][4]
[3] - RGB value = [15][145][19]
[3] - RGB value = [0][0][0]
[3] - RGB value = [1][37][4]
[3] - RGB value = [0][0][0]
[2] - transparent pixels = 18
[2] - colored pixels = 14
[3] - RGB value = [0][0][0]
[3] - RGB value = [6][85][10]
[3] - RGB value = [0][0][0]
[3] - RGB value = [13][104][18]
[3] - RGB value = [18][155][27]
[3] - RGB value = [21][225][27]
[3] - RGB value = [23][179][30]
[3] - RGB value = [22][153][31]
[3] - RGB value = [0][0][0]
[3] - RGB value = [13][178][16]
[3] - RGB value = [15][194][19]
[3] - RGB value = [13][178][19]
[3] - RGB value = [0][0][0]
[3] - RGB value = [0][0][0]
[2] - transparent pixels = 19
[2] - colored pixels = 13
[3] - RGB value = [0][0][0]
[3] - RGB value = [4][63][9]
[3] - RGB value = [0][0][0]
[3] - RGB value = [13][82][18]
[3] - RGB value = [19][205][26]
[3] - RGB value = [19][206][26]
[3] - RGB value = [14][190][20]
[3] - RGB value = [18][151][24]
[3] - RGB value = [17][143][22]
[3] - RGB value = [8][101][12]
[3] - RGB value = [14][197][21]
[3] - RGB value = [0][0][0]
[3] - RGB value = [0][0][0]
[2] - transparent pixels = 20
[2] - colored pixels = 12
[3] - RGB value = [0][0][0]
[3] - RGB value = [4][63][8]
[3] - RGB value = [0][0][0]
[3] - RGB value = [0][0][0]
[3] - RGB value = [22][134][31]
[3] - RGB value = [24][137][33]
[3] - RGB value = [0][0][0]
[3] - RGB value = [11][84][15]
[3] - RGB value = [0][0][0]
[3] - RGB value = [0][0][0]
[3] - RGB value = [6][78][10]
[3] - RGB value = [0][0][0]
[2] - transparent pixels = 21
[2] - colored pixels = 2
[3] - RGB value = [0][0][0]
[3] - RGB value = [0][0][0]
[2] - transparent pixels = 1
[2] - colored pixels = 2
[3] - RGB value = [0][0][0]
[3] - RGB value = [0][0][0]
[2] - transparent pixels = 1
[2] - colored pixels = 4
[3] - RGB value = [0][0][0]
[3] - RGB value = [0][0][0]
[3] - RGB value = [0][0][0]
[3] - RGB value = [0][0][0]
You can view code on how to read sprite information for a spriteID from TibiaAPI (SpriteReader.cs - tibiaapi - Google Code).
Jo3
") Thanks Rep+.
Thanks Rep+.
")