• There is NO official Otland's Discord server and NO official Otland's server list. The Otland's Staff does not manage any Discord server or server list. Moderators or administrator of any Discord server or server lists have NO connection to the Otland's Staff. Do not get scammed!

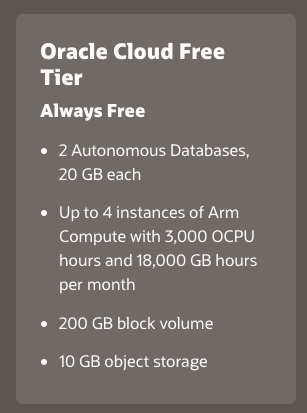
How to get FREE VPS from Oracle Cloud

even though I only used the free tier plans, credits from the 30-day bonus were consumed. I'm afraid I'll start the project I'm planning to create and lose it in a few months.
(the avalue costi analysis informs that is by "Block Storage".. but i dont know why yet. I create my machine within the standards that says there will be no costs: 4cpu 24ram 200gb vpu 120 (even with 50 gb standard vpu 10 they continue to charge))
Post automatically merged:

I'm looking forward to starting over now..
You cannot create 6 VMs as stated in the first post.
The reason is a limit of maximum 200 GB block storage and each server takes 50GB drive... so it's max 4 of them, other 2 will use your money for block storage.
 
Just adding to the post, I had the machine for a long time (150 days+), forgot to clean up the iptables rules, and got locked up when I changed the ssh port (yikes).

Anyway, when I terminated and tried to create a new machine, I got the awful "No Host Capacity"

I then found GitHub - hitrov/oci-arm-host-capacity: This script allows to bypass Oracle Cloud Infrastructure 'Out of host capacity' error immediately when additional OCI capacity will appear in your Home Region / Availability domain. (https://github.com/hitrov/oci-arm-host-capacity). I configured it, put it on the crontab to run every 5, and got my machine a few hours later.
 
You cannot create 6 VMs as stated in the first post.
The reason is a limit of maximum 200 GB block storage and each server takes 50GB drive... so it's max 4 of them, other 2 will use your money for block storage.
My mistake, I didn't realize I had a block volume of more than 200gb created.. I already deleted it and everything is ok.

Just adding to the post, I had the machine for a long time (150 days+), forgot to clean up the iptables rules, and got locked up when I changed the ssh port (yikes).

Anyway, when I terminated and tried to create a new machine, I got the awful "No Host Capacity"

I then found GitHub - hitrov/oci-arm-host-capacity: This script allows to bypass Oracle Cloud Infrastructure 'Out of host capacity' error immediately when additional OCI capacity will appear in your Home Region / Availability domain. (https://github.com/hitrov/oci-arm-host-capacity). I configured it, put it on the crontab to run every 5, and got my machine a few hours later.
very nice share dude!
 
Anyway, when I terminated and tried to create a new machine, I got the awful "No Host Capacity"
If it's same on paid version - it should be - it's hilarious "cloud".
Try to run scalable app there. Every time it tries to get more machines, it gets error 'no capacity'.

I had same problem, but I've changed 'availability domain' to AD-2 and created server, but it was few months ago.
 
Last edited:
Just a warning to everyone following this tutorial:

Dont do those steps:
STEPS 7 - 11: Disable Oracle Cloud firewall
STEPS 12 - 13: Disable Ubuntu firewall
I managed to run a machine for 3 months but then I got hacked by something I never experienced before, it was a miner trojan/crawler. It infected my machine forcing a breach in Ubuntu and took over the machine completely, including running scripts at protected areas of system through cron
I was desesperately but I knew how to stop the bleeding, disabled cron at first thinking I'd be able to kill the processes and search for the log to delete the items that were all scattered in /dev, /var, /usr, /tmp and /dbdata. But every second I disabled it, the script would enable again, change the location of the script and update the cron file.
I decided to take a kamikaze approach and chmod /dev, /var, /usr /tmp and /dbdata to 0 while I removed the trojan, great idea, huh?
No, the moment the miner saw it no longer could execute commands, it tried forcing the ubuntu ssh again and kicked me out of the machine. To avoid be 100% hijacked I did a final blow restarting machine at Oracle... now neither of us could login back.
I had a psql server running locally, I had changed password for user postgres and had a specific password for db access. I have no idea how the fuck they found me online and infected the machine, and the support from Oracle don't include always free resources.
I'd think 10 times before doing any other disable of firewalls, open ONLY what you absolutely need and pray, because it seems that are specific machines out there targeting those Oracle ARM machines (probably they are not using the most updated packages in apt-get and can be exploited by a vulnerability)
I lost 100% of my machine files, I'm 2 days waiting a response from their customer care team but I highly doubt they will be able to do anything to reset permissions through CLI so I can retrieve my files. Even my backups were inside the machine lol.
 
About registration:
In last month a lot of people tried to register to mine crypto on free servers. Now many credit cards are not accepted in registration form. Probably, because these bank users tried to create multiple accounts.
I think it's still worth trying, as you can get free VPSes and it takes around 5 minutes to register.

Disclaimer: otservbr - vcpkg compilation - does not work on ARM processors

------------------------------------------------------------------------------------------------------------

There is new always-free offer on Oracle site:
– AMD Epyc CPU: 2 servers, each with: 1 core, 1 GB ram, 50 GB HDD, 480 mb/s connection
– Ampere ARM CPU: 4 servers, each with: 1 core 2.8 GHz, 6 GB ram, 50 GB HDD, 1gb/s connection
– 10 TB/month transfer limit for all your machines together

These 4 Ampere servers you can combine into 1 server: 4×2.8 GHz, 24 GB ram, 50 GB HDD with 4gb/s connection!
You can also create 6 VPSes for 6 small projects.

Registration:
https://www.oracle.com/uk/cloud/free/
You will have to add credit card to account. Virtual/prepaid cards are not accepted. Revolut virtual card generated in smartphone application is not accepted, but physical Revolut card is ok.

It takes around 15 minutes to activate account after you register.
Wait for e-mail with information that account is ready to use (added 'free credits').

How to order free 4-core VPS and unlock internet access​

When you order any dedic or VPS, it always comes with all internet access opened by default. Here we get machine with almost everything closed (except port 22 for SSH). Every port is blocked in Oracle Cloud panel and in Ubuntu.
If you install nginx on it, it will say in webbrowser that site is offline. Follow next 13 steps to unlock all ports.

STEPS 1 - 6: Order server
STEPS 7 - 11: Disable Oracle Cloud firewall
STEPS 12 - 13: Disable Ubuntu firewall

ORDER SERVER
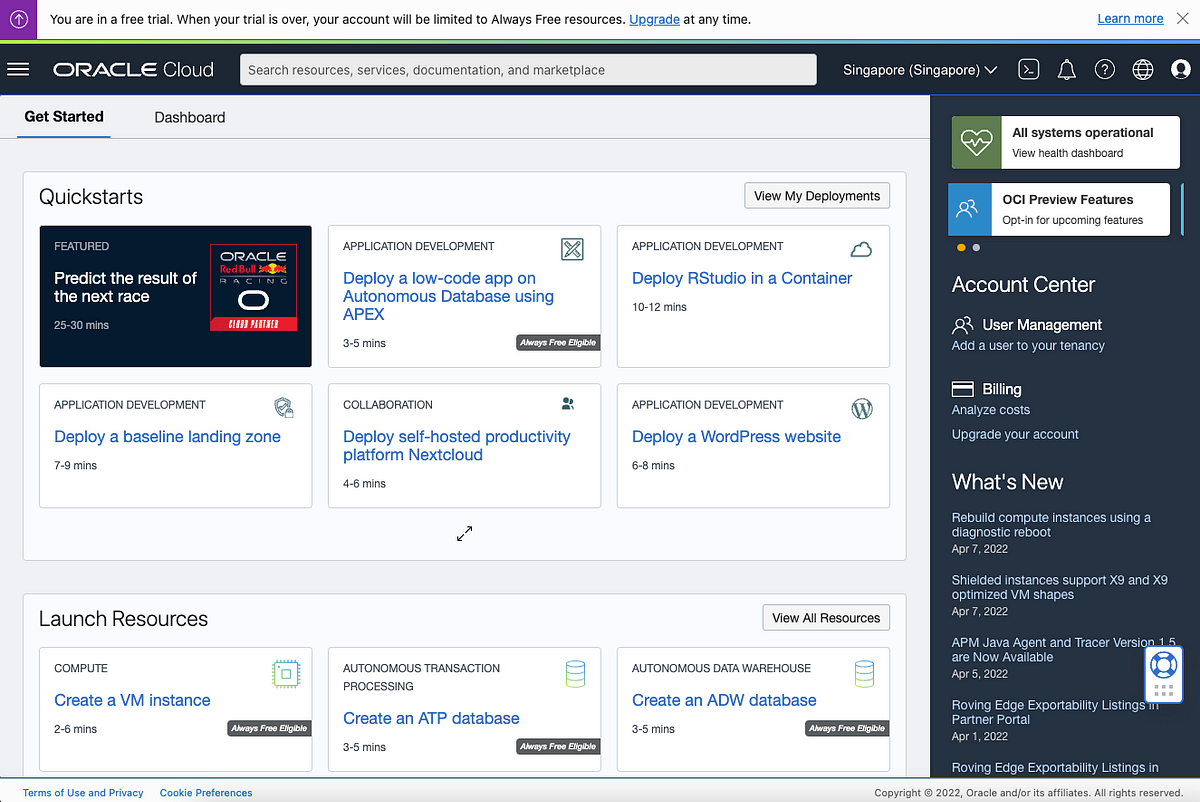
1. Go to Oracle Cloud Infrastructure (https://cloud.oracle.com/) and login to your account. Click on Create a VM instance.
View attachment 64531


2. Click on Edit Image and shape.
View attachment 64532

3. Click on Change image.
View attachment 64533

4. Select Canonical Ubuntu and click Select image.
View attachment 64534

5. Click on Change shape.
  • Select shape Ampere
  • Unroll options
  • Change OCPUs number to 4, it will automatically change RAM to 24 GB
  • Tick VM.Standard.A1.Flex
  • Click Select shape
View attachment 64535

6. Scroll down to Add SSH Keys
------------------------------------------------------------------------------------------------------------
Oracle Cloud servers allow login to SSH only by key. You cannot login using password.
If you don't have SSH key yet. You need to generate one on your computer:

How to Generate SSH keys in Windows 10 and Windows 11 (https://www.howtogeek.com/762863/how-to-generate-ssh-keys-in-windows-10-and-windows-11/)
------------------------------------------------------------------------------------------------------------
Select option Upload public key files (.pub).
View attachment 64536

Your machine should change status to Running within one minute.
On right top side of page, there will appear Public IP address of your server. Copy it. We will use it later.

DISABLE ORACLE CLOUD FIREWALL
7. There will appear Virtual cloud network with some random name. Click on it.
View attachment 64537


8. Click on subnet name.
View attachment 64538

9. Click on Default Security list name.
View attachment 64539

10. Click Add Ingress Rules.
View attachment 64540

11. In source CIDR type:
Code:
0.0.0.0/0
Select All protocols and and click Add Ingress Rules.
View attachment 64541

DISABLE UBUNTU FIREWALL
12. SSH to your server:
View attachment 64542

13. Type:
Code:
sudo systemctl stop ufw
sudo systemctl disable ufw
sudo iptables -I INPUT -j ACCEPT
sudo iptables-save > /etc/iptables/rules.v4
to disable Ubuntu firewall and allow all connections.
View attachment 64543
why disabling ufw ? if you are using tfs and a web service do this
sudo ufw allow http
sudo ufw allow https
sudo ufw allow 7171
sudo ufw allow 7172
that will allow connection to the server and will nto make it vurn for attackers
 
why disabling ufw ? if you are using tfs and a web service do this
I don't like systems that 'try to help' by forcing some rules. Like ufw and apport preinstalled with Ubuntu.

I use iptables to set firewall rules. None of them is about blocking access to port, as all apps required to host OTS should be available from internet (website/OTS) or are already configured to listen on 127.0.0.1 (mysql / mariadb).
 
another warning for everyone following this tutorial:
It seems Oracle is in a hunting season. Several reports popping of people getting randomly disconnected/having their tenancies deactivated without even a pre-warning.
Please, for your OWN SAKE, do not attempt to run anything production related in this machine.
Their support is a joke and you can find INUMEROUS people saying they suddenly woke up and got their machines disconnected/killed without any message whatsover. Even to retrieve their data is impossible and no one tells what's going on and why.
I only found one report of a guy that managed to recover his machine, it took him 3 months.
Plus the last reference happened to a friend of mine, he was in the SECOND WEEK of his trial, running only the 4 core arm cpu.
This means he still had 1500 hours of credit, even so his account was de-activated.

Please, be careful, be mindful. There's no free lunch and apparently this is the biggest scam I've ever seen from VPS companies.

A couple of references:
Great.. now I'm going to have nightmares about waking up to my tenancy terminated for my test server.
Luckily everything is backed up daily, as most people probably should do when testing these types of services.

However I will note that it's been 2-3 months with no issues on my end and I have my neighbor signed up for one as well.
So I will report any issues as they arise from either perspective, safe travels everyone!
 
Last edited:
Great.. now I'm going to have nightmares about waking up to my tenancy terminated for my test server.
Luckily everything is backed up daily, as most people probably should do when testing these types of services.

However I will note that it's been 2-3 months with no issues on my end and I have my neighbor has signed up for one as well.
So I will report any issues as they arise from either perspective, safe travels everyone!
for your own sake, do daily backups of database + always git push your changes. You should be fine.
My backups were being sent to another machine, but both inside same tenancy. So yeah, lost the backup as well.
 
for your own sake, do daily backups of database + always git push your changes. You should be fine.
My backups were being sent to another machine, but both inside same tenancy. So yeah, lost the backup as well.
Exactly my force of habit even if I end up reverting or having to do a second commit to fix typos/small issues.
Awh shucks mate that's terrible - sorry to hear; not sure if you're trying what that guy did in the thread you posted.
But seems after 2-3 months he was able to get his machine back, not sure if thats even worth your time and efforts but by the sounds of it a couple emails went a long way for him! Best of luck on the future projects.
 
Actually i just made the payment i needed a server for like 2 hours so i decided to try this one, i got nothing after the payment went through successfully
 
Hi @Gesior.pl do you maybe know, why my instance can't be started? Im using oracle ~2 months, but from one month, i not playing on my server, is only stay online without any players alive, and yesterday i tried login in and i can't, so i go check instance, and i see, instance is stoped, and when i try start again i get message:


Code:
Unable to start instance: Instance ocid1.instance.oc1.eu-frankfurt-1.antheljtzbxmyxicsgr2yvfdeinw324dvuk2ek5jbfslxi2uxieaqeki5s4a is disabled and will not accept any action requests. Please contact customer support to reenable.

Im looked on google about it, and i found only information about contact with support, but i can;t find any contact for free users, only for ppl what have buyed "something" idk what
 
Im using oracle ~2 months, but from one month, i not playing on my server, is only stay online without any players alive, and yesterday i tried login in and i can't, so i go check instance, and i see, instance is stoped, and when i try start again i get message:
I don't know what they are doing. One of my servers stopped working 24 days ago - in panel it was still 'Active' - and I had to restart it.

I understand that they may decide to shutdown some 'free' machines, but would be nice, if they send some e-mail like: 'We will disable your account tommorow. Backup data within 24 hours.', but they say nothing and some random machines and accounts get stopped/disabled.
 
Just some tips for some extra security.

1. It is recommended to use ed25519 instead of the default rsa encryption for SSH keys.
Code:
ssh-keygen -t ed25519 -a 100 -C "my ot server"
The -C flag is to just add a comment to the key, makes it easier for you to distinguish what the key is for, if you have many OT server machines with SSH keys.

------------------------------------------------------------------------------------------------

2. It is recommended to change your default SSH port to something else, to lower the chance of bruteforce attacks.
Code:
sudo nano /etc/ssh/sshd_config
Uncomment the line with "#Port 22" by removing the # and then enter any other port you may want that isn't used by anything else.
E.g. Port 21073
When you SSH into your machine you must add the -p flag followed by the port.
If you use password authentication, it looks like this:
ssh root@<ip-address> -p 21073

If you use SSH keys, you run:
ssh root@<ip-address> -p 21073 -i <key-filename>

------------------------------------------------------------------------------------------------

3. Do not disable ufw firewall. Instead, it should always be enabled!
Do not forget to add the SSH port (in my example, 21073)

Simply run these:
Code:
sudo apt install ufw
sudo systemctl enable ufw
sudo systemctl start ufw
sudo ufw default deny incoming
sudo ufw default allow outgoing
sudo ufw allow 21073
sudo ufw allow 80
sudo ufw allow 443
sudo ufw allow 3306
sudo ufw allow 7171
sudo ufw allow 7172
sudo systemctl restart ufw

Then check that ufw is enabled and what ports have been added:
Code:
systemctl status ufw
ufw status

------------------------------------------------------------------------------------------------

4. Disable root login and create a non-root user for the machine.
By doing that, an attacker must know your custom username for SSH.
The non-root user is only used to later on enter into root!
You need to again edit the file: /etc/ssh/sshd_config and remove the root login.
For SSH keys, also remove the password authentication in the file.
Basically, you go from this:
(Your Local PC) -> Root
To this:
(Your Local PC) -> Non-Root User -> Root

Look up how to add a user and edit the SSH config. It is not hard.

So when you SSH into the machine, you can either run:
Code:
su -
or
Code:
su root

And then later on go into root.

------------------------------------------------------------------------------------------------

5. Install fail2ban to mitigate bruteforce attacks. Make sure to not just install & enable it, but to actually edit the configuration file for it! Otherwise it is useless. If someone tries to connect multiple times to your machine, they will be IP blocked. This helps against SSH bruteforce attacks.

Code:
sudo apt install fail2ban
systemctl enable fail2ban
systemctl start fail2ban

Make copies of the default config files and then edit the new files:
Code:
cd /etc/fail2ban
cp fail2ban.conf fail2ban.local
cp jail.conf jail.local
sudo nano jail.local

Simply add this line "enabled = true" to any JAILs you may want to enable fail2ban for.
If you don't know how fail2ban jails work, then look it up on their documentation!
Only enable fail2ban for the things you want to protect.
For example, you want to protect your SSH, your web server, your database!
But you do NOT want to protect it on port 7171 or 7172.
Cus then you may IP ban players for some time, if they enter incorrect password.
And you probably don't want that, hehe :)


--------------------------------
tl/dr:
1. Use SSH keys
2. Use a very strong encryption for SSH keys
3. Change the default SSH port
4. Install and enable ufw firewall, configure the ports you want to use
5. Disable root login for SSH and add a non-root user
6. Install fail2ban and configure its "jails"

BONUS: Only allow your non-root user to SSH, by editing:
sudo nano /etc/ssh/sshd_config
Add a new line anywhere in that file and write:
AllowUsers <username>

So you only add your non-root user(s) to the login. You separate them by space.
So if you have the non-root users "john" and "sarah", add:
AllowUsers john sarah
 
Last edited:
@222222 - Thank you for sharing this awesome information, so simple to take a few extra steps to prevent attacks and stay safe out here on the wild west of the internet.
 
@222222 - Thank you for sharing this awesome information, so simple to take a few extra steps to prevent attacks and stay safe out here on the wild west of the internet.

Nothing can be 100% secured, but by doing something is better than doing nothing.
"Security is a journey, not a destination".

I can guarantee you lower the chances for bruteforce attacks by changing SSH port, using SSH keys, have good SSH key encryption and use a non-root user. Disable all other ports on the machine (using ufw firewall) and only enable the ones you use. The first thing bots do is check for port 22 (default) and username 'root' (default). Adding fail2ban on top of it makes it very hard for them to bruteforce anything. I typically allow 5 login attempts per 10 minutes. If it exceeds that, I IP ban them for 60 minutes.

You could go as far as editing the ports for the database and web server as well to something else only you know, and use Nginx as a reverse proxy for that, but that might be too much for most users.

Store as little information as you possibly can on your computer. Instead, write everything down on a piece of paper and have a backup on an external drive instead. That's what I do. I have a notebook with all my passwords, usernames, etc.
 
Just some tips for some extra security.

1. It is recommended to use ed25519 instead of the default rsa encryption for SSH keys.
Code:
ssh-keygen -t ed25519 -a 100 -C "my ot server"
The -C flag is to just add a comment to the key, makes it easier for you to distinguish what the key is for, if you have many OT server machines with SSH keys.

------------------------------------------------------------------------------------------------

2. It is recommended to change your default SSH port to something else, to lower the chance of bruteforce attacks.
Code:
sudo nano /etc/ssh/sshd_config
Uncomment the line with "#Port 22" by removing the # and then enter any other port you may want that isn't used by anything else.
E.g. Port 21073
When you SSH into your machine you must add the -p flag followed by the port.
If you use password authentication, it looks like this:
ssh root@<ip-address> -p 21073

If you use SSH keys, you run:
ssh root@<ip-address> -p 21073 -i <key-filename>

------------------------------------------------------------------------------------------------

3. Do not disable ufw firewall. Instead, it should always be enabled!
Do not forget to add the SSH port (in my example, 21073)

Simply run these:
Code:
sudo apt install ufw
sudo systemctl enable ufw
sudo systemctl start ufw
sudo ufw default deny incoming
sudo ufw default allow outgoing
sudo ufw allow 21073
sudo ufw allow 80
sudo ufw allow 443
sudo ufw allow 3306
sudo ufw allow 7171
sudo ufw allow 7172
sudo systemctl restart ufw

Then check that ufw is enabled and what ports have been added:
Code:
systemctl status ufw
ufw status

------------------------------------------------------------------------------------------------

4. Disable root login and create a non-root user for the machine.
By doing that, an attacker must know your custom username for SSH.
The non-root user is only used to later on enter into root!
You need to again edit the file: /etc/ssh/sshd_config and remove the root login.
For SSH keys, also remove the password authentication in the file.
Basically, you go from this:
(Your Local PC) -> Root
To this:
(Your Local PC) -> Non-Root User -> Root

Look up how to add a user and edit the SSH config. It is not hard.

So when you SSH into the machine, you can either run:
Code:
su -
or
Code:
su root

And then later on go into root.

------------------------------------------------------------------------------------------------

5. Install fail2ban to mitigate bruteforce attacks. Make sure to not just install & enable it, but to actually edit the configuration file for it! Otherwise it is useless. If someone tries to connect multiple times to your machine, they will be IP blocked. This helps against SSH bruteforce attacks.

Code:
sudo apt install fail2ban
systemctl enable fail2ban
systemctl start fail2ban

Make copies of the default config files and then edit the new files:
Code:
cd /etc/fail2ban
cp fail2ban.conf fail2ban.local
cp jail.conf jail.local
sudo nano jail.local

Simply add this line "enabled = true" to any JAILs you may want to enable fail2ban for.
If you don't know how fail2ban jails work, then look it up on their documentation!
Only enable fail2ban for the things you want to protect.
For example, you want to protect your SSH, your web server, your database!
But you do NOT want to protect it on port 7171 or 7172.
Cus then you may IP ban players for some time, if they enter incorrect password.
And you probably don't want that, hehe :)


--------------------------------
tl/dr:
1. Use SSH keys
2. Use a very strong encryption for SSH keys
3. Change the default SSH port
4. Install and enable ufw firewall, configure the ports you want to use
5. Disable root login for SSH and add a non-root user
6. Install fail2ban and configure its "jails"

BONUS: Only allow your non-root user to SSH, by editing:
sudo nano /etc/ssh/sshd_config
Add a new line anywhere in that file and write:
AllowUsers <username>

So you only add your non-root user(s) to the login. You separate them by space.
So if you have the non-root users "john" and "sarah", add:
AllowUsers john sarah
these are really valuable tips.
I've been getting botnet attacks on the website and game port.
would fail2ban in these cases help?

and is there a good iptable rule to stop the flood of simultaneous connections?
 
these are really valuable tips.
I've been getting botnet attacks on the website and game port.
would fail2ban in these cases help?

and is there a good iptable rule to stop the flood of simultaneous connections?
fail2ban is just to protect SSH.
To limit connections per IP to ports 7171-7172 you got to run some extra iptables:
Bash:
# 5 polaczen naraz na 1 IP
iptables -A INPUT -p tcp --syn --dport 7171:7172 -m connlimit --connlimit-above 5 --connlimit-mask 32 -j REJECT --reject-with tcp-reset
# 10 nowych polaczen na minute na 1 IP
iptables -A INPUT -p tcp --dport 7171:7172 -m state --state NEW -m hashlimit --hashlimit-mode srcip --hashlimit-above 10/min --hashlimit-burst 10 --hashlimit-name conn_7171_rate_min -j REJECT --reject-with tcp-reset
# 2 nowe polaczenia na sekunde na 1 IP
iptables -A INPUT -p tcp --dport 7171:7172 -m state --state NEW -m hashlimit --hashlimit-mode srcip --hashlimit-above 2/sec --hashlimit-burst 2 --hashlimit-name conn_7171_rate_sec -j REJECT --reject-with tcp-reset
# 150 pakietow przychodzacych na sekunde na 1 IP (149 i 150 sa specjalnie, bo iptables ma jakis problem - nie dziala - jak obie wartosci sa takie same)
iptables -A INPUT -p tcp --dport 7171:7172 -m hashlimit --hashlimit-mode srcip --hashlimit-above 149/sec --hashlimit-burst 150 --hashlimit-name conn_7171_rate_packets_sec -j REJECT --reject-with tcp-reset
# 10 kb transferu przychodzacego na sekunde na 1 IP, tibia moze przyslac wiele pakietow w 1 pakiecie sieciowym,
# wiec 150 pakietow sieciowych moze zawierac 15000 pakietow do obslugi w dispatcherze, tutaj limitujemy taki spam z bota
iptables -A INPUT -p tcp --dport 7171:7172 -m hashlimit --hashlimit-above 10kb/s --hashlimit-mode srcip --hashlimit-name bandwidth_7171_sec -j REJECT --reject-with tcp-reset
Comments what does what are in polish, but it should translate them easily in Google Translate. Packets per second for 12+ client should be around 500.

If you are running website on your host with direct access by IP, you can apply similar rules to ports 80 (HTTP) and 443 (HTTPS).

Anyway, only real protection for website is cloudflare.com [it's free, you don't need 'paid' plan to get full protection] that filters packets between your host and users.
If you configure your website to run 'behind cloudflare', you can run this to limit access to www ports only for cloudflare servers:
Bash:
for i in `curl https://www.cloudflare.com/ips-v4`; do iptables -I INPUT -p tcp -m multiport --dports http,https -s $i -j ACCEPT; done
for i in `curl https://www.cloudflare.com/ips-v6`; do ip6tables -I INPUT -p tcp -m multiport --dports http,https -s $i -j ACCEPT; done
iptables -A INPUT -p tcp -m multiport --dports http,https -j DROP
ip6tables -A INPUT -p tcp -m multiport --dports http,https -j DROP
 
Back
Top