Please note I am no expert in linux or virtual box, I am beginner like most of you. I pieced together this step by step through trial and error, if there is something which can be done better please say so thanks.
Download and install the Virtual Box Binaries
https://www.virtualbox.org/wiki/Downloads
We will be using Ubuntu 16.04.1 LTS (Xenial Xerus) for this tutorial.
64 bit
http://releases.ubuntu.com/16.04/ubuntu-16.04.1-desktop-amd64.iso
32 bit
http://releases.ubuntu.com/16.04/ubuntu-16.04.1-desktop-i386.iso
If you need something different you can check out this page and download what you want.
http://releases.ubuntu.com/
Once you have the Ubuntu iso downloaded you are going to launch virtual box. You should see a screen like this below.
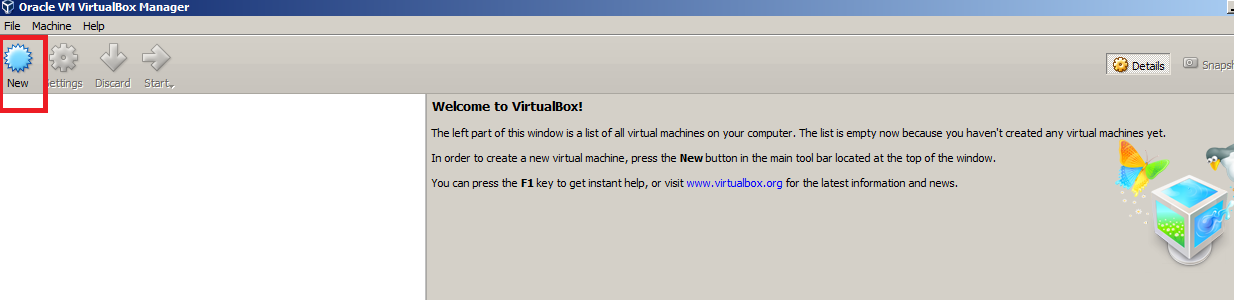
Click on New, a window will popup allowing you to Name the virtual machine, the Type is the target platform and the Version is Operating system version.
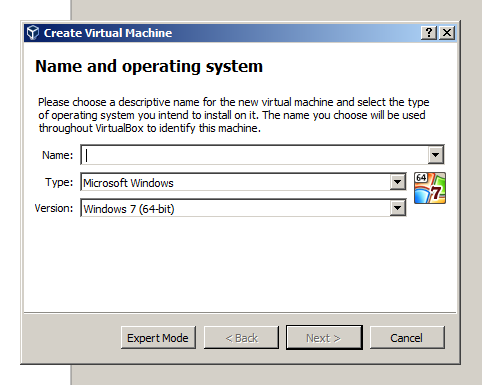
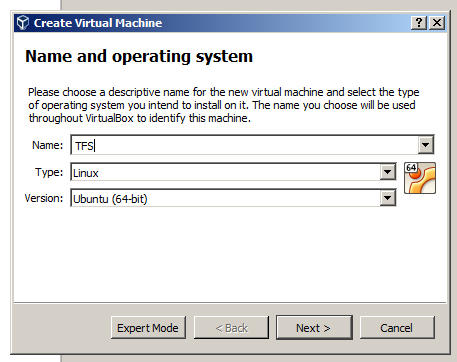
Click on the Type drop down and select Linux, Version should automatically update to your systems architecture, on my machine Ubuntu (64 bit) is chosen, it might different on yours.
In the Name box type in the name of your virtual machine. It should look something like this, click Next to continue.
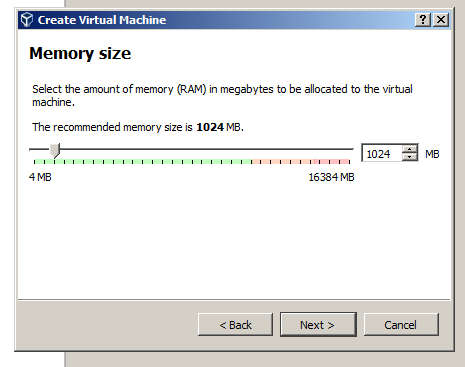
In this window it shows you how much memory (RAM) you have installed on your computer.
1024 MB is equal to 1 gigabyte of memory. This window allows you to adjust the amount of ram you would like to allocate (assign) to the virtual machine. Set the slider to the amount of memory you think you require for your project. Careful not to add too much as the virtual machine may crash your computer (try to keep away from the red area of the bar). Once you have your memory set click Next.
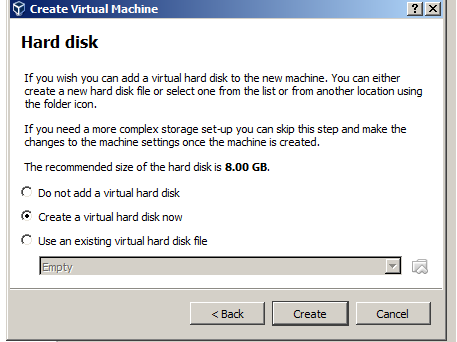
Since I don't know too much about these settings just leave everything as is and click Create.
Same thing here leave everything as is and click Next.
If you know what you are doing then you can mess around with the settings.

Click Next.
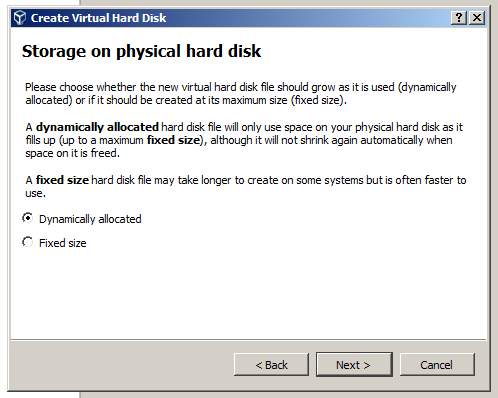
This window allows us to set the partition (Total size of its virtual hard drive) of the virtual machine.
I've tried installing with the default 8 gigs on 64 bit but it never completed the installation because of low
disk space, so set it to 20.00 GB (which is reasonable) and click Create.

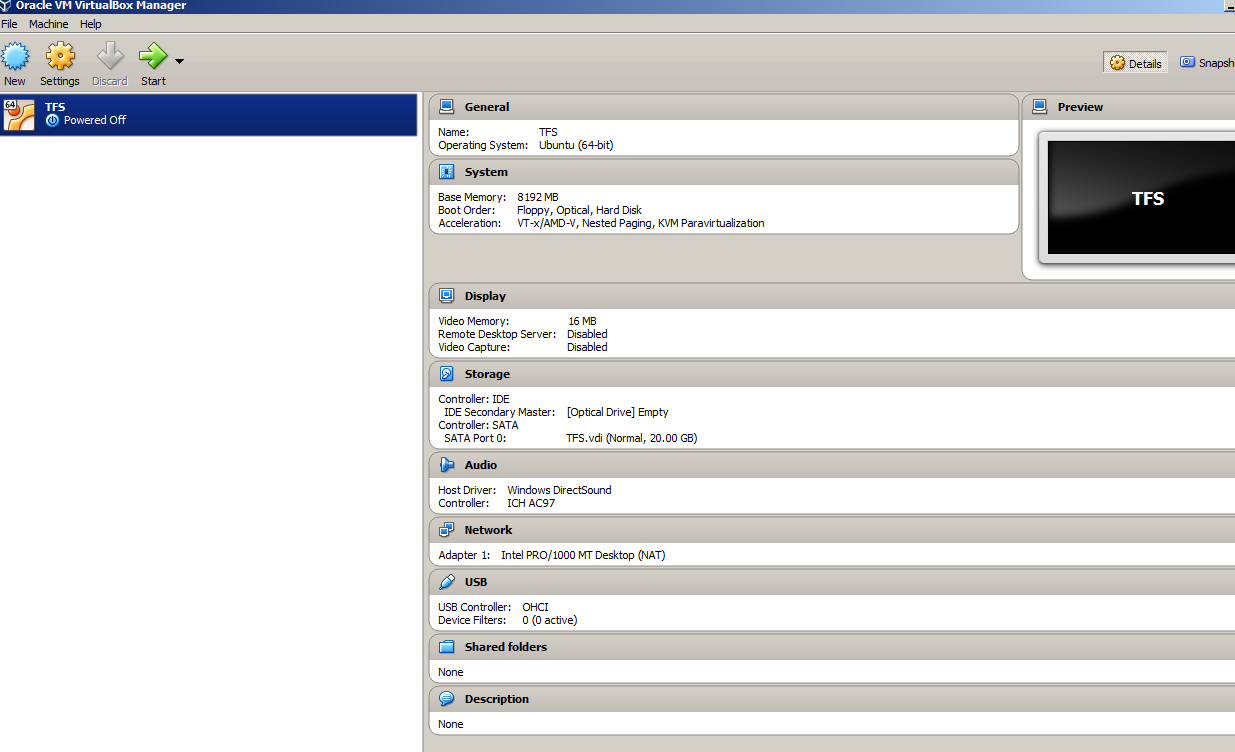
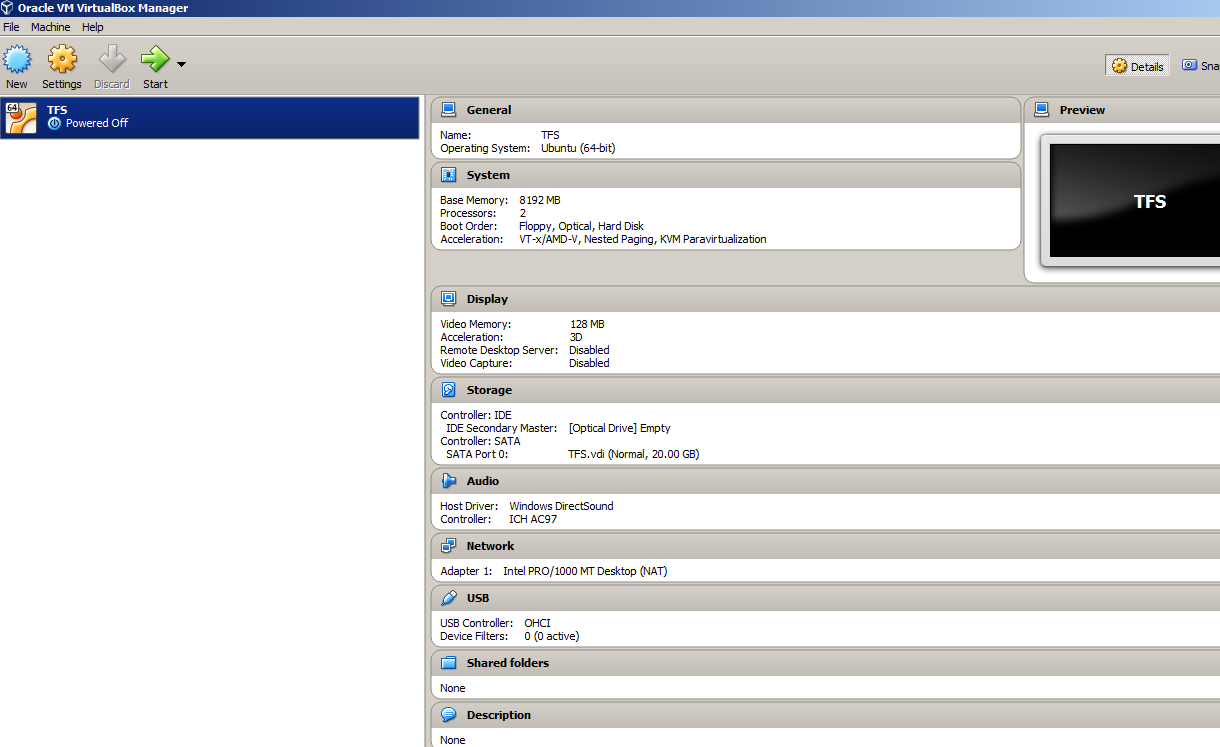
Once you've done that you should see a similar window like this.
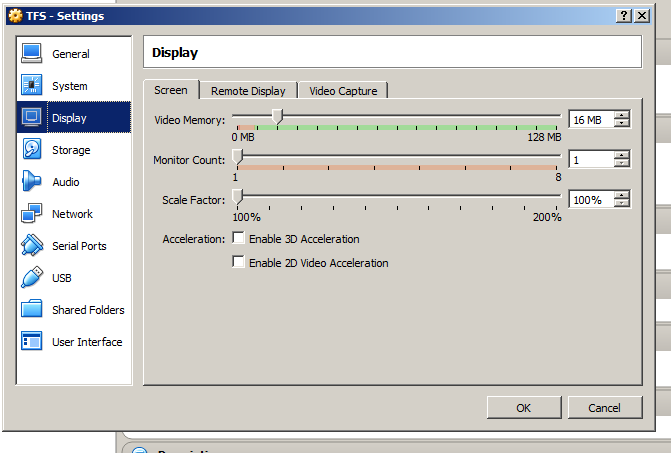
If you look in the settings you will notice I have very little video memory this will lag the hell out Ubuntu if I keep it at 16 MB.
Go ahead and click on Settings. Here you can choose the amount of video memory to use in the virtual machine as well as enable both 2D & 3D acceleration.
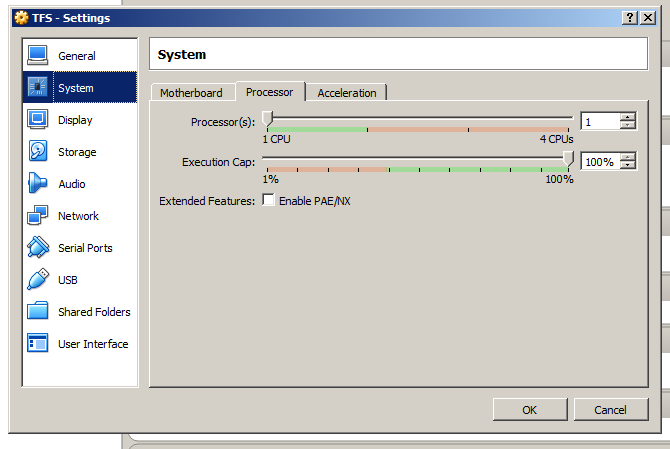
If you click on System you can choose the amount of processors to use.
Once you are done with the settings click OK.
Now the settings for your virtual machine should be updated.
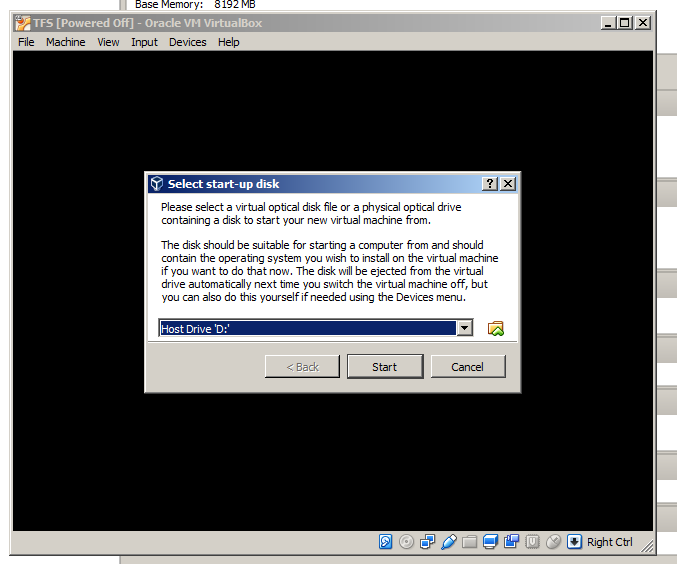
Click on the Start button and a window will pop up similar to this.
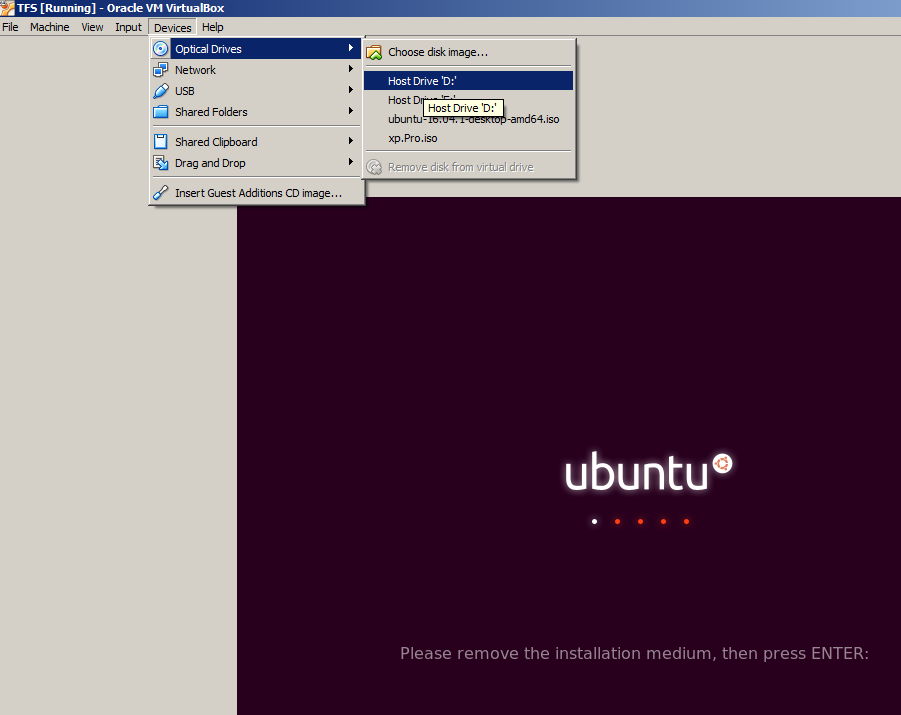
To the right of Host Drive 'D:' is a folder icon, click it and navigate the Ubuntu iso you downloaded.
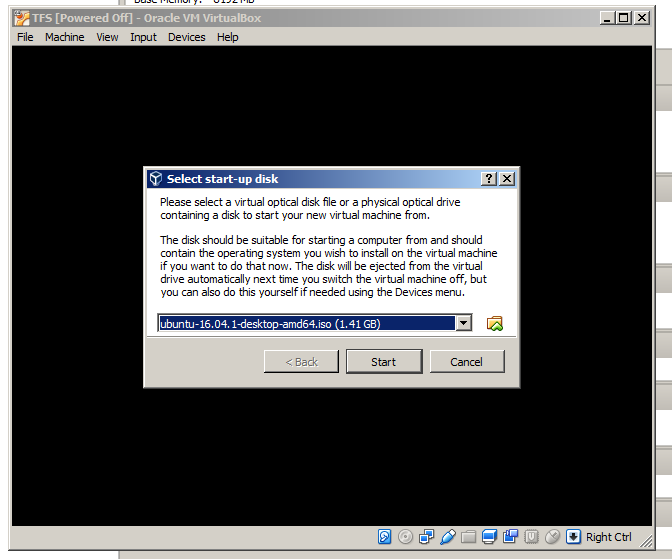
Now your window should look similar to this, go ahead and click on Start.
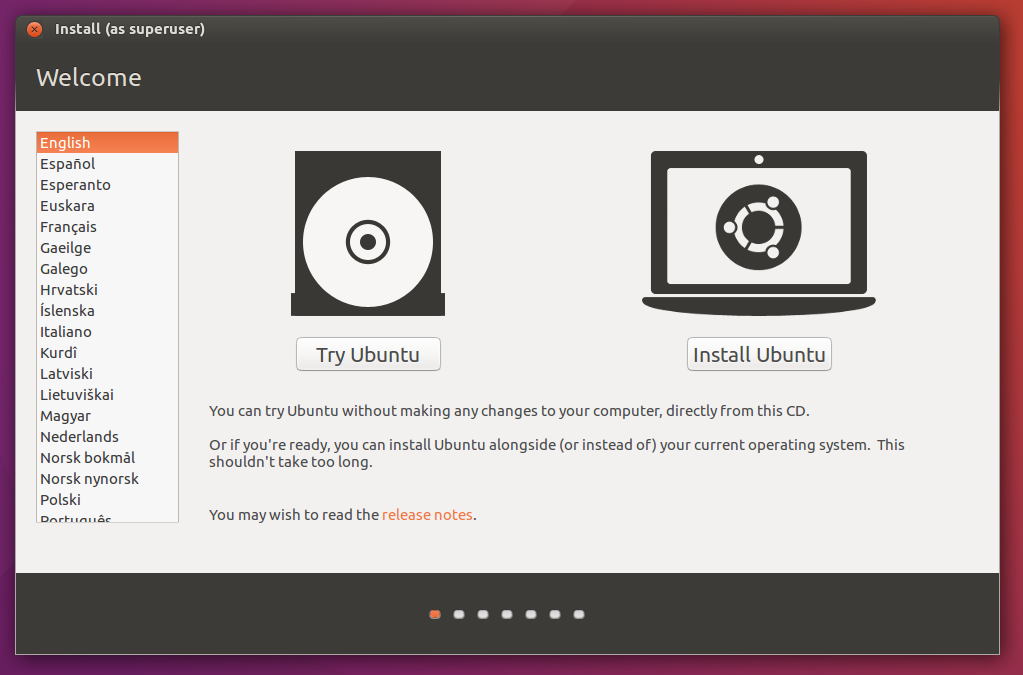
Click on the Install Ubuntu button.
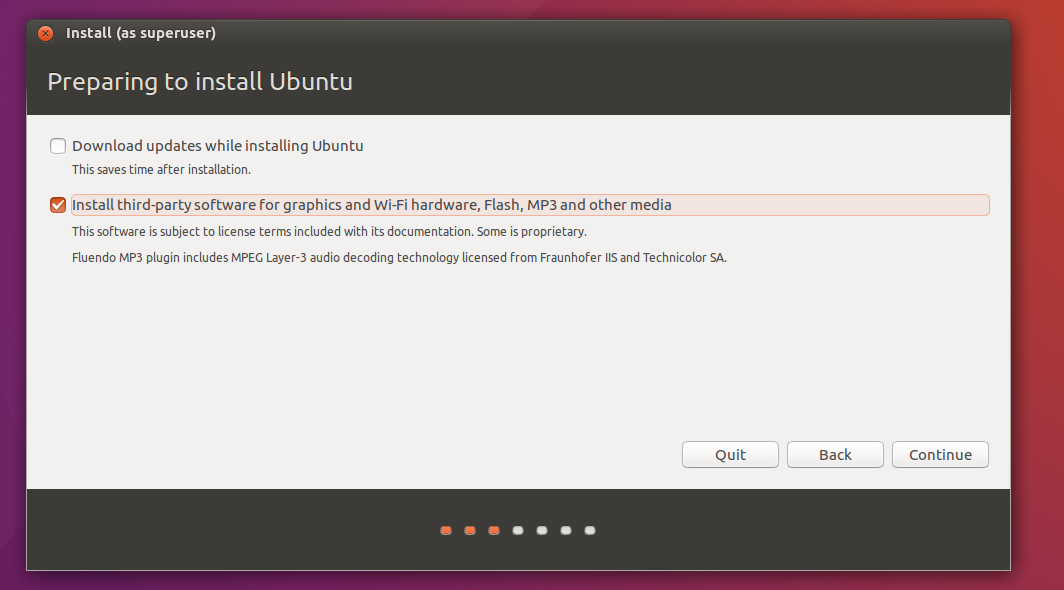
Check the box that says Install third-party software for graphics .. then click continue.
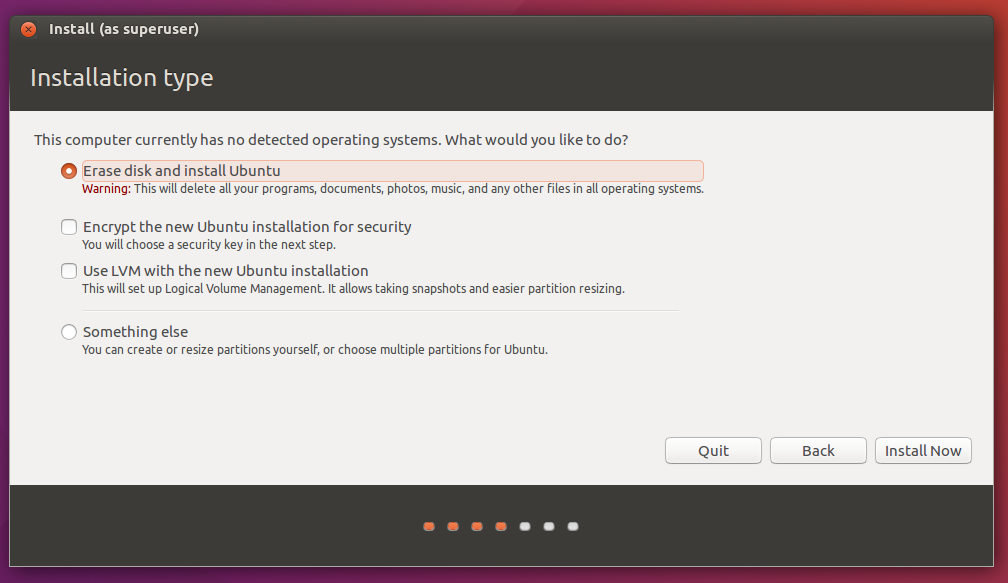
In the next window that pops up just leave everything as is and click the Install Now button.
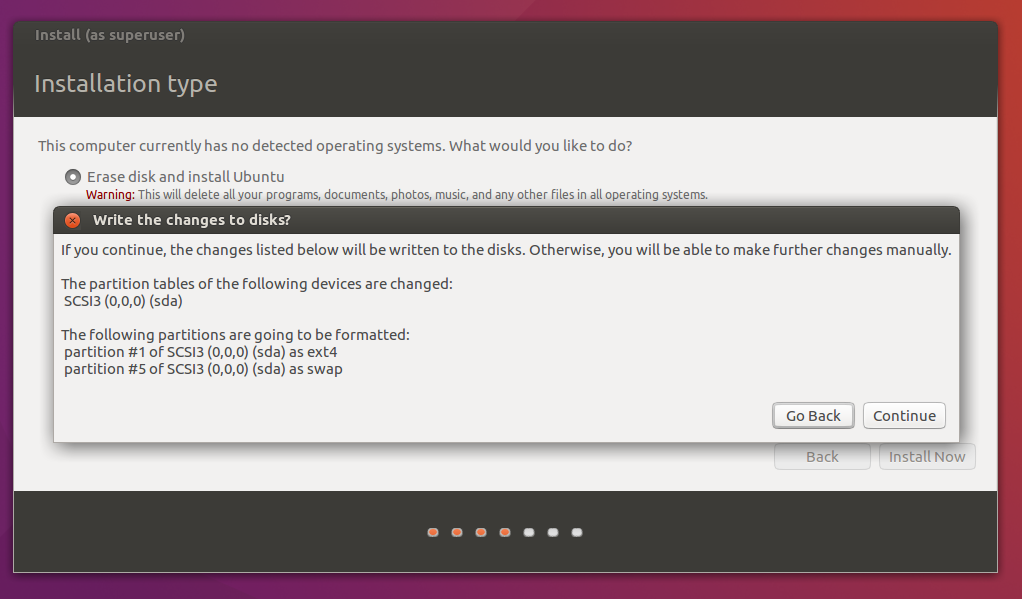
If you see a window like this it means everything you've done up to this point is correct.
Click the Continue button.
Download and install the Virtual Box Binaries
https://www.virtualbox.org/wiki/Downloads
We will be using Ubuntu 16.04.1 LTS (Xenial Xerus) for this tutorial.
You need a minimum of 15.04 in order to install a 1.2 server using the setup linked at the bottom of the 2nd post
64 bit
http://releases.ubuntu.com/16.04/ubuntu-16.04.1-desktop-amd64.iso
32 bit
http://releases.ubuntu.com/16.04/ubuntu-16.04.1-desktop-i386.iso
If you need something different you can check out this page and download what you want.
http://releases.ubuntu.com/
Once you have the Ubuntu iso downloaded you are going to launch virtual box. You should see a screen like this below.
Click on New, a window will popup allowing you to Name the virtual machine, the Type is the target platform and the Version is Operating system version.
Click on the Type drop down and select Linux, Version should automatically update to your systems architecture, on my machine Ubuntu (64 bit) is chosen, it might different on yours.
In the Name box type in the name of your virtual machine. It should look something like this, click Next to continue.
In this window it shows you how much memory (RAM) you have installed on your computer.
1024 MB is equal to 1 gigabyte of memory. This window allows you to adjust the amount of ram you would like to allocate (assign) to the virtual machine. Set the slider to the amount of memory you think you require for your project. Careful not to add too much as the virtual machine may crash your computer (try to keep away from the red area of the bar). Once you have your memory set click Next.
Since I don't know too much about these settings just leave everything as is and click Create.
Same thing here leave everything as is and click Next.
If you know what you are doing then you can mess around with the settings.
Click Next.
This window allows us to set the partition (Total size of its virtual hard drive) of the virtual machine.
I've tried installing with the default 8 gigs on 64 bit but it never completed the installation because of low
disk space, so set it to 20.00 GB (which is reasonable) and click Create.
Once you've done that you should see a similar window like this.
If you look in the settings you will notice I have very little video memory this will lag the hell out Ubuntu if I keep it at 16 MB.
Go ahead and click on Settings. Here you can choose the amount of video memory to use in the virtual machine as well as enable both 2D & 3D acceleration.
If you click on System you can choose the amount of processors to use.
Once you are done with the settings click OK.
Now the settings for your virtual machine should be updated.
Click on the Start button and a window will pop up similar to this.
To the right of Host Drive 'D:' is a folder icon, click it and navigate the Ubuntu iso you downloaded.
Now your window should look similar to this, go ahead and click on Start.
Click on the Install Ubuntu button.
Check the box that says Install third-party software for graphics .. then click continue.
In the next window that pops up just leave everything as is and click the Install Now button.
If you see a window like this it means everything you've done up to this point is correct.
Click the Continue button.
**** IMPORTANT ****
If you get errors or the installation tells you that there isn't enough disk space and asks you to go back, DO NOT GO BACK. & DO NOT CLICK CONTINUE Just close out the virtual machine and delete it then start over with more appropriate settings.
Last edited: