Recadra
New Member
- Joined
- Jul 12, 2008
- Messages
- 70
- Reaction score
- 3
Everything in Italic font is optional or informational
* Start by downloading Ubuntu 8.04 LTS Server Edition from http://www.ubuntu.com/getubuntu/download
* After you downloaded that, burn the ISO to a CD and shove it into your server.
You'll get a screen like this
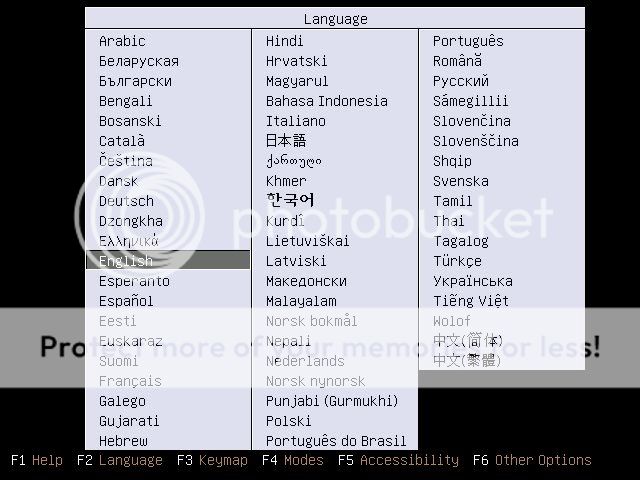
* I strongly recommend you choose English for this tutorial, but if you must, choose your own language.
* Select Install Ubuntu Server (it's selected by default) and press Enter.
* Now wait for the installation to start. It will ask you to choose a language again. I strongly recommend you choose English for this tutorial.
* It will now ask you what country you live in, select your country.
* The installation will now ask you if the installer should detect your keyboard layout. If you're a first-time linux user, this is stronly recommended. If you know what you're doing, select it from the list.
* The installer will now start retreiving packages, configure your network etc.

* After it's done with this, you have to enter your Hostname. If you have a domain name, fill it in here, if not, just give the system a name.
* Now, partitioning the disk. If you want to do it the easy way, just set it to "Guided - use entire disk".
If you want a faster performing server, follow these steps (I strongly recommend you doing this):
- Select "Manual" and press Enter
- Select "Guided partitioning" and press Enter
- Select "Guided - use entire disk" and press Enter
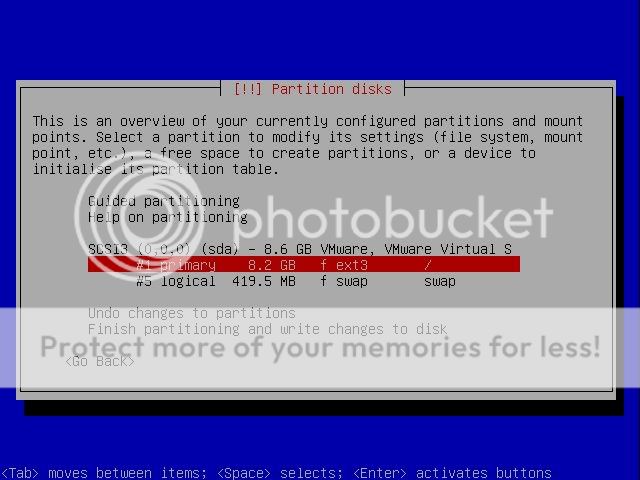
- select the first partition and press Enter. It will look like this:
- Select "Use as: Ext3 journaling file system" and press Enter
- Select "ReiserFS journaling file system" from the list and press Enter (ReiserFS performs better than the other file systems listed)
- Select "Bootable flag: off" and press Enter
- Select "Done setting up the partition" and press Enter
- Select "Finish partitioning and write changes to disk" and press Enter
* Select "<Yes>" to continue the installation.
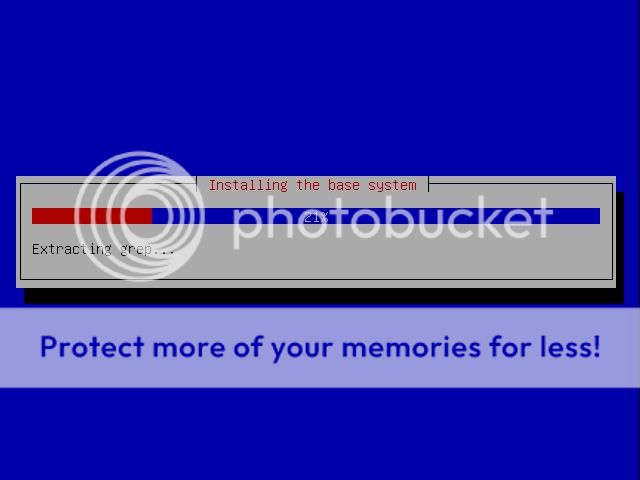
Ubuntu will now start installing. Get yourself a drink, a cookie, whatever you want. This may take up to 20 minutes (unless you're running 15K RPM SAS drives in Raid 5 with a 52x cd reader )
)
In the mean while I'll also explain to you why I advice you to choose ReiserFS over Ext3 or XFS. ReiserFS is extremely fast at handling small files. XFS is the fast one for handling large files. Ext3 is just medium at both. Because an OT server (and database) work with a lot of small files, ReiserFS will outperform XFS and Ext3 here.
When it's done with the installation of the base system, the installation will be asking you for your full name.
* Enter your full name and press Enter.
* Enter your desired username (or use the given one) and press Enter.
* Enter your desired password and press Enter.
* Repeat.
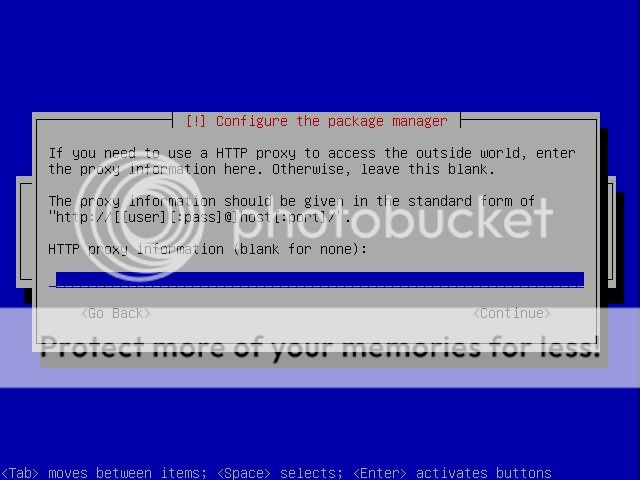
* If you have a HTTP proxy server, enter it here. Most likely you can just press Enter without filling anything in.
* After a little bit of network activity, the installer will ask you what software to install. For a dedicated OT server I strongly recommend you to install "LAMP server" and "OpenSSH server".
You can select the software you want to install by moving the cursor down (with the arrow keys) to the software package and press the space bar.
* After you selected the "LAMP server" and "OpenSSH server" package, press Enter.
* Now you will be asked for new MySQL "root" user. Enter the password you want to use for the MySQL database and press Enter.
* Repeat.
The installation of Ubuntu will finish now. In about 10 minutes from now, the installer wants you to rip out the CD. Do so, and then continue.
If you booted in Ubuntu, Yay! Congratulations. You've survived the first and easiest part! If you didn't boot into Ubuntu, you probably made a mistake somewhere; I suggest you to start again.
Now you'll see something similar to this:
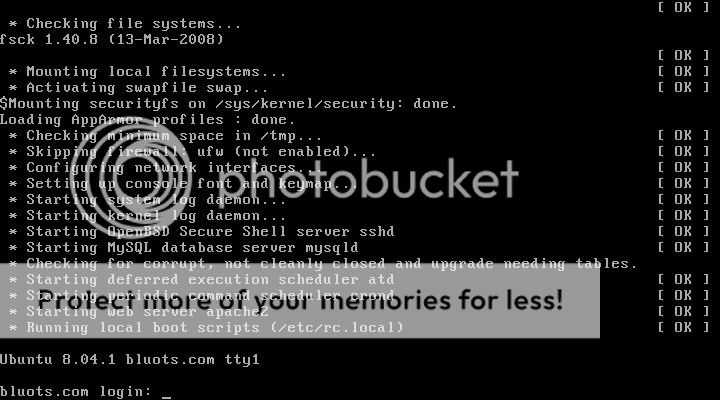
* Log in to Ubuntu with the Username and Password you entered in the installer.
* For the configuration, we need to become root. Root is the superuser of Linux, like the "Administrator" account on Windows.
* So, become root by typing
* Enter your normal password
* First, let's upgrade Ubuntu so we have the latest security updates. Do so by entering
* Aptitude will ask you if you really want to continue. Press Enter.
* After that is done, install vsftpd. Vsftpd is a small and easy to configure FTP server. With an FTP server it's easy to port files to your server.
* To install vsftpd type
Thank god for Debian-based distros being so simple.
* Press Enter when asked for a confirmation.
* Now we need to configure the FTP server. Type
to edit the configuration.
* Scroll down (yes, with arrow keys, your mouse won't be working) and replace the following:
* Now, press Ctrl + O to save the file (WriteOut). Press Enter to confirm.
* Then, press Ctrl + X to exit.
Well, I think now would be a great time to set up port forwarding in your router. I'm not going into details about this, but I can tell you how to get the IP address of your fresh linux server.
* Type
You will see a lot of text, including
After you set up port forwarding (if needed), continue with the tutorial.
If you need a static IP address instead of a DHCP one, if, for example, your server is located in a data centre follow the following steps:
- Type "nano /etc/network/interfaces"
- Change "iface eth0 inet dhcp" to "iface eth0 inet static"
- Under that, add the following:
address <enter your ip>
netmask <enter netmask ip>
network <enter network ip>
broadcast <enter broadcast ip>
gateway <enter gateway ip>
- Save (Ctrl + O) then exit (Ctrl + X)
- Restart networking by typing "/etc/init.d/networking restart" and press Enter.
Now it's time to set up phpMyAdmin.
* Go to the webroot folder by typing
* Now download phpMyAdmin by typing
* Extract the archive with
* Rename the directory to something that doesn't make sence. This is to prevent people from finding your phpMyAdmin installation and using it to brute-force your database.
* Type
* Remove the archive with
* Move into the phpMyAdmin directory with
* Rename config.sample.inc.php by typing
* Edit config.inc.php with
* Scroll down to
* Change "cookie" to "http"
* Save with Ctrl + O, Enter to confirm, Ctrl + X to exit
You can now reach your phpMyAdmin through a browser on another computer at the location:
* Create a new database called "ot".
Okay, now it's time for compiling the OT.
Follow step 1 and 2 of Elf's compiling guide located at http://otland.net/showthread.php?t=2868
* Then type
to clear up the archives we don't need anymore.
* Type
to download all the sources.
* Now do
to rename the folder to "ot".
* Go into the ot folder by typing
Now, there is one little problem when you want to compile, liblua5.1-sql-sqlite doesn't exist. Oh yay. That's no problem as we'll be using MySQL.
* Type
WATCH IT. You need to use a Capitalized letter with Makefile or it won't work.
* Search for
and delete it
* Save with "Ctrl + O", press Enter to confirm, exit with "Ctrl + X"
* Type
to make an executable file from the source.
* You should have no compiling errors. If you have any, you fucked something up.
Now, we're gonna copy the OT files needed by the executable.
* Type
* Type
* Type
* Type
* Type
* Type
Now we should configure the config.lua file
* Type
* Type
* Configure config.lua to your needs. Make sure you change the sqlType from sqlite to mysql
* Ctrl + O to save, enter to confirm, Ctrl + X to exit
* Type
to copy the sql scheme to the webroot
* Go to
on another computer
* Select everything (Ctrl + A) and copy it to the clipboard
* Go into your phpMyAdmin, select the ot database
* Click on SQL
* Paste the clipboard content in the textfield
* Click on Go
You should get a message "Your SQL query has been executed successfully"
Back to the server.
* Change the directory back to the OT folder by typing
* Test the server by typing
Well, if you did everything correctly, you should get no errors whatsoever. Except for a warning that you are executing the server as root.
Since you did an update (yes, back in the beginning you did one, remember aptitude upgrade?) it's time to restart the computer as there has been a kernel update since the release of this Ubuntu version. Just remember for the future to reboot Linux only with a kernel update. Don't reboot the server if it's not necessary.
* Reboot by typing
* When Ubuntu rebooted, login again
* Become root with
We're going to make a startup script for the OT to start when Linux starts
* start with
* then enter
* Enter the following there (this is a restarter script for linux):
* Ctrl + O to save, enter to confirm, Ctrl + X to exit
* Change the permissions of ot.sh (so it can be executed) with
* Add the script to the startup with
Now before we reboot, we're gonna change some things so you can easily manage the OT data directory files through ftp.
* Enter
* Change the directory to /ot/data with
* Then change the permissions so it's editable by entering
* Enter
Okay, the big moment is here. It's testing time! Type
If you made no mistakes, the server will now be running.
A few tips to make it a bit easier:
1. If you want to do something on the server, enter "Alt + F2" to change to tty2. That's simply another bash spawn you can login to.
2. You can remote control your server using SSH with a program like putty.
3. Read, read and read. A lot of information about Linux is available on the internet.
4. Don't stress out when something goes wrong, just be patient and read tip 3.
5. Next time, warn me when I have the sicko idea of writing such a large tutorial
6. If you want to update the source code, simply turn yourself into root (sudo su), go to the OT source directory (cd ~/ot) and do an update (svn update *). Then copy the files to /ot again (as described above)
If you have any questions please ask them ^^
If I made any typos here, (hey, I'm human too) please tell me so I can fix it.
Credits:
Me
Elf (compiling part)
Special thanks to:
The Ubuntu team
The Forgotten Server team (you guys are awesomesauce)
A Windows Server 2003 installation for driving me nuts and forcing me to go to Linux
Enjoy my friggin 4 hours of work
* Start by downloading Ubuntu 8.04 LTS Server Edition from http://www.ubuntu.com/getubuntu/download
* After you downloaded that, burn the ISO to a CD and shove it into your server.
You'll get a screen like this
* I strongly recommend you choose English for this tutorial, but if you must, choose your own language.
* Select Install Ubuntu Server (it's selected by default) and press Enter.
* Now wait for the installation to start. It will ask you to choose a language again. I strongly recommend you choose English for this tutorial.
* It will now ask you what country you live in, select your country.
* The installation will now ask you if the installer should detect your keyboard layout. If you're a first-time linux user, this is stronly recommended. If you know what you're doing, select it from the list.
* The installer will now start retreiving packages, configure your network etc.
* After it's done with this, you have to enter your Hostname. If you have a domain name, fill it in here, if not, just give the system a name.
* Now, partitioning the disk. If you want to do it the easy way, just set it to "Guided - use entire disk".
If you want a faster performing server, follow these steps (I strongly recommend you doing this):
- Select "Manual" and press Enter
- Select "Guided partitioning" and press Enter
- Select "Guided - use entire disk" and press Enter
- select the first partition and press Enter. It will look like this:
- Select "Use as: Ext3 journaling file system" and press Enter
- Select "ReiserFS journaling file system" from the list and press Enter (ReiserFS performs better than the other file systems listed)
- Select "Bootable flag: off" and press Enter
- Select "Done setting up the partition" and press Enter
- Select "Finish partitioning and write changes to disk" and press Enter
* Select "<Yes>" to continue the installation.
Ubuntu will now start installing. Get yourself a drink, a cookie, whatever you want. This may take up to 20 minutes (unless you're running 15K RPM SAS drives in Raid 5 with a 52x cd reader
)In the mean while I'll also explain to you why I advice you to choose ReiserFS over Ext3 or XFS. ReiserFS is extremely fast at handling small files. XFS is the fast one for handling large files. Ext3 is just medium at both. Because an OT server (and database) work with a lot of small files, ReiserFS will outperform XFS and Ext3 here.
When it's done with the installation of the base system, the installation will be asking you for your full name.
* Enter your full name and press Enter.
* Enter your desired username (or use the given one) and press Enter.
* Enter your desired password and press Enter.
* Repeat.
* If you have a HTTP proxy server, enter it here. Most likely you can just press Enter without filling anything in.
* After a little bit of network activity, the installer will ask you what software to install. For a dedicated OT server I strongly recommend you to install "LAMP server" and "OpenSSH server".
You can select the software you want to install by moving the cursor down (with the arrow keys) to the software package and press the space bar.
* After you selected the "LAMP server" and "OpenSSH server" package, press Enter.
* Now you will be asked for new MySQL "root" user. Enter the password you want to use for the MySQL database and press Enter.
* Repeat.
The installation of Ubuntu will finish now. In about 10 minutes from now, the installer wants you to rip out the CD. Do so, and then continue.
If you booted in Ubuntu, Yay! Congratulations. You've survived the first and easiest part! If you didn't boot into Ubuntu, you probably made a mistake somewhere; I suggest you to start again.
Now you'll see something similar to this:
* Log in to Ubuntu with the Username and Password you entered in the installer.
* For the configuration, we need to become root. Root is the superuser of Linux, like the "Administrator" account on Windows.
* So, become root by typing
Code:
sudo su* First, let's upgrade Ubuntu so we have the latest security updates. Do so by entering
Code:
aptitude safe-upgrade* After that is done, install vsftpd. Vsftpd is a small and easy to configure FTP server. With an FTP server it's easy to port files to your server.
* To install vsftpd type
Code:
aptitude install vsftpd* Press Enter when asked for a confirmation.
* Now we need to configure the FTP server. Type
Code:
nano /etc/vsftpd.conf* Scroll down (yes, with arrow keys, your mouse won't be working) and replace the following:
Code:
"anonymous_enable=YES" should be changed to "anonymous_enable=NO"
"#local_enable=YES" should be changed to "local_enable=YES" (remove the #)
Also remove the # in front of "write_enable=YES"
* Now, press Ctrl + O to save the file (WriteOut). Press Enter to confirm.
* Then, press Ctrl + X to exit.
Well, I think now would be a great time to set up port forwarding in your router. I'm not going into details about this, but I can tell you how to get the IP address of your fresh linux server.
* Type
Code:
/sbin/ifconfig eth0
Code:
inet addr:<PC's IP>After you set up port forwarding (if needed), continue with the tutorial.
If you need a static IP address instead of a DHCP one, if, for example, your server is located in a data centre follow the following steps:
- Type "nano /etc/network/interfaces"
- Change "iface eth0 inet dhcp" to "iface eth0 inet static"
- Under that, add the following:
address <enter your ip>
netmask <enter netmask ip>
network <enter network ip>
broadcast <enter broadcast ip>
gateway <enter gateway ip>
- Save (Ctrl + O) then exit (Ctrl + X)
- Restart networking by typing "/etc/init.d/networking restart" and press Enter.
Now it's time to set up phpMyAdmin.
* Go to the webroot folder by typing
Code:
cd /var/www
Code:
wget http://heanet.dl.sourceforge.net/sourceforge/phpmyadmin/phpMyAdmin-2.11.8.1-all-languages-utf-8-only.tar.gz
Code:
tar -xf phpMyAdmin-2.11.8.1-all-languages-utf-8-only.tar.gz* Type
Code:
mv phpMyAdmin-2.11.8.1-all-languages-utf-8-only <new folder name>
Code:
rm -f phpMyAdmin-2.11.8.1-all-languages-utf-8-only.tar.gz
Code:
cd <folder name>
Code:
mv config.sample.inc.php config.inc.php
Code:
nano config.inc.php
Code:
$cfg['Servers'][$i]['auth_type'] = 'cookie';* Save with Ctrl + O, Enter to confirm, Ctrl + X to exit
You can now reach your phpMyAdmin through a browser on another computer at the location:
Code:
http://<server ip>/<phpMyAdmin folder>* Create a new database called "ot".
Okay, now it's time for compiling the OT.
Follow step 1 and 2 of Elf's compiling guide located at http://otland.net/showthread.php?t=2868
* Then type
Code:
rm -f boost_asio_0_3_8.tar.gz boost_1_34_1.tar.gz* Type
Code:
svn co http://forgottenserver.svn.sourceforge.net/svnroot/forgottenserver/forgottenserver/tags/0.2* Now do
Code:
mv 0.2 ot* Go into the ot folder by typing
Code:
cd ot* Type
Code:
nano Makefile* Search for
Code:
-llua5.1-sql-sqlite* Save with "Ctrl + O", press Enter to confirm, exit with "Ctrl + X"
* Type
Code:
make* You should have no compiling errors. If you have any, you fucked something up.
Now, we're gonna copy the OT files needed by the executable.
* Type
Code:
mkdir /ot
Code:
cp TheForgottenServer /ot
Code:
cp config.lua /ot
Code:
cp lastMotd.txt /ot
Code:
cp playersRecord.txt /ot
Code:
cp -apv data/ /ot/dataNow we should configure the config.lua file
* Type
Code:
cd /ot
Code:
nano config.lua* Ctrl + O to save, enter to confirm, Ctrl + X to exit
* Type
Code:
cp ~/ot/forgottenserver.sql /var/www* Go to
Code:
http://<server ip>/forgottenserver.sql* Select everything (Ctrl + A) and copy it to the clipboard
* Go into your phpMyAdmin, select the ot database
* Click on SQL
* Paste the clipboard content in the textfield
* Click on Go
You should get a message "Your SQL query has been executed successfully"
Back to the server.
* Change the directory back to the OT folder by typing
Code:
cd /ot
Code:
./TheForgottenServerWell, if you did everything correctly, you should get no errors whatsoever. Except for a warning that you are executing the server as root.
Since you did an update (yes, back in the beginning you did one, remember aptitude upgrade?) it's time to restart the computer as there has been a kernel update since the release of this Ubuntu version. Just remember for the future to reboot Linux only with a kernel update. Don't reboot the server if it's not necessary.
* Reboot by typing
Code:
reboot* When Ubuntu rebooted, login again
* Become root with
Code:
sudo su* start with
Code:
cd /etc/init.d
Code:
nano ot.sh
Code:
#!/bin/bash
while true
do
 cd /ot
 ./TheForgottenServer
done
* Change the permissions of ot.sh (so it can be executed) with
Code:
chmod +x ot.sh
Code:
update-rc.d ot.sh multiuser 99Now before we reboot, we're gonna change some things so you can easily manage the OT data directory files through ftp.
* Enter
Code:
usermod -d/ot/data <your username>
Code:
cd /ot/data
Code:
chmod 777 * && chmod 777 */* && chmod 777 */*/* && chmod 777 */*/*/*
Code:
cd .. && chmod 777 dataOkay, the big moment is here. It's testing time! Type
Code:
rebootIf you made no mistakes, the server will now be running.
A few tips to make it a bit easier:
1. If you want to do something on the server, enter "Alt + F2" to change to tty2. That's simply another bash spawn you can login to.
2. You can remote control your server using SSH with a program like putty.
3. Read, read and read. A lot of information about Linux is available on the internet.
4. Don't stress out when something goes wrong, just be patient and read tip 3.
5. Next time, warn me when I have the sicko idea of writing such a large tutorial
6. If you want to update the source code, simply turn yourself into root (sudo su), go to the OT source directory (cd ~/ot) and do an update (svn update *). Then copy the files to /ot again (as described above)
If you have any questions please ask them ^^
If I made any typos here, (hey, I'm human too) please tell me so I can fix it.
Credits:
Me
Elf (compiling part)
Special thanks to:
The Ubuntu team
The Forgotten Server team (you guys are awesomesauce)
A Windows Server 2003 installation for driving me nuts and forcing me to go to Linux
Enjoy my friggin 4 hours of work
Last edited: