Joriku
Working in the mines, need something?
This tutorial is aiming on Ubuntu 18.04
What you need:
Paid Host/Linux server
Recommended Options: (link removed due to advertisement).
Hetzner.com - hetasd (link removed due to advertisement).
Ovh.com/world - OVH Hosting Company (link removed due to advertisement).
Programs needed: (FileZilla works, but recommend WinSCP)
Putty - Download Putty (link removed due to advertisement).
WinSCP - Download WinSCP (link removed due to advertisement).
Server Files at the end of the tutorial (OTServBR 12.20 Linux comming soon)
Steps in the tutorial,
1. Install Apache
2. Install MySQL
3. Configure Firewall & MySQL Security
4. Install PHP
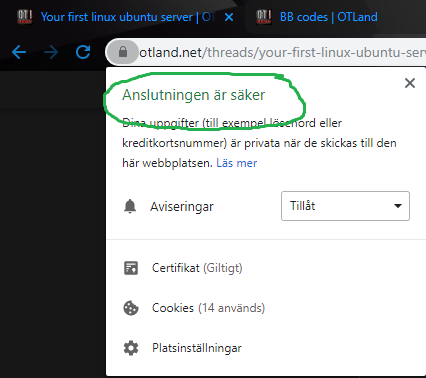
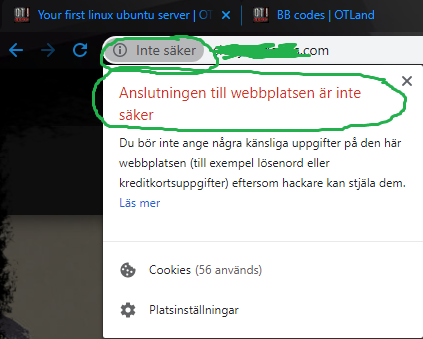
5. Encrypt SSL (Secured Website Traffic)
This is Encrypted Traffic/None encrypted Traffic
Superuser Setup
example will be: john
add user john by typing:
Once you added the user, give it superuser privileges by typing:
Now switch over to the user by typing:
Check server Timezone
First of all, let us see if the timezone is correct by typing:
If the date is correct you can skip this.
Now, let us change the timezone into your timezone by typing:
(Press SPACE to page down, b to page up and once you find your Timezone press q to exit)
Find your timezone, example. Iam in Sweden so I'll be using Europe/Stockholm.
Update your Timezone by typing:
Now check if your Timezone is correct by typing:
Next step is to update Ubuntu, type:
Type Y and hit ENTER
Afther the installation is compleated reboot the server by typing:
Close down Putty and reopen it and login with your created user. Example: john
Configure a Web Server
You now have two alternatives [Apache] & [Negix]
[Apache Guide]
Install Apache, Type:
Now configure firewall, type:
If you get an error “ERROR: could find a profile matching openSSH”, this probably means you are not configuring the server remotely and can ignore it.
Now add firewall rules for Apache, Type:
Now we enable the firewall, type:
Press Y if you see a message
Now, check the current firewall status by typing:
You should see something like this:
Apache Full ALLOW Anywhere
Apache Full (v6) ALLOW Anywhere (v6)
Test Apache service, type:
You should see something like this:
Alot more but notice this line,
Active: active (running) since Sat 2018-03-31 08:44:04 CEST; 15min ago
Now we can enter our webpage to see if it works, enter SERVER_IP or DOMAINNAME.COM
If you do not know your server ip type this:
At the webpage you should see this.
Install MySQL
Two commands in one line, type:
Press Y and hit ENTER when prompted to install the MySQL package.
Now check if the service is running, type:
Agin, Focus this line:
Active: active (running) since Mon 2018-04-02 02:40:59 CEST; 2min 47s ago
Press q to exit, now we know the service is installed and running.
Configure MySQL Security
Recommended, GENERATE STRONG PASSWORD: Generate Password (link removed due to advertisement).
To configure security for MySQL, type:
If you created a root password in Step 1, you may be prompted to enter it here. Otherwise you will be asked to create one.
You will be asked if you want to set up the Validate Password Plugin. It’s not really necessary unless you want to enforce strict password policies for some reason.
Press ENTER here if you dont want to setup the validate password plugin
Press Y and ENTER to remove anonymous users
Press Y and ENTER to disallow root login remotley. This will prevent bots and hackers from trying to guess the root password.
Press Y and ENTER to remove the test database
Press Y and ENTER to reload the privilege tables
Now we are done with the MySQL, lets login into the MySQL and run the version command
Press q to exit
Install PHP
Update by typing:
Press Y and ENTER when prompted to install the PHP package
Test PHP
Type:
If PHP installed correctly, you should see something similar below:
Now let's test PHP for Apache
We'll create a file called info.php which you can enter thru IP.COM/info.php or DOMAINNAME.COM/info.php.
NOTE! This file needs to be deleted due to dangerous information.
Create it by typing:
Once nano editor has opened, paste in the following PHP code.
Press CTRL + X, press Y and then press ENTER to save it and exit.
Now enter IP.COM/info.php or DOMAINNAME.COM/info.php
It should look like this:
NOTE!
Once you’ve confirmed PHP is working correctly, it’s important to delete info.php as it contains information that could be useful to hackers.
Delete it by typing:
Now we need to change Max upload file size, type: (This is a must for DATABASE SQL files)
Press CTRL + W, Search for
Change it to
Press CTRL + W, search for
Change it to
Press CTRL + X, press Y and then hit ENTER to save & exit
Restart Apache/PHP
Type
Install phpMyAdmin & Hide /phpmyadmin
Start with updating package and install phpmyadmin, type
Do the following
[*] apache2
[ ] lightpd
Select Apache2 and press <OK>
Select Yes and press ENTER to install and configure the database.
Create a password for phpMyAdmin
Test phpMyAdmin
Enter IP.COM/phpmyadmin or DOMAINNAME.COM/phpmyadmin
it should look like this
Create MySQL User[/SIZE]
If you weren’t able to log in as root above, you can now create a superuser account just for phpMyAdmin.
In terminal, log into MySQL as root. You may have created a root password when you installed MySQL for the first time or the password could be blank, in which case you can just press ENTER when prompted for a password.
Type
Now add a new MySQL user with the username of your choice. In this example we are calling it pmauser (php my admin user). Make sure to replace password_here with your own (generate a password (link removed due to advertisement)).
The % symbol tells MySQL to allow this user to log in from anywhere remotely. If you want heightened security, you could replace this with an IP address.
type
Now we will grant superuser privileges to our new user pmauser.
type
Now exit MySQL.
type
What you need:
Paid Host/Linux server
Recommended Options: (link removed due to advertisement).
Hetzner.com - hetasd (link removed due to advertisement).
Ovh.com/world - OVH Hosting Company (link removed due to advertisement).
Programs needed: (FileZilla works, but recommend WinSCP)
Putty - Download Putty (link removed due to advertisement).
WinSCP - Download WinSCP (link removed due to advertisement).
Server Files at the end of the tutorial (OTServBR 12.20 Linux comming soon)
Steps in the tutorial,
1. Install Apache
2. Install MySQL
3. Configure Firewall & MySQL Security
4. Install PHP
5. Encrypt SSL (Secured Website Traffic)
This is Encrypted Traffic/None encrypted Traffic
Superuser Setup
example will be: john
add user john by typing:
Code:
sudo adduser john
Code:
sudo usermod -aG sudo john
Code:
sudo su - johnFirst of all, let us see if the timezone is correct by typing:
Code:
dateNow, let us change the timezone into your timezone by typing:
Code:
timedatectl list-timezonesFind your timezone, example. Iam in Sweden so I'll be using Europe/Stockholm.
Update your Timezone by typing:
Code:
sudo timedatectl set-timezone YOUR_TIMEZONE
Code:
date
Code:
sudo apt update && sudo apt upgrade && sudo apt dist-upgradeAfther the installation is compleated reboot the server by typing:
Code:
sudo rebootConfigure a Web Server
You now have two alternatives [Apache] & [Negix]
[Apache Guide]
Install Apache, Type:
Code:
sudo apt update && sudo apt install apache2
Code:
sudo ufw allow OpenSSHNow add firewall rules for Apache, Type:
Code:
sudo ufw allow in "Apache Full"
Code:
sudo ufw enableNow, check the current firewall status by typing:
Code:
sudo ufw statusApache Full ALLOW Anywhere
Apache Full (v6) ALLOW Anywhere (v6)
Test Apache service, type:
Code:
sudo service apache2 statusAlot more but notice this line,
Active: active (running) since Sat 2018-03-31 08:44:04 CEST; 15min ago
Now we can enter our webpage to see if it works, enter SERVER_IP or DOMAINNAME.COM
If you do not know your server ip type this:
Code:
sudo ifconfig | grep -Eo 'inet (addr:)?([0-9]*\.){3}[0-9]*' | grep -Eo '([0-9]*\.){3}[0-9]*' | grep -v '127.0.0.1'Install MySQL
Two commands in one line, type:
Code:
sudo apt update && sudo apt install mysql-serverNow check if the service is running, type:
Code:
sudo service mysql statusActive: active (running) since Mon 2018-04-02 02:40:59 CEST; 2min 47s ago
Press q to exit, now we know the service is installed and running.
Configure MySQL Security
Recommended, GENERATE STRONG PASSWORD: Generate Password (link removed due to advertisement).
To configure security for MySQL, type:
Code:
sudo mysql_secure_installationYou will be asked if you want to set up the Validate Password Plugin. It’s not really necessary unless you want to enforce strict password policies for some reason.
Code:
Securing the MySQL server deployment.

Connecting to MySQL using a blank password.

VALIDATE PASSWORD PLUGIN can be used to test passwords
and improve security. It checks the strength of password
and allows the users to set only those passwords which are
secure enough. Would you like to setup VALIDATE PASSWORD plugin?

Press y|Y for Yes, any other key for No:
Code:
By default, a MySQL installation has an anonymous user,
allowing anyone to log into MySQL without having to have
a user account created for them. This is intended only for
testing, and to make the installation go a bit smoother.
You should remove them before moving into a production
environment.

Remove anonymous users? (Press y|Y for Yes, any other key for No) :
Code:
Normally, root should only be allowed to connect from
'localhost'. This ensures that someone cannot guess at
the root password from the network.

Disallow root login remotely? (Press y|Y for Yes, any other key for No) :
Code:
By default, MySQL comes with a database named 'test' that
anyone can access. This is also intended only for testing,
and should be removed before moving into a production
environment.

Remove test database and access to it? (Press y|Y for Yes, any other key for No) :
Code:
Reloading the privilege tables will ensure that all changes
made so far will take effect immediately.

Reload privilege tables now? (Press y|Y for Yes, any other key for No) :Now we are done with the MySQL, lets login into the MySQL and run the version command
Code:
sudo mysqladmin -p -u root versionInstall PHP
Update by typing:
Code:
sudo apt update && sudo apt install php libapache2-mod-php php-mysqlTest PHP
Type:
Code:
php -version
Code:
PHP 7.2.3-1ubuntu1 (cli) (built: Mar 14 2018 22:03:58) ( NTS )
Copyright (c) 1997-2018 The PHP Group
Zend Engine v3.2.0, Copyright (c) 1998-2018 Zend Technologies
with Zend OPcache v7.2.3-1ubuntu1, Copyright (c) 1999-2018, by Zend TechnologiesWe'll create a file called info.php which you can enter thru IP.COM/info.php or DOMAINNAME.COM/info.php.
NOTE! This file needs to be deleted due to dangerous information.
Create it by typing:
Code:
sudo nano /var/www/html/info.php
Code:
<?php
phpinfo();Now enter IP.COM/info.php or DOMAINNAME.COM/info.php
It should look like this:
NOTE!
Once you’ve confirmed PHP is working correctly, it’s important to delete info.php as it contains information that could be useful to hackers.
Delete it by typing:
Code:
sudo rm /var/www/html/info.php
Code:
sudo nano /etc/php/7.2/apache2/php.ini
Code:
upload_max_filesize
Code:
upload_max_filesize = 64M
Code:
post_max_size
Code:
post_max_size = 64MRestart Apache/PHP
Type
Code:
sudo systemctl restart apache2Start with updating package and install phpmyadmin, type
Code:
sudo apt update && sudo apt install phpmyadmin[*] apache2
[ ] lightpd
Select Apache2 and press <OK>
Select Yes and press ENTER to install and configure the database.
Create a password for phpMyAdmin
Test phpMyAdmin
Enter IP.COM/phpmyadmin or DOMAINNAME.COM/phpmyadmin
it should look like this
Create MySQL User[/SIZE]
If you weren’t able to log in as root above, you can now create a superuser account just for phpMyAdmin.
In terminal, log into MySQL as root. You may have created a root password when you installed MySQL for the first time or the password could be blank, in which case you can just press ENTER when prompted for a password.
Type
Code:
sudo mysql -p -u rootThe % symbol tells MySQL to allow this user to log in from anywhere remotely. If you want heightened security, you could replace this with an IP address.
type
Code:
sudo mysql -p -u rootThe % symbol tells MySQL to allow this user to log in from anywhere remotely. If you want heightened security, you could replace this with an IP address.
type
Code:
CREATE USER 'pmauser'@'%' IDENTIFIED BY 'password_here';type
Code:
GRANT ALL PRIVILEGES ON *.* TO 'pmauser'@'%' WITH GRANT OPTION;type
Code:
exit
Last edited:
