Zuma Master
~Holes Through Happiness~
Hello and welcome to this tutorial , which will , hopefully , teach you how to insert sprites to your OT server. Let's get started: (FULL CREDITS FOR THIS PART GOES TO SIR BANANAS)
Adding Sprites Into Your Custom Client (CREDITS TO SIR BANANAS FOR THIS PART)
I've seen soooo many people ask this question, and SOOOO many more people giving the wrong anwsers, and ruining a spriters career :I
So i decided to make everyone's life easier. So here is my .spr and .dat editing tutorial!
What is .dat and .spr?
The .dat and .spr are the files that hold the sprites of Tibia. The .spr is the compilation of all the sprites ( where the sprites are stored), and the .dat is where they come together as looktypes and itemtypes. To edit them, we will require two programs! Why two, you ask? One for adding the sprites into the .spr, and another one for putting them into position inside the .dat. So here are the links to what we will be using in this tutorial. In reality, you only need one, but the first one, which is the TibiaEditorv6, doesnt work with the .dat, for some reason, and the Blackdemon Dat Editor is what most people use, but 99/100 times you try to save your work, it corrupts your .spr file, destroying your work. So we will use the TibiaEditor to add sprites into the .spr, and the Dat Editor to well, obviously edit the .dat.

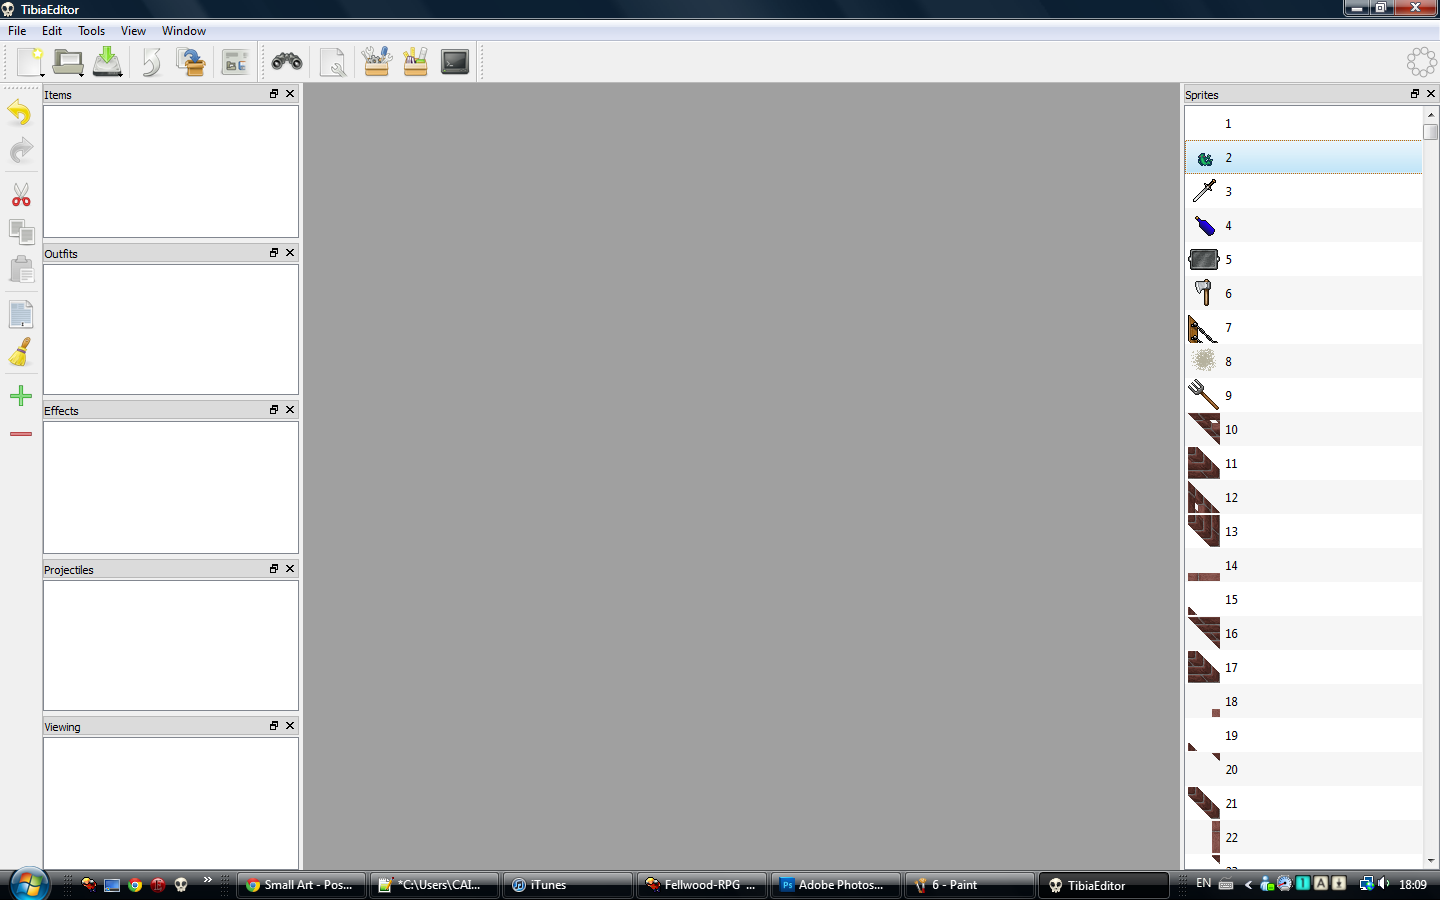
Now that we have all the programs, lets start by opening TibiaEditorv6
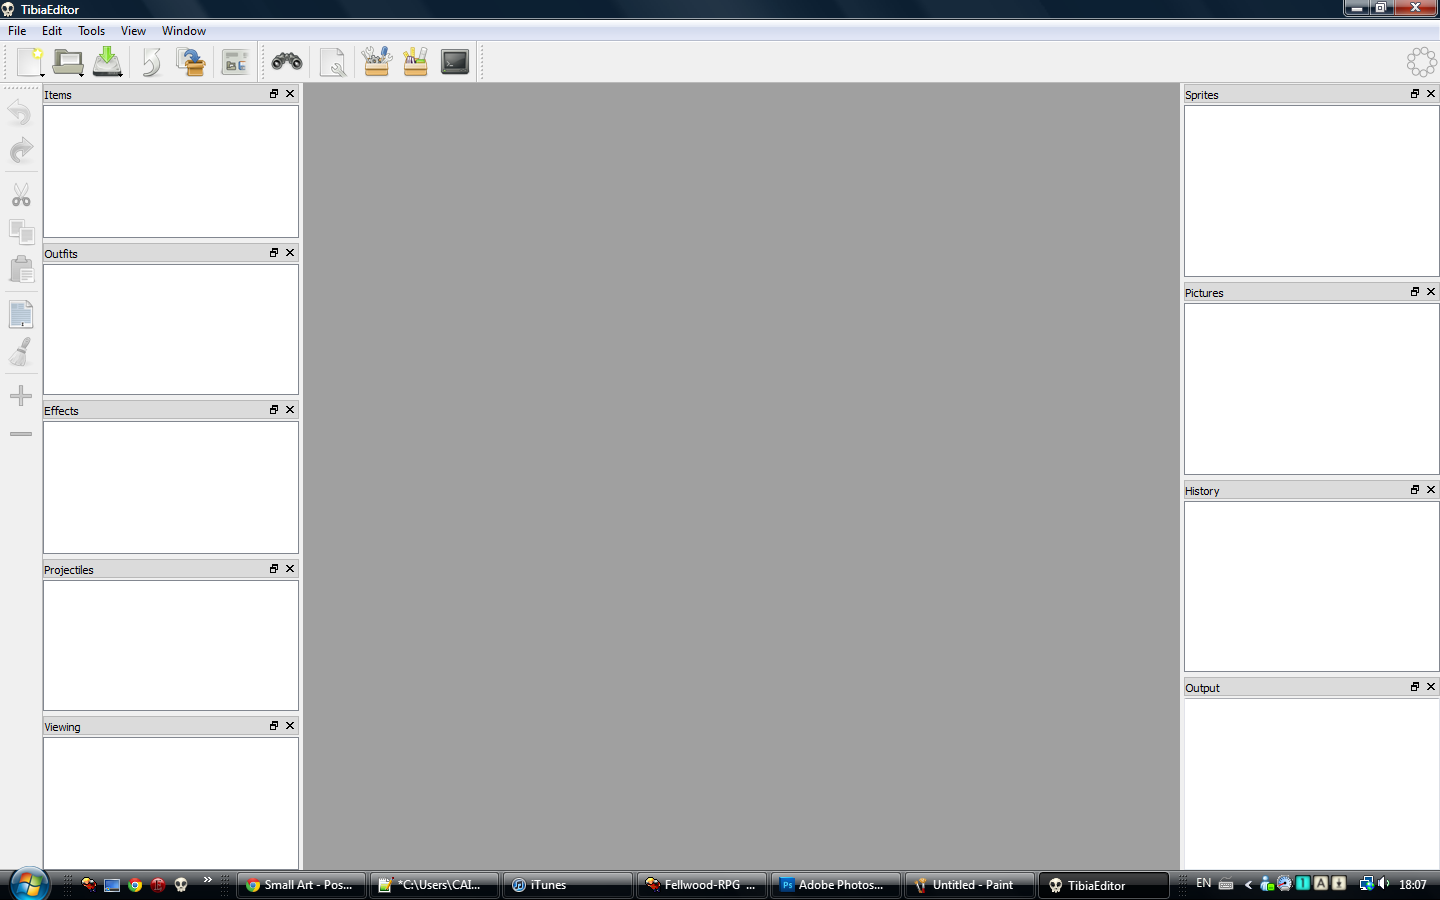
Now lets open our spr file! Just do what I do in the pics.
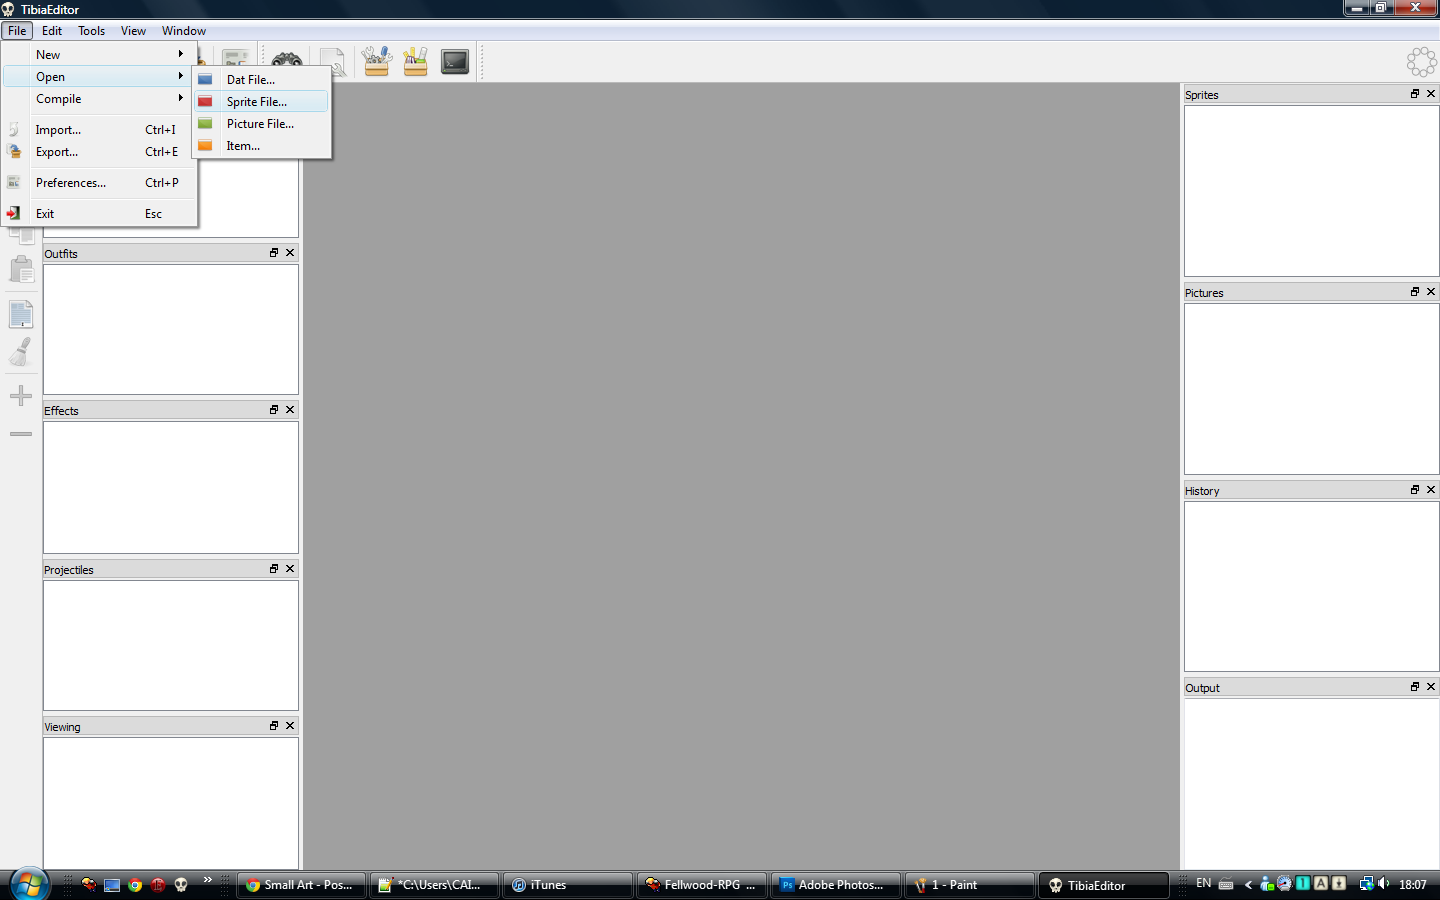
Okay! Find the path, and open it. After you open it, it should look like this

-- Warning! Don't scroll up and down too fast in TibiaEditor, or you'll end up freezing and crashing :/ --
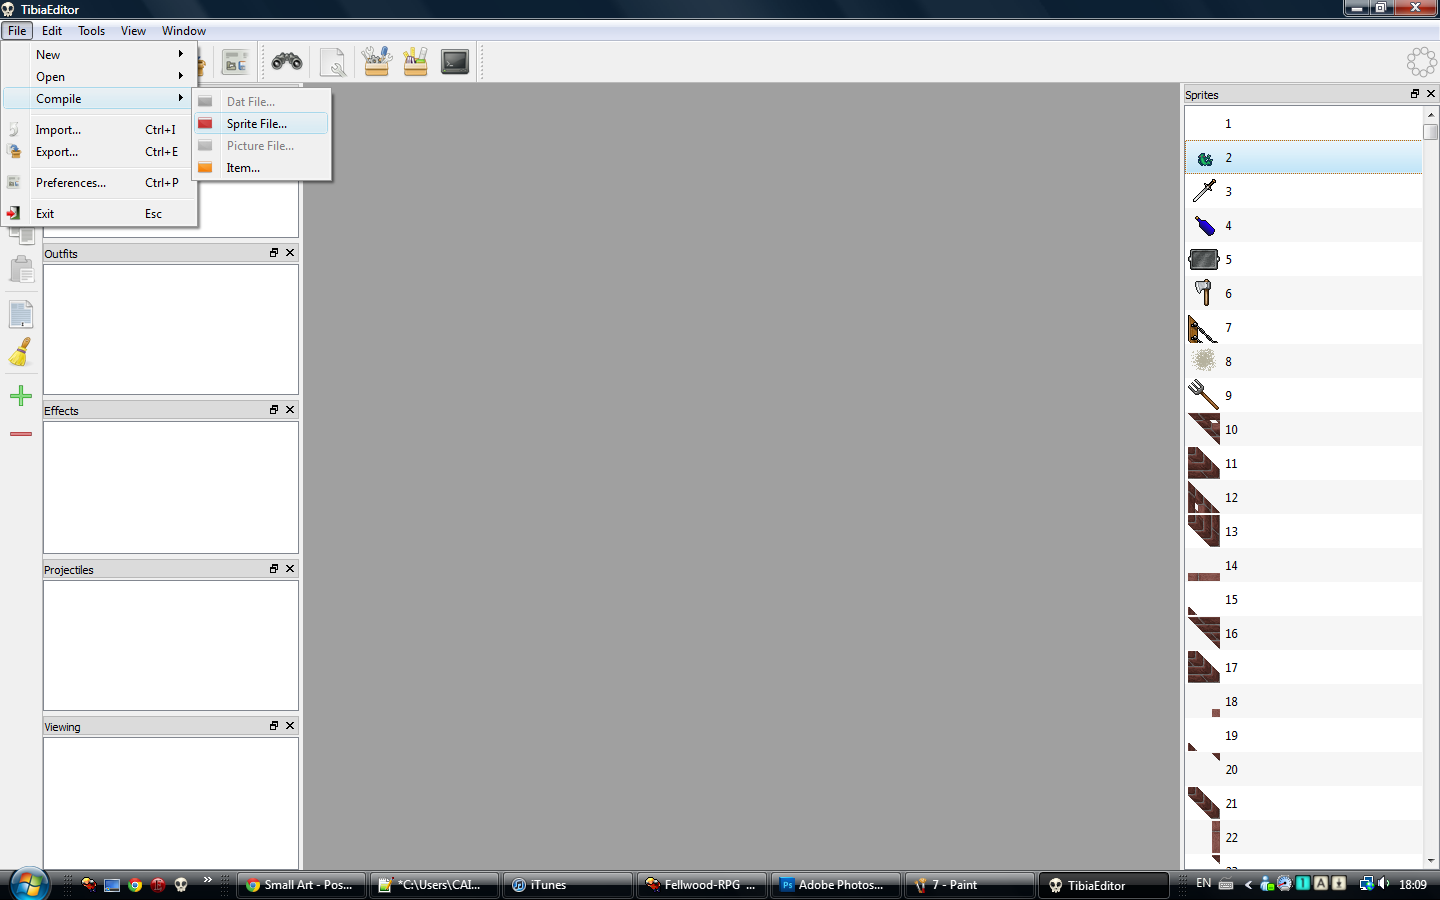
Back to business. Now that our .spr is open, we have to import the sprite we are adding.
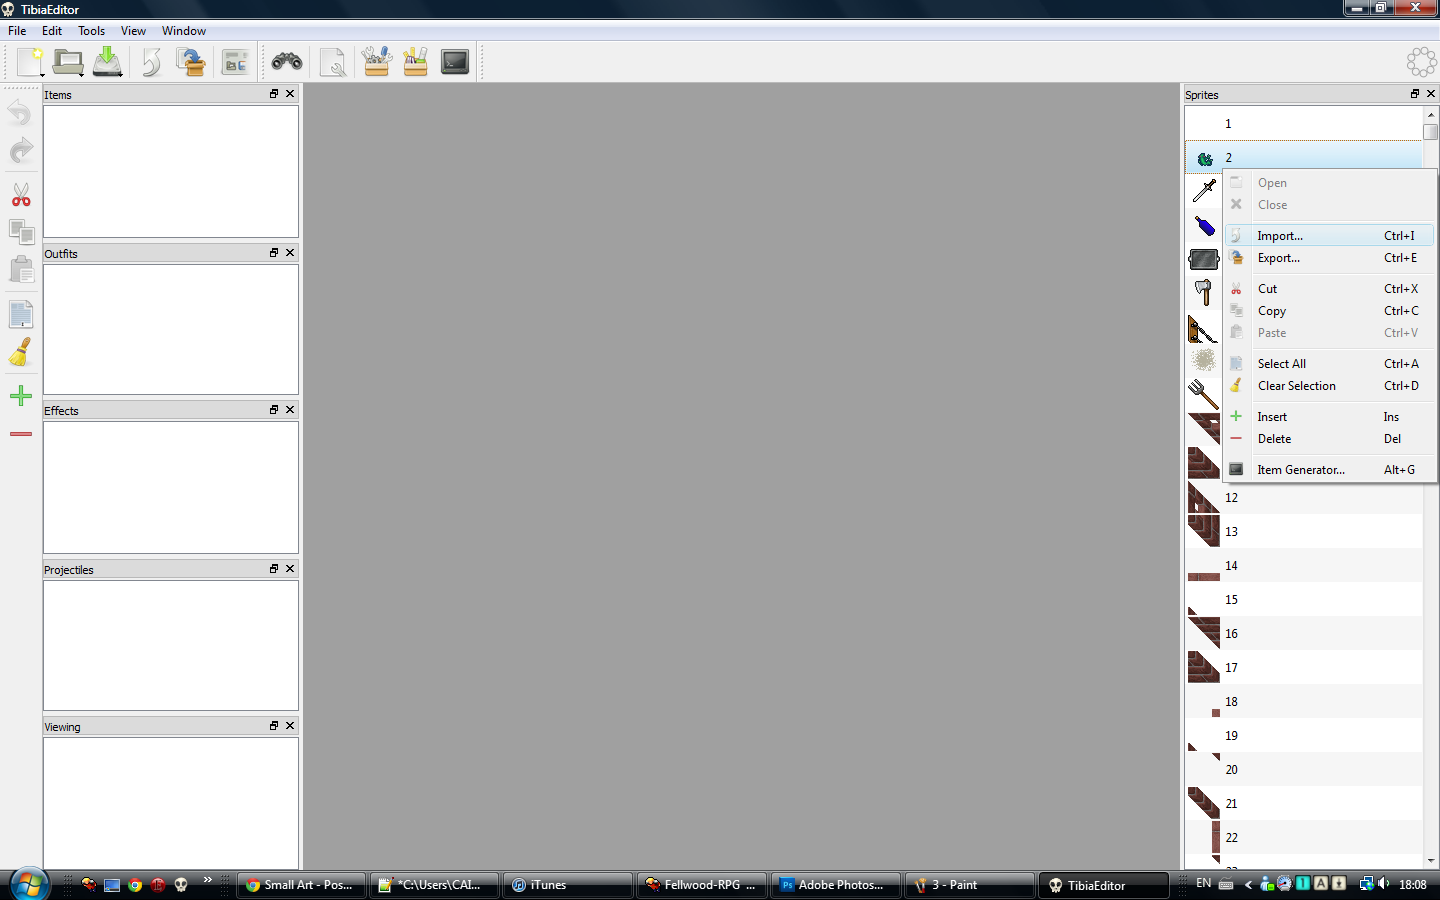
So do like the image, and right click any sprite and press Import.
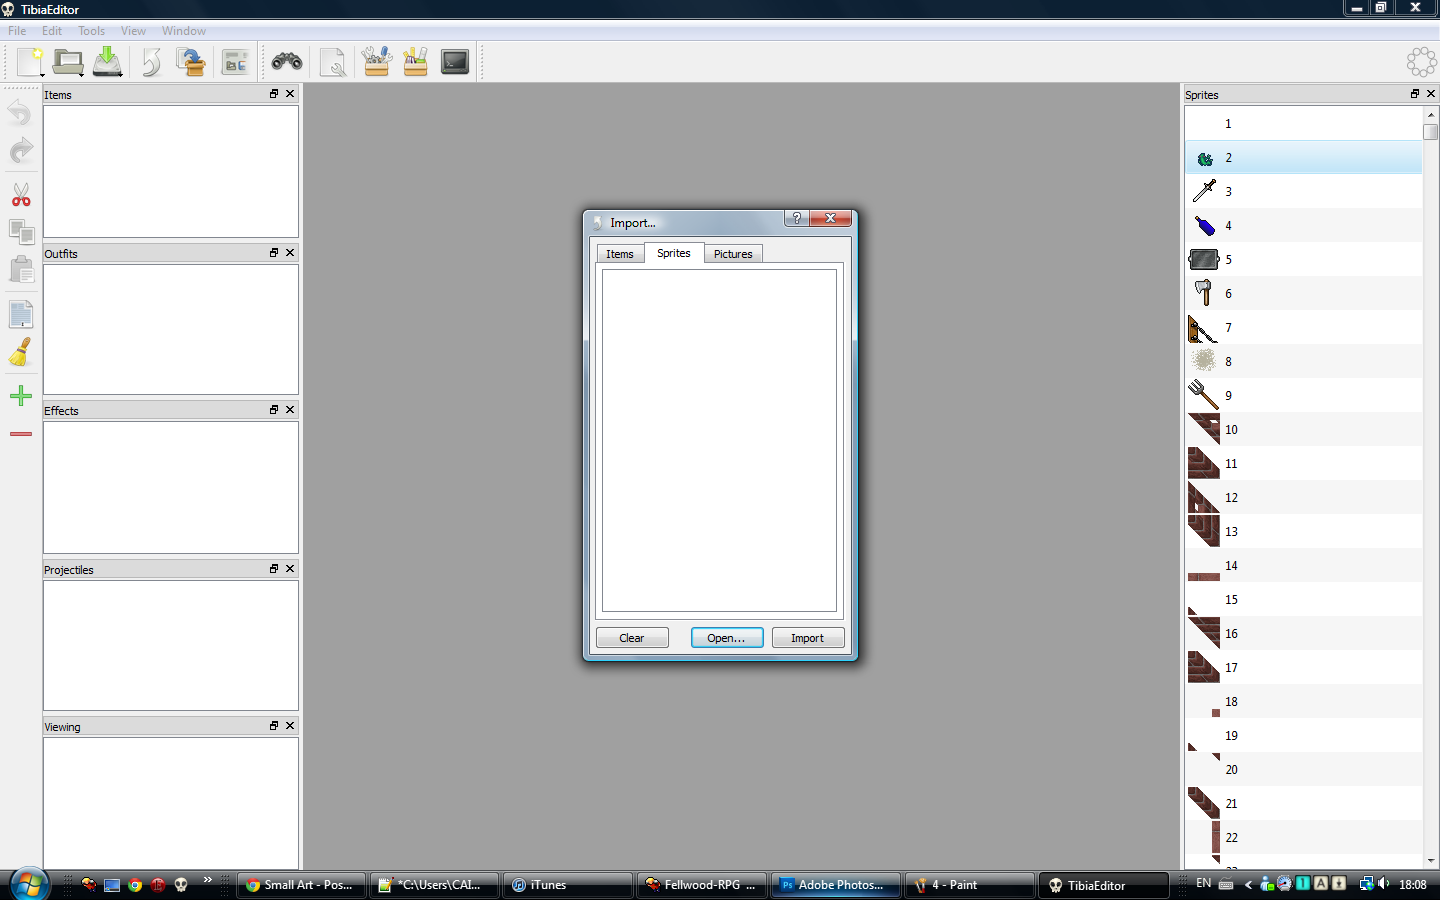
This window should appear. Now press Open, and find the path to the sprite, and open it, just like we did with the .spr
It should now look like this

Now just press Import, and the window should close and look like this
No really apparent change, but our sprite has been added ^^, now we have to save our file.
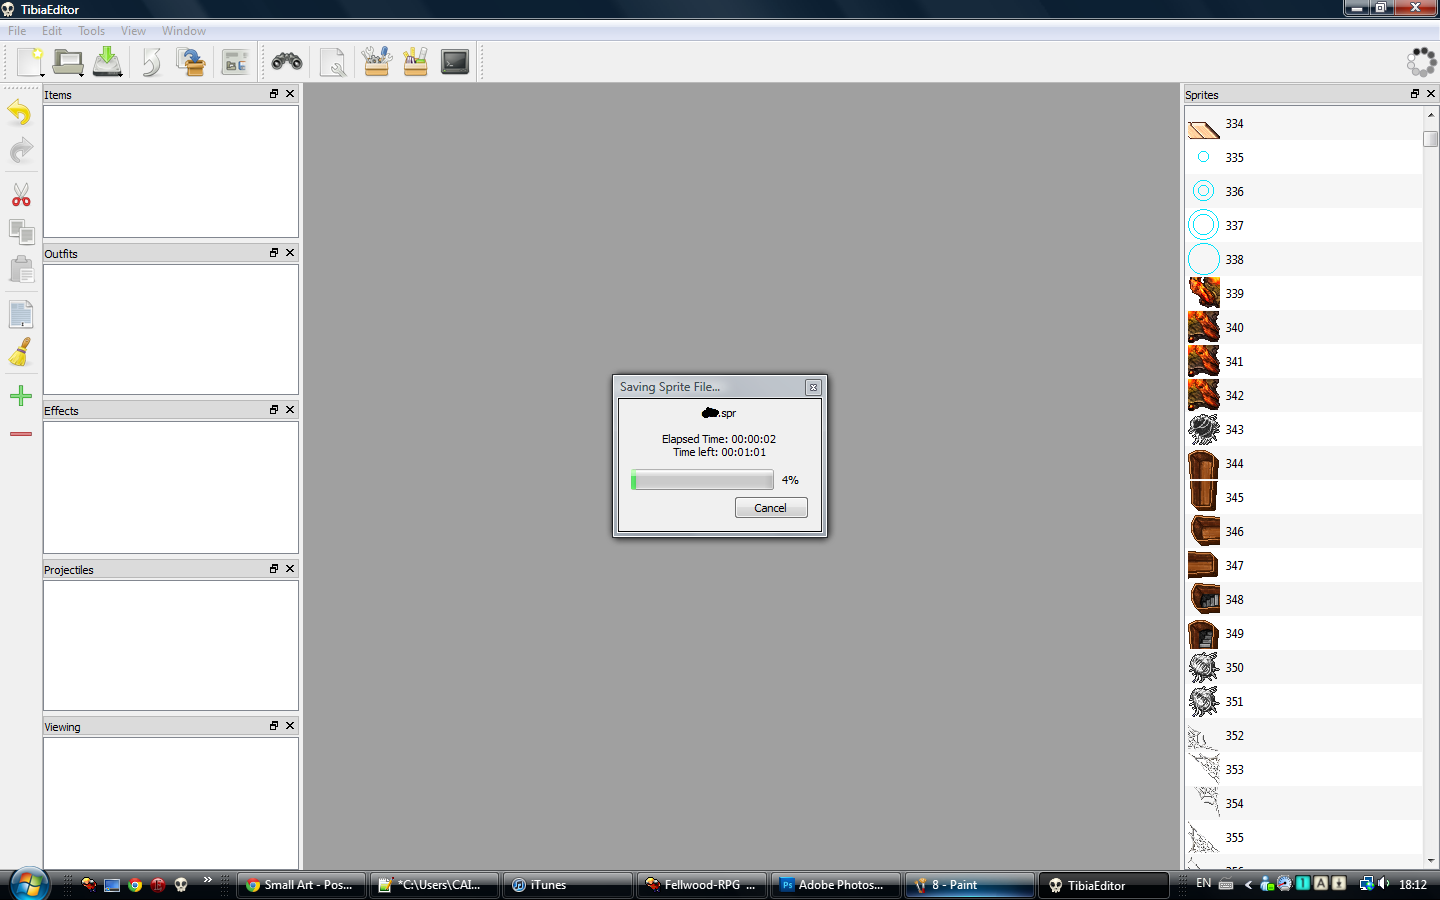
So just do what I do in the pic
Then save it to wherever you want, and it should look like this
After that is done, we are finished with editing the .spr! So just close TibiaEditor, and now open DatEditor.
When you open it, it should look like this
Now press the little folder, and choose the path. The .dat should be the .dat you want to edit, and the .spr is the .spr we compiled with TibiaEditor.
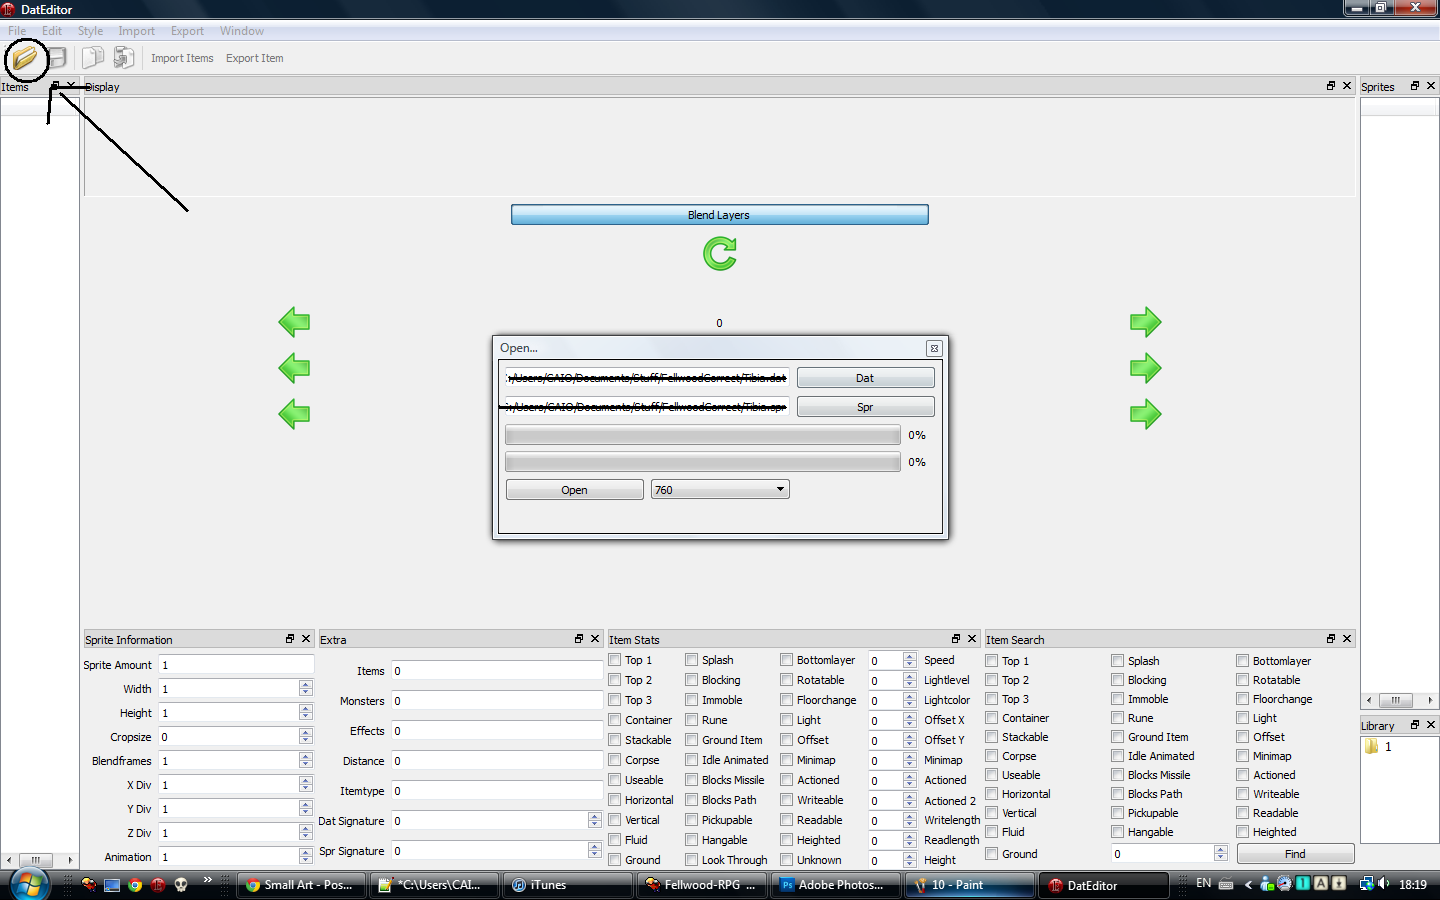
After thats done, press open
Wait until it looks like this
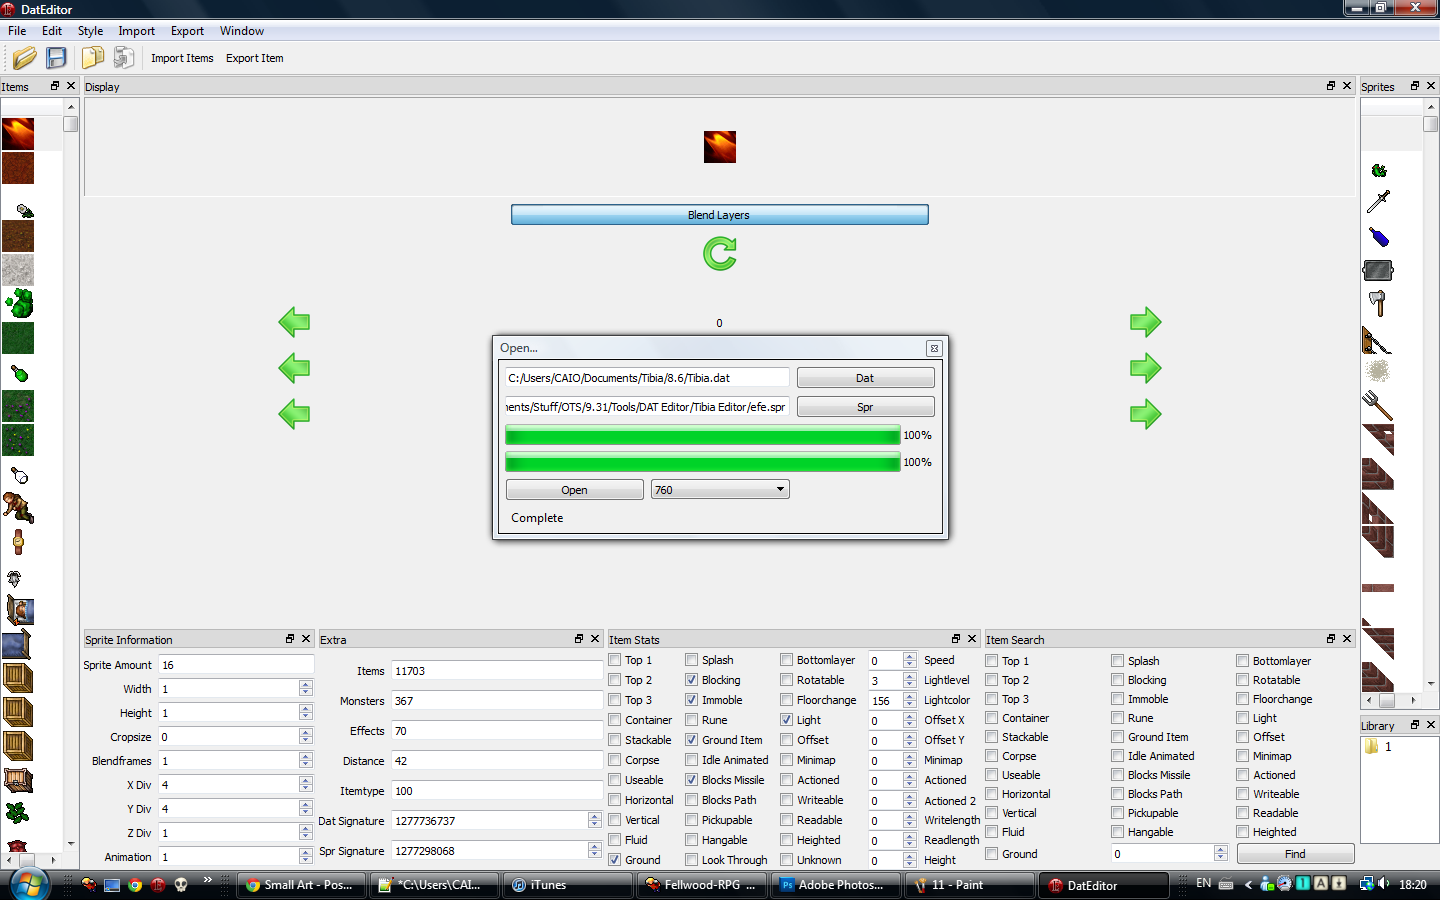
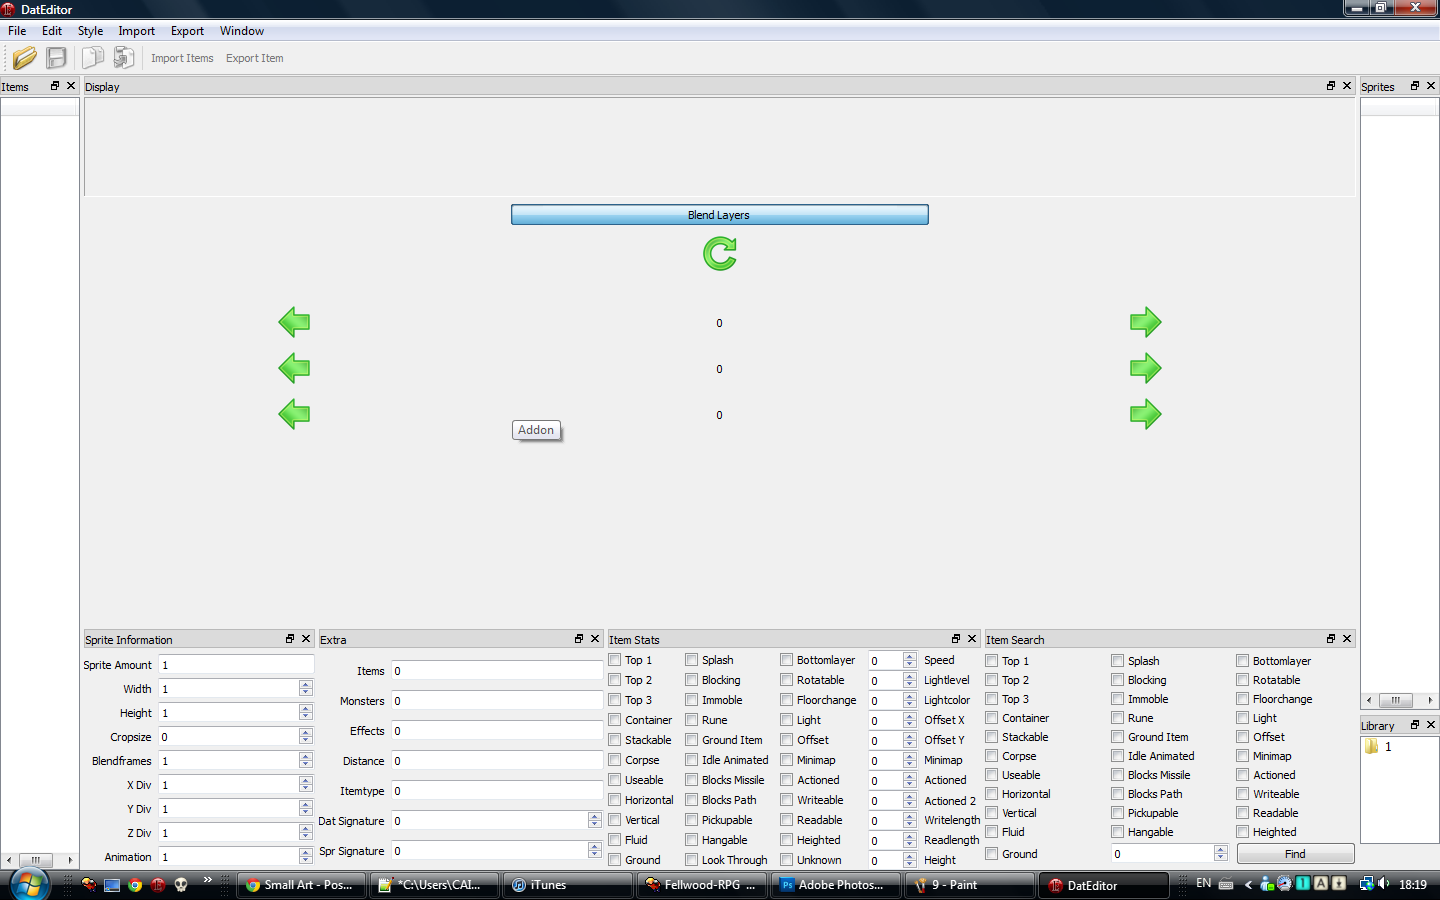
Then press Close and you should be here
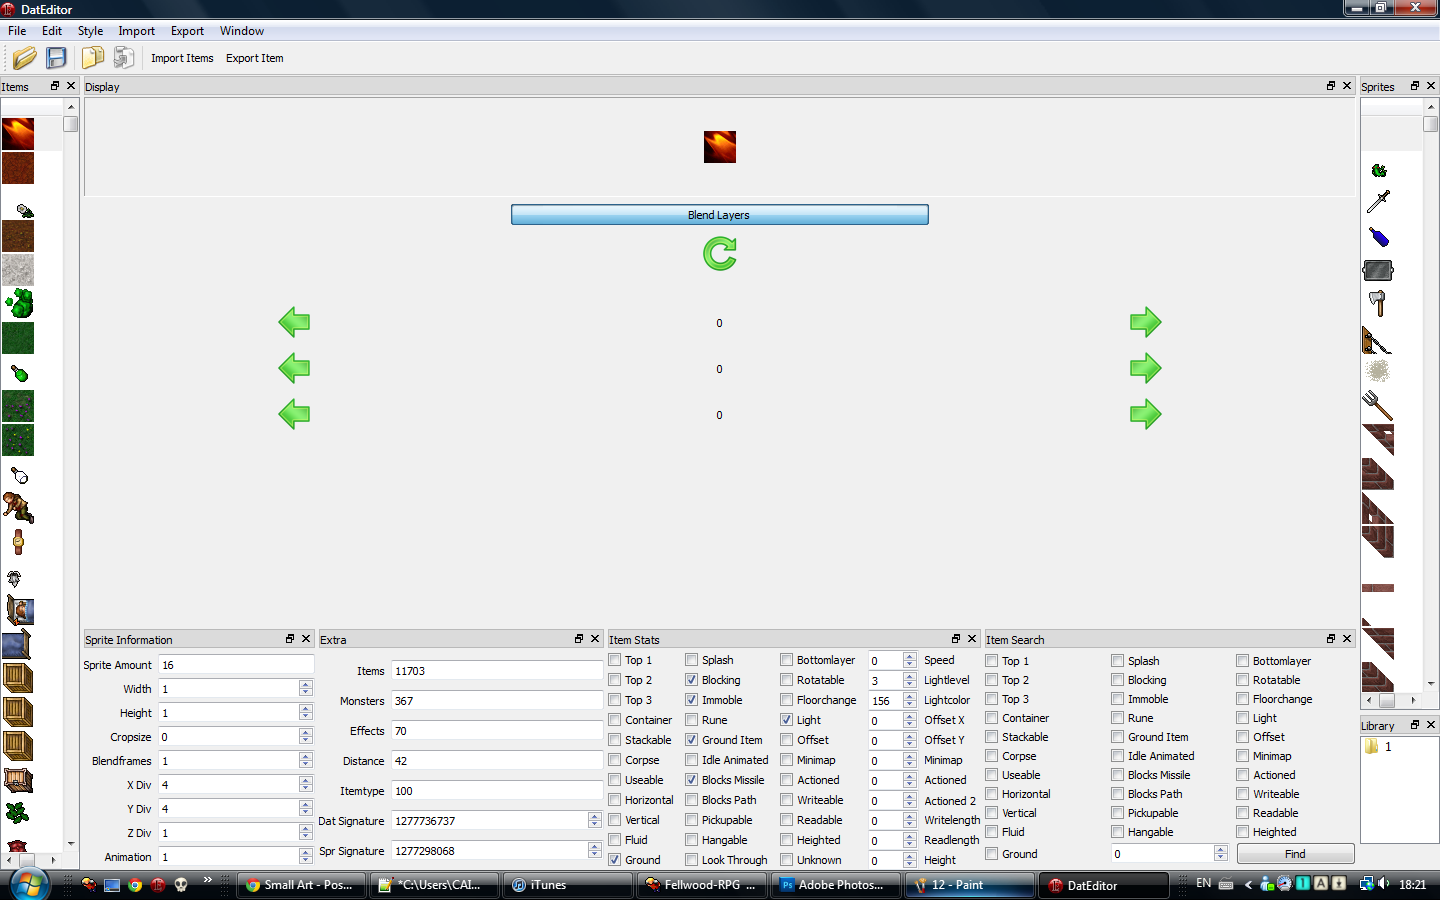
Now scroll down until the very end of the sprites (on the right side [>>]), until you see this
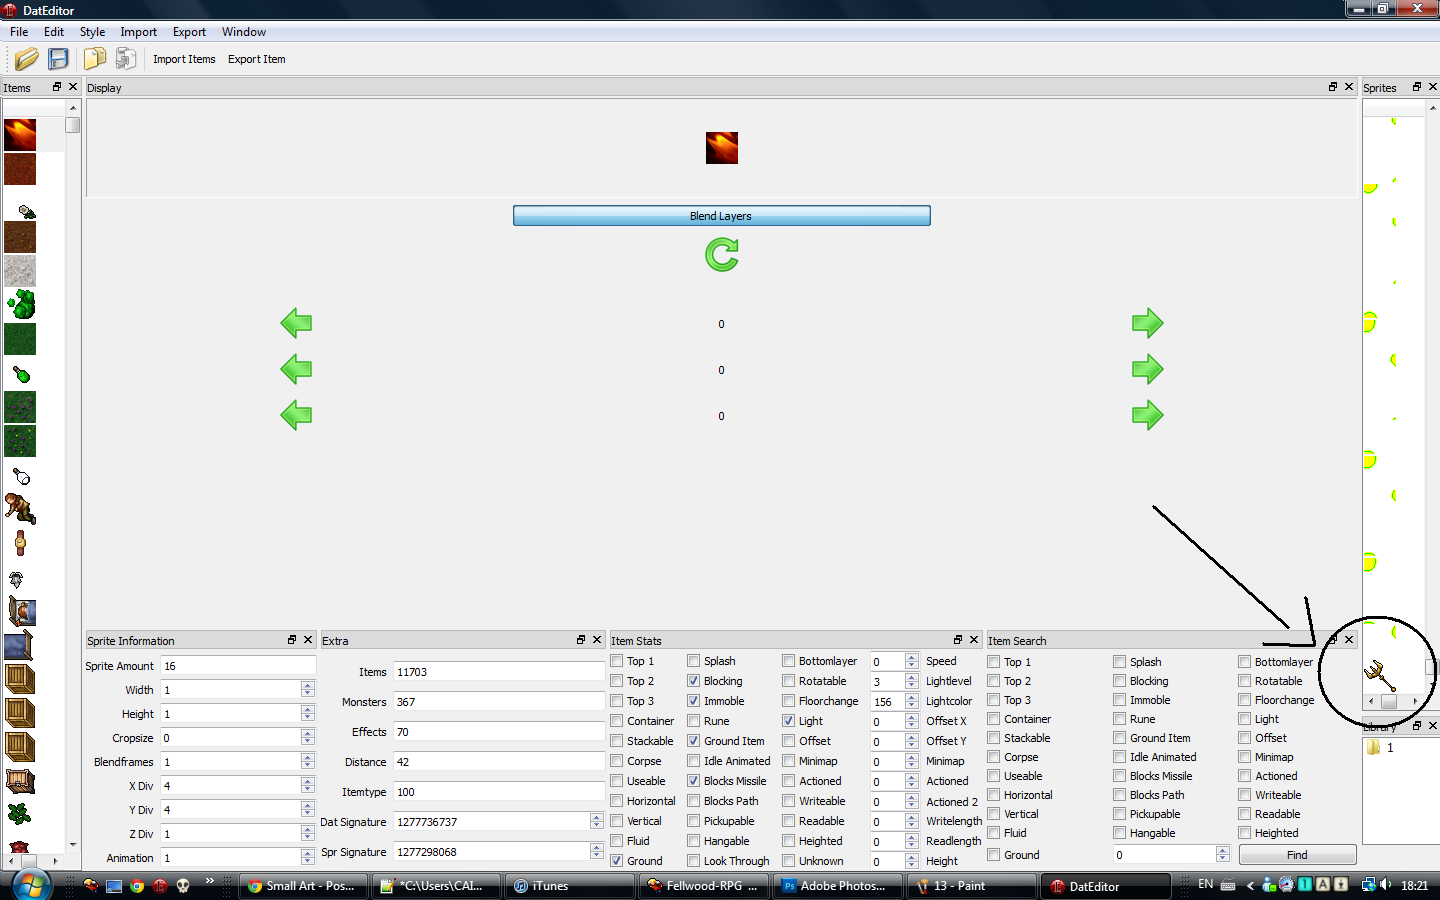
Now follow the steps in this pic (File - new - Item)
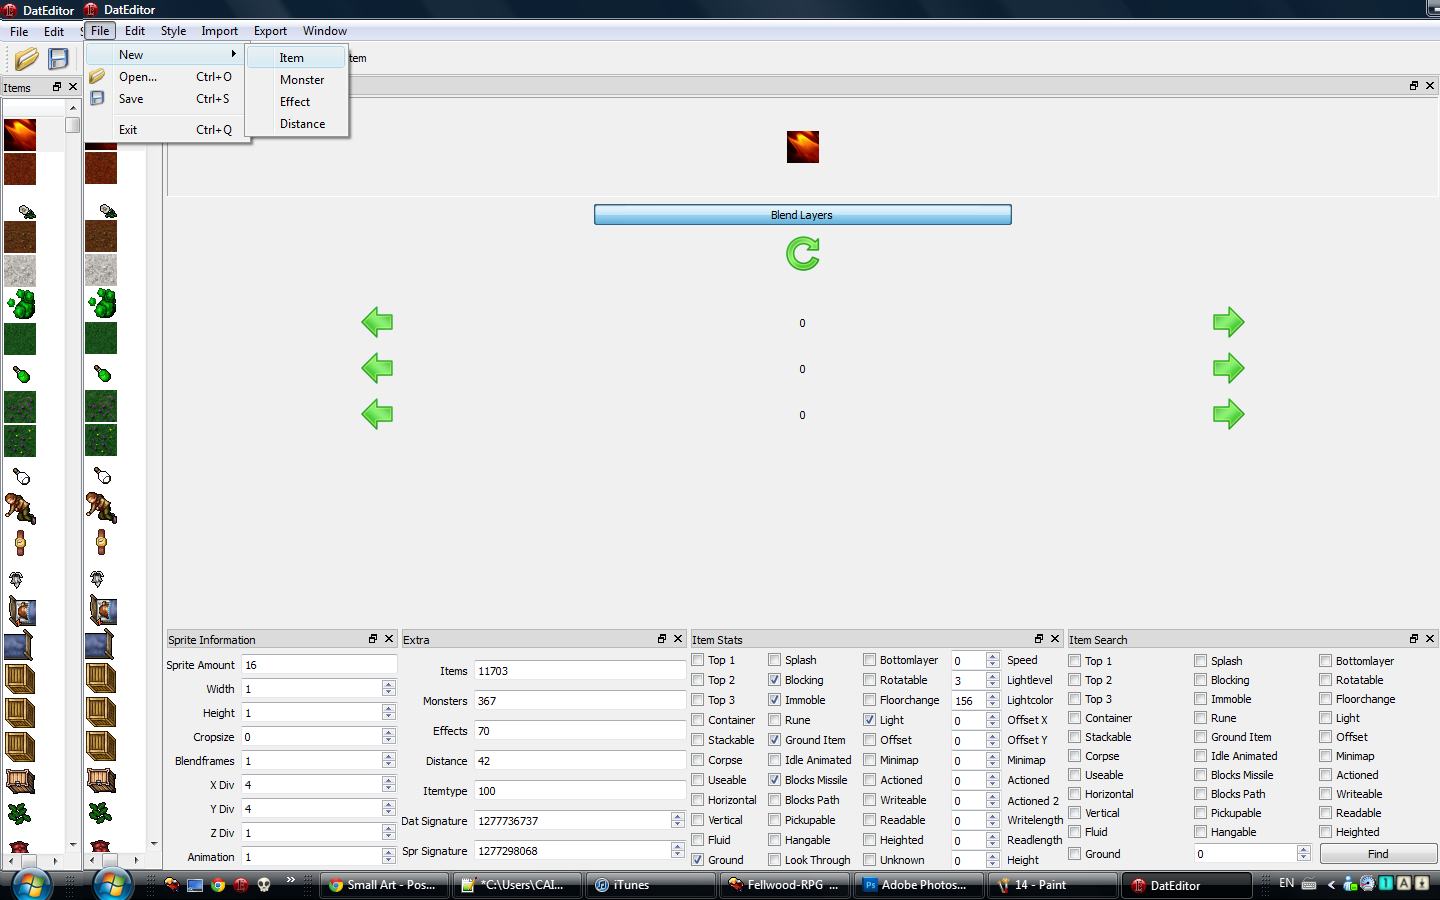
And it should go to this. It will be blank, don't worry, thats normal
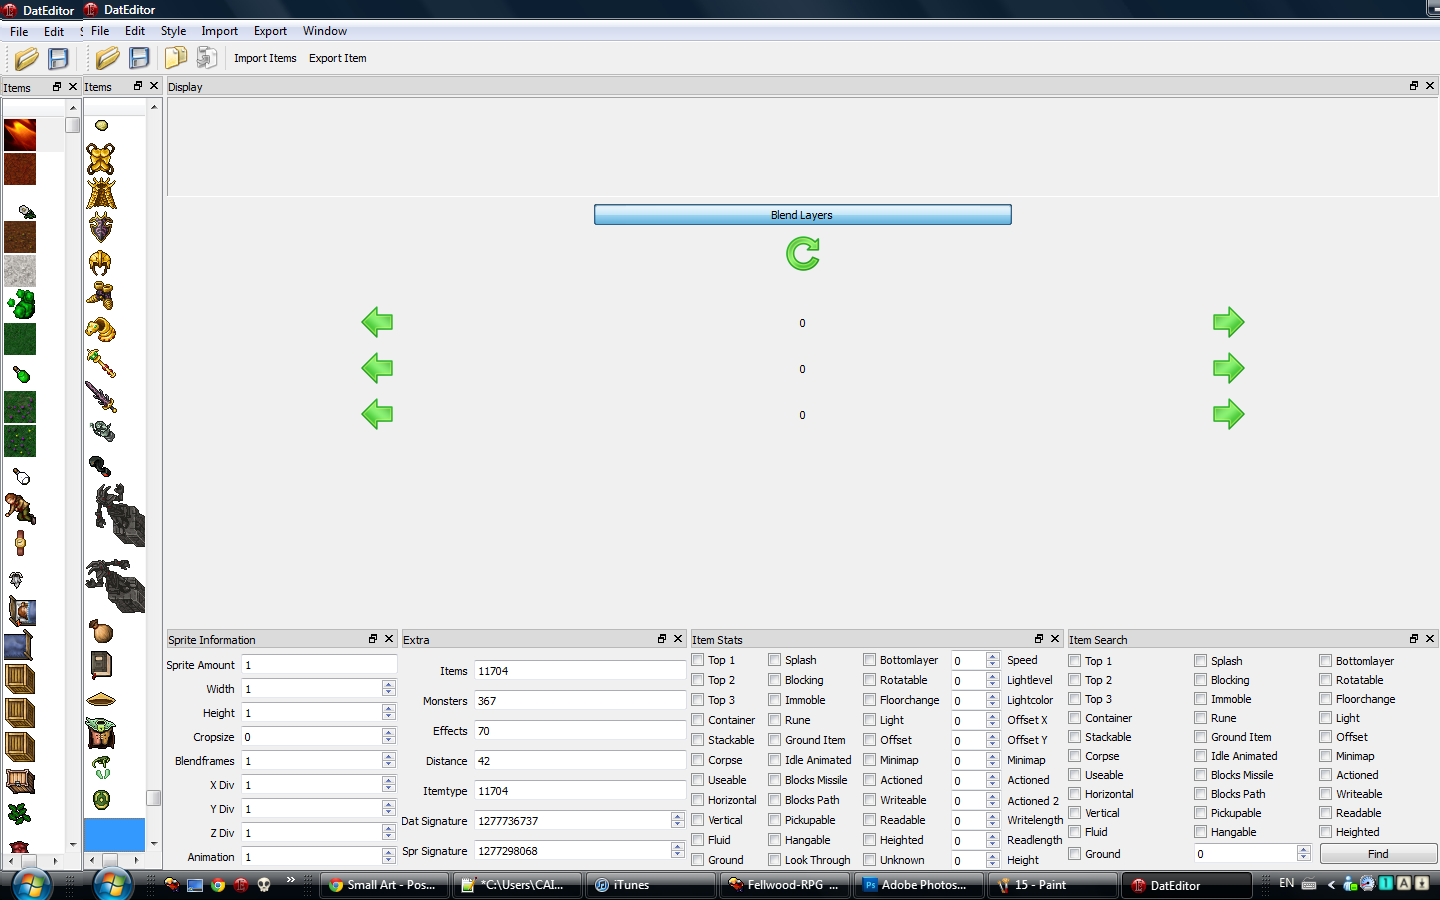
Now we drag our sprite to the location showed in this pic
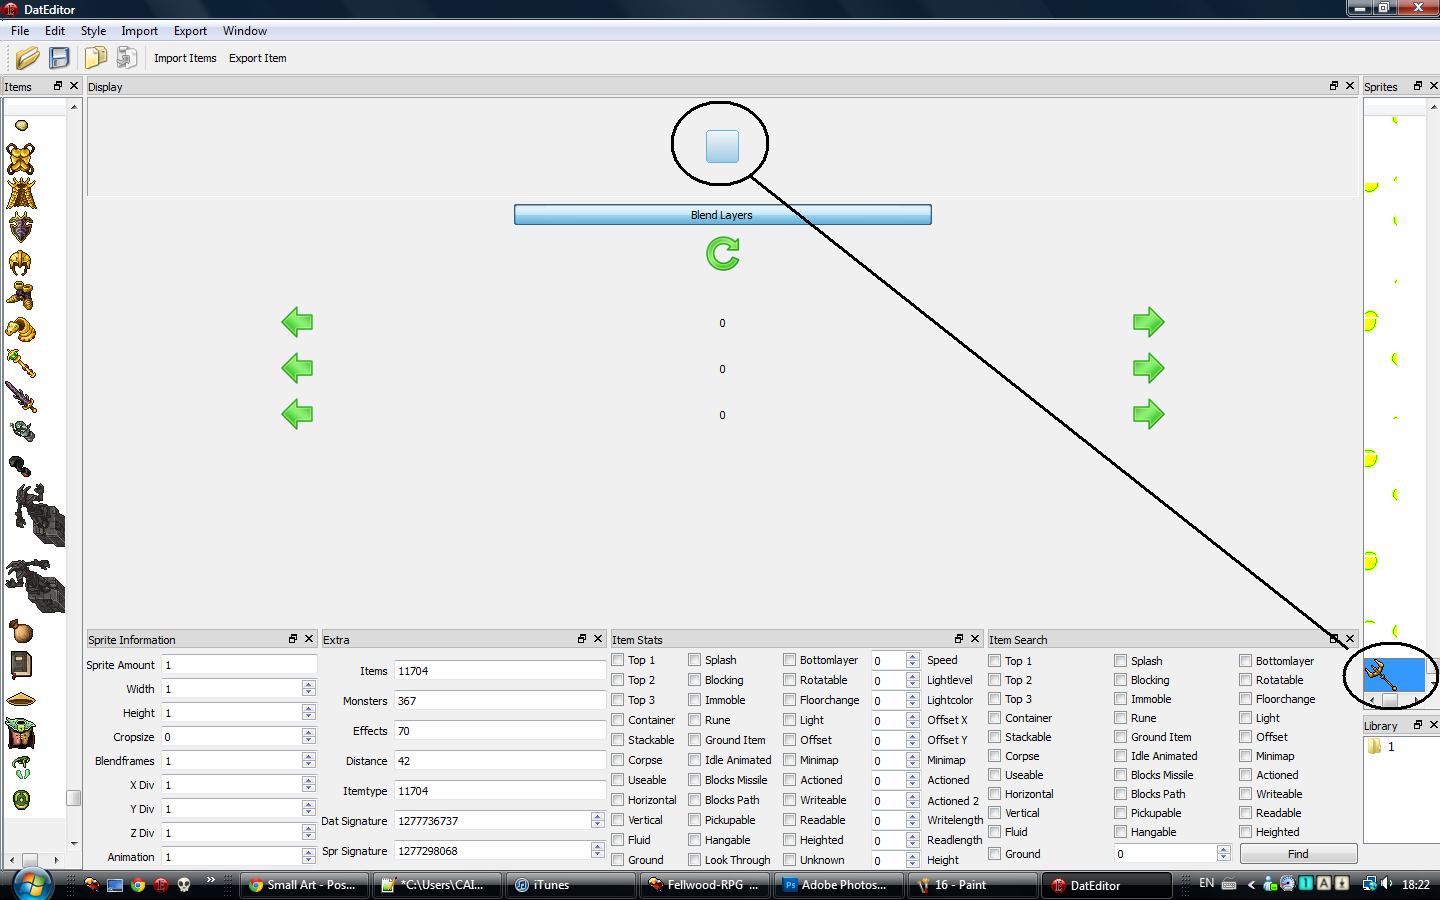
And it should now look like this
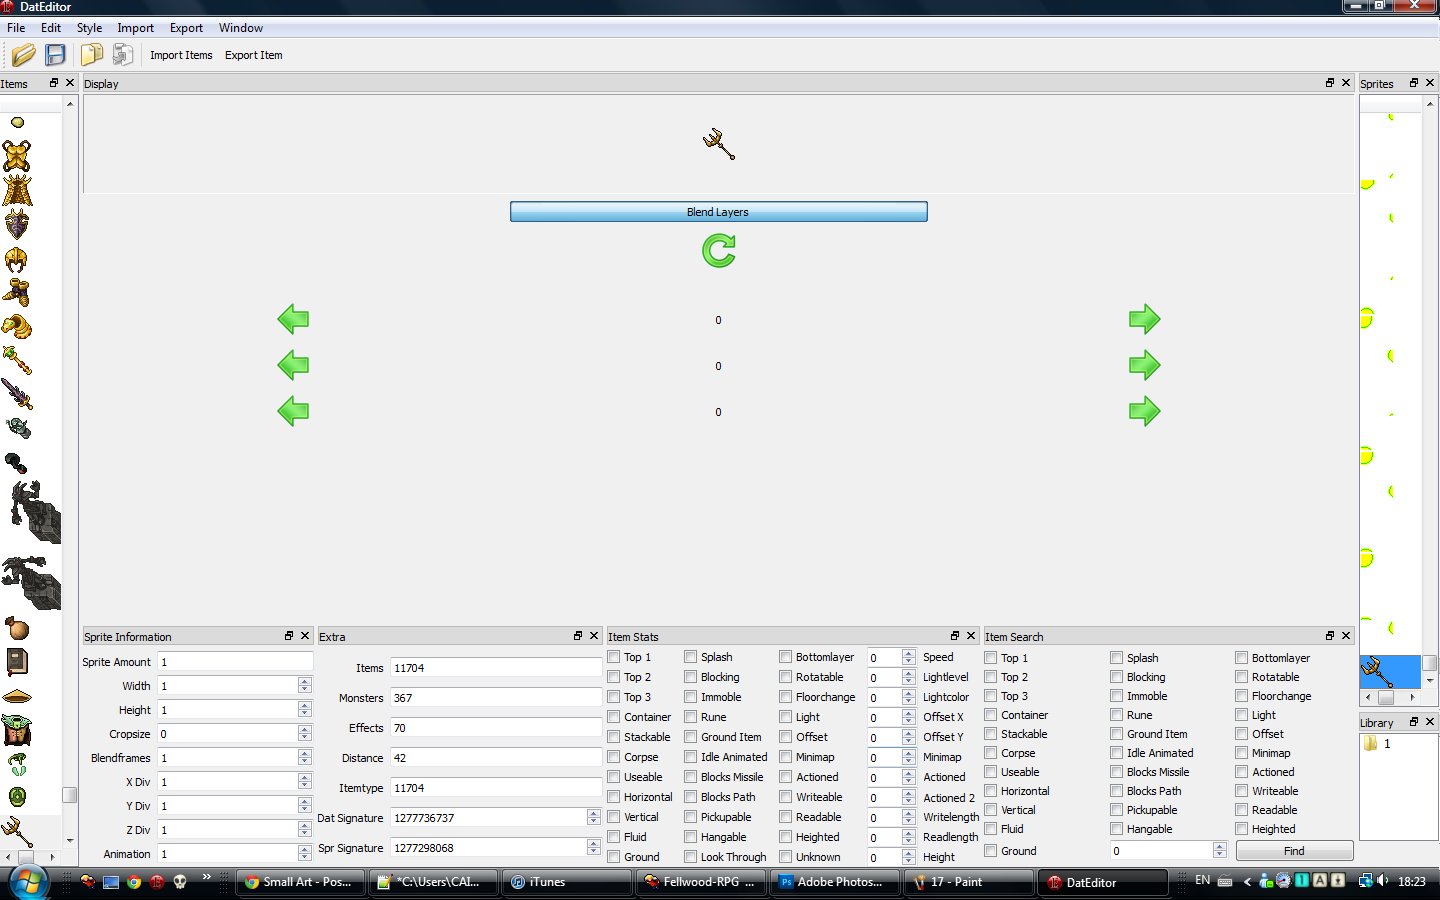
Now press the Save icon next to the folder we used to open our sprites, and this should pop up
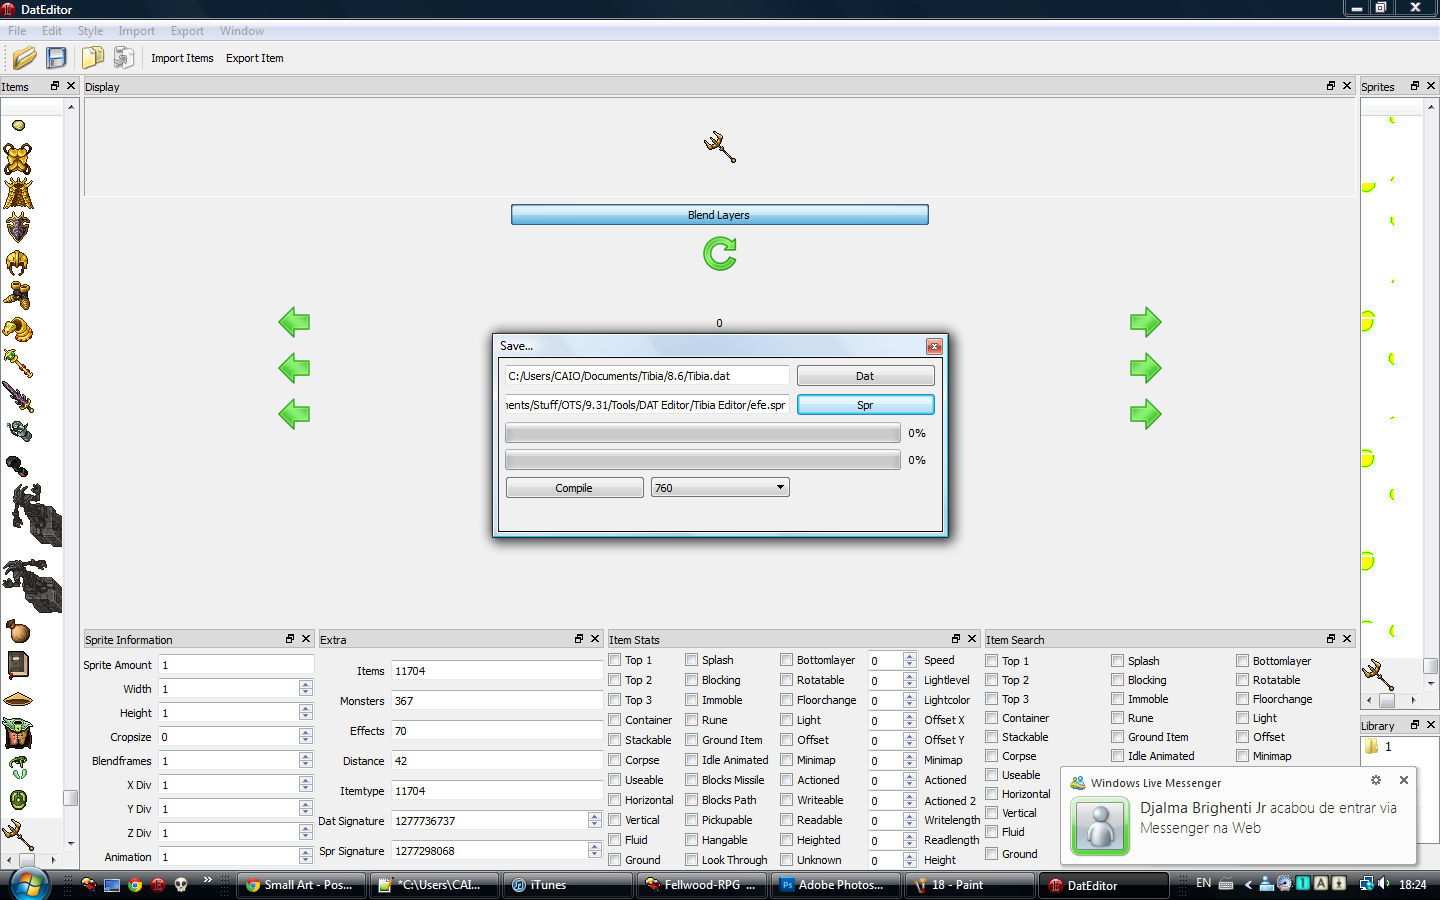
Now here comes the tricky part. Save the .dat to where u want to save it ^^, but the spr, dont overwrite the one we compiled with TibiaEditor, because DatEditor WILL crash, and if you overwrite the one from TibiaEditor, you will lose all your progress. Now after you chose the locations, press save, and this will happen
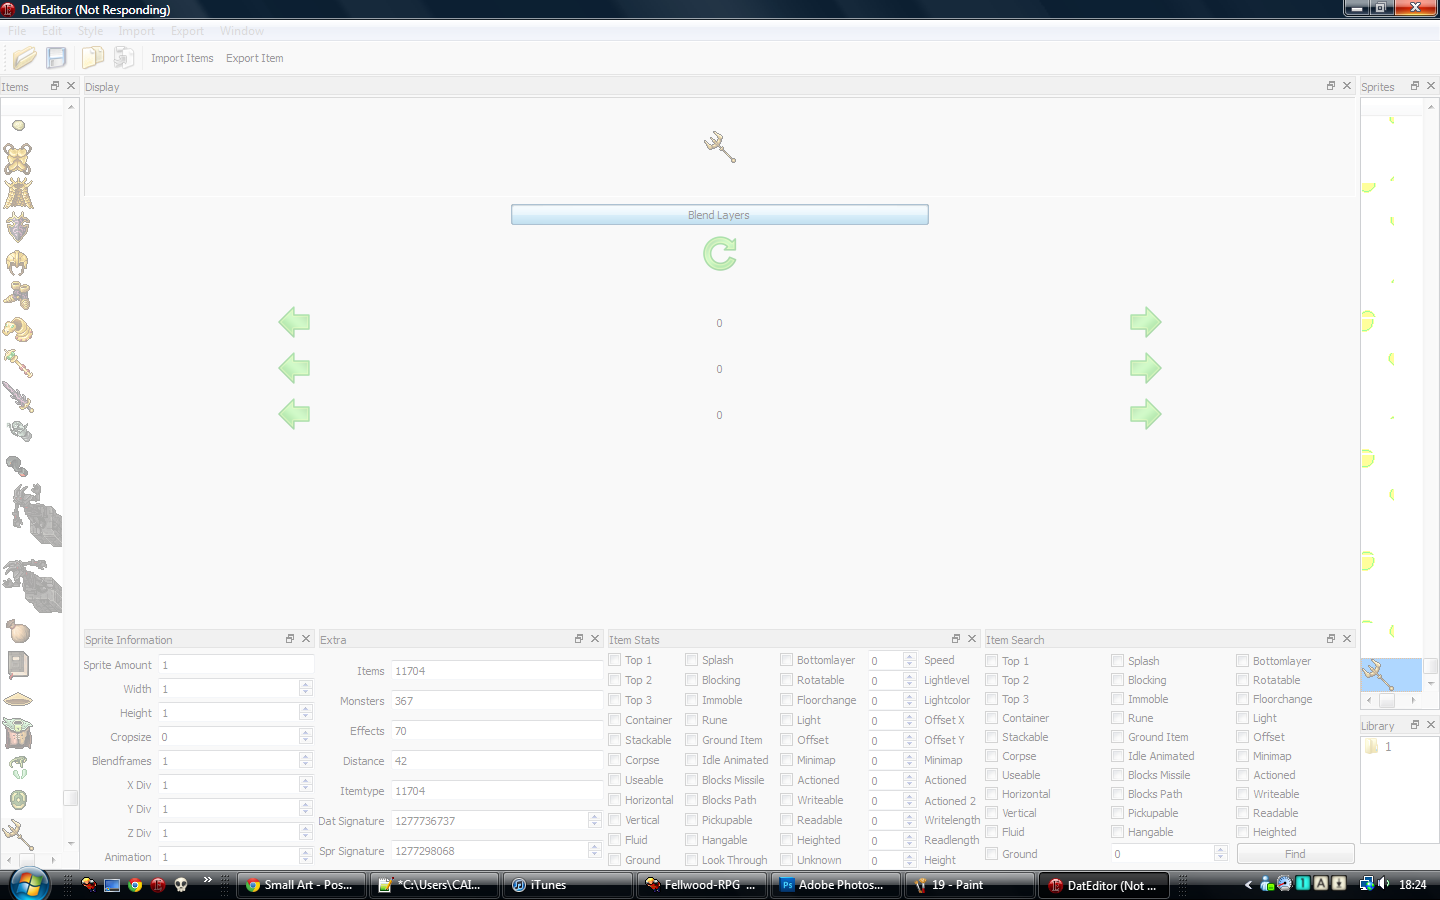
So now the spr we saved with DatEditor will be ruined, but the .dat will be working fine, so take the .dat from DatEditor and the .spr from TibiaEditor, and there you go, you've added a sprite to a client ^^
Hope you liked the tutorial, and hope it was useful. Took me weeks to find out completely how to do this, reading over 20 tutorials, and none were complete like this, so i hope this helps everybody.
(Next steps by Zuma Master , Respect and thanks to sir bananas for this part..) Tutorial continues...
=====================================================================================================================================================
Adding Sprites Into Your Custom Client (CREDITS TO SIR BANANAS FOR THIS PART)
I've seen soooo many people ask this question, and SOOOO many more people giving the wrong anwsers, and ruining a spriters career :I
So i decided to make everyone's life easier. So here is my .spr and .dat editing tutorial!
What is .dat and .spr?
The .dat and .spr are the files that hold the sprites of Tibia. The .spr is the compilation of all the sprites ( where the sprites are stored), and the .dat is where they come together as looktypes and itemtypes. To edit them, we will require two programs! Why two, you ask? One for adding the sprites into the .spr, and another one for putting them into position inside the .dat. So here are the links to what we will be using in this tutorial. In reality, you only need one, but the first one, which is the TibiaEditorv6, doesnt work with the .dat, for some reason, and the Blackdemon Dat Editor is what most people use, but 99/100 times you try to save your work, it corrupts your .spr file, destroying your work. So we will use the TibiaEditor to add sprites into the .spr, and the Dat Editor to well, obviously edit the .dat.
Now that we have all the programs, lets start by opening TibiaEditorv6
Now lets open our spr file! Just do what I do in the pics.
Okay! Find the path, and open it. After you open it, it should look like this
-- Warning! Don't scroll up and down too fast in TibiaEditor, or you'll end up freezing and crashing :/ --
Back to business. Now that our .spr is open, we have to import the sprite we are adding.
So do like the image, and right click any sprite and press Import.
This window should appear. Now press Open, and find the path to the sprite, and open it, just like we did with the .spr
It should now look like this
Now just press Import, and the window should close and look like this
No really apparent change, but our sprite has been added ^^, now we have to save our file.
So just do what I do in the pic
Then save it to wherever you want, and it should look like this
After that is done, we are finished with editing the .spr! So just close TibiaEditor, and now open DatEditor.
When you open it, it should look like this
Now press the little folder, and choose the path. The .dat should be the .dat you want to edit, and the .spr is the .spr we compiled with TibiaEditor.
After thats done, press open
Wait until it looks like this
Then press Close and you should be here
Now scroll down until the very end of the sprites (on the right side [>>]), until you see this
Now follow the steps in this pic (File - new - Item)
And it should go to this. It will be blank, don't worry, thats normal
Now we drag our sprite to the location showed in this pic
And it should now look like this
Now press the Save icon next to the folder we used to open our sprites, and this should pop up
Now here comes the tricky part. Save the .dat to where u want to save it ^^, but the spr, dont overwrite the one we compiled with TibiaEditor, because DatEditor WILL crash, and if you overwrite the one from TibiaEditor, you will lose all your progress. Now after you chose the locations, press save, and this will happen
So now the spr we saved with DatEditor will be ruined, but the .dat will be working fine, so take the .dat from DatEditor and the .spr from TibiaEditor, and there you go, you've added a sprite to a client ^^
Hope you liked the tutorial, and hope it was useful. Took me weeks to find out completely how to do this, reading over 20 tutorials, and none were complete like this, so i hope this helps everybody.
(Next steps by Zuma Master , Respect and thanks to sir bananas for this part..) Tutorial continues...
=====================================================================================================================================================


