Crevasse
惡名昭彰
DISCLAIMER
This guide is for educational purposes only! This is intended for setting up the leaked CipSoft files for nostalgia purposes. I cannot guarantee that a server created from this guide will be secure if opened to the public. You will need to take additional measures if you intend on opening your network.
I know it’s a little late, but there might still be people out there, like me, who never got around to trying this out back in 2016 when it was released to OTLand and could benefit from an updated, intelligible tutorial to get this server running on a single instance of Ubuntu. Apparently no one is either capable or willing to write an intelligible tutorial, so here I am.
Even for someone like myself who, as a SysAdmin, has experience with Linux, compiling, networking and Open Tibia, attempting to piece this project together and make it run properly took way longer than it should have due to how poorly the instructions are written. The tutorial by lordkill, while fairly complete, is a) now outdated and b) completely fails to mention several important configuration steps that are necessary to make this work.
Setting up the host
For this tutorial I am using Ubuntu 18.04. I know this isn’t the most modern distribution, but I had an ISO for it sitting in my HD and didn’t feel like downloading a different one. You can use Ubuntu 14, 16 or 20, it doesn’t matter. You can run this on a VM or a dedicated machine, I was able successfully set it up on both, just make sure you have at least 4 GB of Ram and 2 cores if you want it to run smoothly on a VM.
The Game Files
Now it is time for the (in)famous Linux libraries or “libs” as they are often referred to. Library files are necessary for certain programs to run, and if they are not setup correctly you will quickly run into confusing, frustrating error messages. Searching online won’t help much as these Libraries are specific to CipSoft’s files, so unless you spend hours teaching yourself about Linux library structure, you won’t know what to do unless someone tells you. The OTLand experts love chiming in and saying “just check the libs” whenever someone asks a question, but to a beginner that means nothing.
If you try and follow the instructions in lordkill’s post for setting up a database, you’re going to feel like pulling your hair out since he assumes you know how to create and import a blank database using MySQL commands. Here is the quickest way to import the database and install phpMyAdmin for easy UI.
The Querymanager is required to accept and direct incoming client requests to the database. The file attached here includes the source files, but you will need to edit the main.cpp file with your IP address and database password before compiling the sources to get an executable.
Before running the game, let’s take a moment to open some necessary ports in the firewall. Without this, login requests from the client will never make it to the database (and you will just get connection timeout errors).
The final step is creating a custom client using a hex editing tool. This can seem daunting, but it really isn’t that hard. There is already a great tutorial by Jester (lordkill references this in his tutorial as well) here. To clarify, you can skip the first step about replacing the RSA key and skip straight to the second half about changing the IP.
The only thing I would add is that the link in his tutorial is broken, if you want to use the same program he is, simply do a Google search for “XVI32 Hex Editor.” The “official” download site is the first result (I won’t post the link here, not sure if it’s allowed).
Once you’ve finished creating your custom 7.70 client, go ahead and grab an account number and password from the “Users” tab of the otserv database from the accordion menu in your phpMyAdmin page. If you followed all the steps, you should get a character list and be able to log in to the game.
Modified "game" file: 4.25 MB file on MEGA (https://mega.nz/file/i40RlSpA#cYXVIp3R_TmukO-FbrFSONmtH9k_TuRmlM4a9m2ljmU)
Tibia-game tarball: 290.61 MB file on MEGA (https://mega.nz/file/iksxxI6C#0WSSzeaRwmS-8FMtrWObe3ZA8kSQMNJTrPFn0Kac-LA)
This guide is for educational purposes only! This is intended for setting up the leaked CipSoft files for nostalgia purposes. I cannot guarantee that a server created from this guide will be secure if opened to the public. You will need to take additional measures if you intend on opening your network.
I know it’s a little late, but there might still be people out there, like me, who never got around to trying this out back in 2016 when it was released to OTLand and could benefit from an updated, intelligible tutorial to get this server running on a single instance of Ubuntu. Apparently no one is either capable or willing to write an intelligible tutorial, so here I am.
Even for someone like myself who, as a SysAdmin, has experience with Linux, compiling, networking and Open Tibia, attempting to piece this project together and make it run properly took way longer than it should have due to how poorly the instructions are written. The tutorial by lordkill, while fairly complete, is a) now outdated and b) completely fails to mention several important configuration steps that are necessary to make this work.
Setting up the host
For this tutorial I am using Ubuntu 18.04. I know this isn’t the most modern distribution, but I had an ISO for it sitting in my HD and didn’t feel like downloading a different one. You can use Ubuntu 14, 16 or 20, it doesn’t matter. You can run this on a VM or a dedicated machine, I was able successfully set it up on both, just make sure you have at least 4 GB of Ram and 2 cores if you want it to run smoothly on a VM.
The Game Files
- Attached is the “tibia-game.tarball.tar.gz” file. This is a compressed folder that contains all of the game data as well as the game executable. Also attached is the modified “game” file. Download both of these.
- Navigate to the Home tab in Files and right-click anywhere to create a new folder, call it “game” (make sure it is all lowercase; Linux is case sensitive).
- Right click the “tibia-game.tarball.tar.gz” package and select “Open With Archive Manager.” Click “Extract” in the upper-left then browse to the “game” folder you just created. Wait for it to finish then you can close out of Archive Manager.
- Next, we need to move the entire “game” folder to a different directory. This cannot be done like Windows with drag-and-drop, you must use the Terminal. To open the Terminal, right click anywhere on the desktop and select “Open Terminal” from the menu. With Terminal open, type the following command:
sudo mv /home/your_username/game /home
You will be asked for your password after entering this command, type it then hit enter to complete it. This command will move the game folder to the /home directory which is necessary for the game to work. If done correctly, you should no longer see the “game” folder in your Home. Instead, it can be found by navigating to the /home directory.
- Next, open the “game” folder and use the keyboard shortcut control + h. This will reveal all hidden files, and you should see another dozen or so icons appear in the game folder that were not there before.
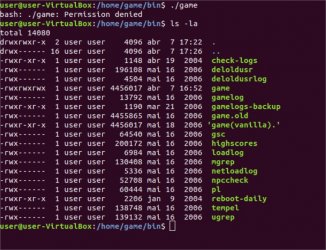
- Inside the “game” folder there is a sub folder called “bin,” open that. Inside there are several files, the one we are interested in is called “game.” Right-click it, and rename it to “game(vanilla).” Now, drag and drop the “game” file that you downloaded from this post directly into the “bin” folder. This secondary “game” file is the “modified binary” that is talked about in the original thread. We want to run this so we can use the re-named libraries (we’ll get to that later).
- While we’re still inside the “bin” subfolder, right click anywhere to open a Terminal window. Enter the command:
sudo chmod 777 game
This gives full read, write and execute privileges to the game executable. Without this, you will encounter errors.
- Next, back up one level to the main “game” folder. There should be a file called “.tibia,” open it. In the first section, you need to add “/home” to the front of each filepath, so it looks like this:
C:BINPATH = "/home/game/bin" MAPPATH = "/home/game/map" ORIGMAPPATH = "/home/game/origmap" DATAPATH = "/home/game/dat" USERPATH = "/home/game/usr" LOGPATH = "/home/game/log" SAVEPATH = "/home/game/save" MONSTERPATH = "/home/game/mon" NPCPATH = "/home/game/npc"
If you don’t do this, the game executable will not be able to load the map, monsters, npcs, etc. which is (obviously) necessary for the server to run.
- Now, go back to your terminal window and enter the command:
ip a
Your internal IPV4 address will be listed on the 11th line down, write it down/save it to your clipboard as you will be entering it several times throughout the course of this guide.
- Go back to the open .tibia file in Text Editor. Near the bottom of the file, the second to last section is #QueryManager. There is a string of text with IP addresses and ports. Change all of the IP addresses to your IPV4 address from the previous step, and all of the ports to 17778:
C:QueryManager = {("192.168.188.134",17778,"nXE?/>j`"),("192.168.188.134",17778,"nXE?/>j`"),("192.168.188.134",17778,"nXE?/>j`"),("192.168.188.134",17778,"nXE?/>j`")}
We’re done editing this file, save it and close out.
- Now, we need to copy this .tibia file to our user directory. The quickest way to do this is by right-clicking anywhere inside the “game” folder and opening an instance of Terminal. In this new terminal window, enter the command:
sudo cp .tibia /home/your_username
You can verify it worked by going to your Home and checking to see if the file is there.
Now it is time for the (in)famous Linux libraries or “libs” as they are often referred to. Library files are necessary for certain programs to run, and if they are not setup correctly you will quickly run into confusing, frustrating error messages. Searching online won’t help much as these Libraries are specific to CipSoft’s files, so unless you spend hours teaching yourself about Linux library structure, you won’t know what to do unless someone tells you. The OTLand experts love chiming in and saying “just check the libs” whenever someone asks a question, but to a beginner that means nothing.
- Attached is a .rar file called “dennis-libraries.” If you haven’t already, download this and unpack it to your Home.
- Next, we need to copy these files from the “dennis-libraries” folder to their final destination, the /lib directory. This is done by entering the following command in Terminal (open the Terminal window inside the dennis-libraries folder so you don’t have to type the full address):
sudo cp {ilovesatan.so.9,libc.so.6,lmao.so.9,payhunted.so.9,rofl.so.9,satanism.so.9,test_libpthread.so,trololol.so.9} /lib
You can confirm that this worked by navigating to Other Locations, Computer, lib.
- Now what we need to do is give full RWX (read, write, execute) permissions to these libraries so the game executable can fully access them. This can be done by going to Terminal, and entering the command:
sudo chmod –R 777 /lib
- Now we need to download and install the 32-bit libraries. The CipSoft game file is a 32-bit program, and standard Ubuntu 18.04 does not have a 32-bit version. This can be done by entering the following commands in Terminal:
sudo apt-get update
sudo apt-get install lib32z1
Terminal will ask you if you want to install [y/n], make sure to hit y. Once the install is finished, there should be a new file called “ld-linux.so.2” in the /lib directory.
If you try and follow the instructions in lordkill’s post for setting up a database, you’re going to feel like pulling your hair out since he assumes you know how to create and import a blank database using MySQL commands. Here is the quickest way to import the database and install phpMyAdmin for easy UI.
- In Terminal, install Apache with the following command:
sudo apt update && sudo apt install apache2
Make sure to enter your password and “y” when prompted to complete the installation.
- We need to allow Apache through the firewall, do this with the following command in Terminal:
sudo ufw allow in “Apache Full”
- Enable the firewall with:
sudo ufw enable
- You can confirm Apache is running with the following command:
sudo service apache2 status
The 4th line down of the output should say "Active: active (running)"
- Next, we need to install MySQL. The command to do that is:
sudo apt update && sudo apt install mysql-server
- Once the installation has finished, you can again check to make sure MySQL is running but using the command:
sudo service mysql status
- You should get a return that says “Active: active running since <date>.” This means MySQL is running, enter q to exit.
- Next, install phpMyAdmin with the command:
sudo apt update && sudo apt install phpmyadmin
When prompted, select apache2, then select ‘yes.’
- Next, we need to increase the maximum data import size that phpMyAdmin will allow (it’s set to only 2 MB by default). Open the necessary file with this command:
sudo gedit /etc/php/7.2/apache2/php.ini
Find “upload_max_filesize = 2M” and change it to: upload_max_filesize = 64M
- Next, enter the command:
sudo gedit /etc/apache2/apache2.conf
This will open a file in Text Editor, you need to scroll down to the very bottom of the file and simply add this line:
Include /etc/phpmyadmin/apache.conf
Now you can save and close.
- Now we need to make a MySQL user. Enter the command:
sudo mysql –p –u root
You will be prompted for your password.
- While we are in MySQL, we will create a user account. This is done with the following command:
CREATE USER ‘otserv’@’%’ IDENTIFIED BY ‘password of your choice’;
It is important that you use ‘otserv’ as the username for the sake of making the setup easy. If you change the username to something else, there are several lines of code that must be edited to match your username.
- Next, we need to grant our MySQL user account all necessary permissions with the following command:
GRANT ALL PRIVILEGES ON . to ‘otserv’@’%’ WITH GRANT OPTION;
- To make sure everything is setup correctly, open Firefox and type 127.0.0.1/phpmyadmin in the URL bar. You should be greeted with a login screen. Enter ‘otserv’ for the username and the password you chose in step 11.
- Once you’ve logged in, click “New” from the accordion menu in the upper left. For the new database name, use “otserv,” leave all of the defaults as is and click “Create:”
- Now, we need to import the existing database tables with all of the CipSoft data. Make sure you have the newly-created “otserv” database selected from the accordion menu, then open the “Import” tab.
You should have downloaded and unpacked the “otserv_data_schema.sql” file from this post, click Browse to locate and import it. Once you’ve done that, click “Go” at the bottom of the page.
- You should get a green banner message at the top of the page saying that the rows were imported successfully. You may also get some warning errors, you can ignore these.
- The final step for the database is done by editing a file with the following command:
sudo gedit /etc/mysql/mysql.conf.d
Use control + f to locate the line that says “bind-address,” then change the IP from 127.0.0.1 to 0.0.0.0. This allows any address to communicate with the database.
The Querymanager is required to accept and direct incoming client requests to the database. The file attached here includes the source files, but you will need to edit the main.cpp file with your IP address and database password before compiling the sources to get an executable.
- First, we need to install a package that will allow us to compile the source files. This can be done with the following command:
sudo apt-get install g++ libmysqlclient-dev mysql-server
- Once this has finished installing, navigate to the “realots-query-manager-master” folder and open “main.cpp” with Text Editor.
In this particular query manager, there 8 locations where you need to change the existing database password to the password you made for your “otserv” user. The easiest way to find these is by control + f searching the first couple letters of the default password (Cz7u89dmyPzHDNEL). Every line where you find this, replace it with your database user password.
- Next, use control + f to find this line:
std::string q_world = "otserver"
and replace ‘otserver’ with ‘RealOTS.’
- Now, search for the line:
C++:hton1(INADDR_LOOPBACK)
and replace it with:
C++:inet_addr("your IPV4 address")
Yes, the quotes need to be in there.
- Finally, use search to find
C++:writeMsg.adByte(213)
You should see 4 lines total, each with a different number. Each line corresponds to a number in your IP address. Using my VM as an example, I changed the 4 lines to:
C++:writeMsg.adByte(192); writeMsg.adByte(168); writeMsg.adByte(188); writeMsg.adByte(134);
Once this is done, save and close out of main.cpp.
- Now, we are ready to compile the Query Manager. Inside the “realots-query-manager-master” folder, right click and open Terminal. Enter the command:
sudo make
- If done correctly, there should now be a new file in the folder called “querymanager.” To run it, in the same instance of Terminal, enter the command:
./querymanager
If everything was done correctly, you should get an output that says:
Code:------------------------- OTServ QueryManager ------------------------- :: Connecting to the MySQL database...[done] :: Starting OTServ QueryManager... [done]
Before running the game, let’s take a moment to open some necessary ports in the firewall. Without this, login requests from the client will never make it to the database (and you will just get connection timeout errors).
- Open Terminal and type the following commands:
sudo ufw allow 7171/tcp
sudo ufw allow 7172/tcp
- Navigate back to the “game” folder (which is in the /home directory). Inside the “game” folder, there is a folder called “save.” Open it to make sure there isn’t anything inside. If you see a file called game.pid, delete it. This file is created anytime the game executable is run, and if you try and start a new instance of the game executable while there is a game.pid file in the “save” folder, you will get an error message saying there is already an instance of the server running.
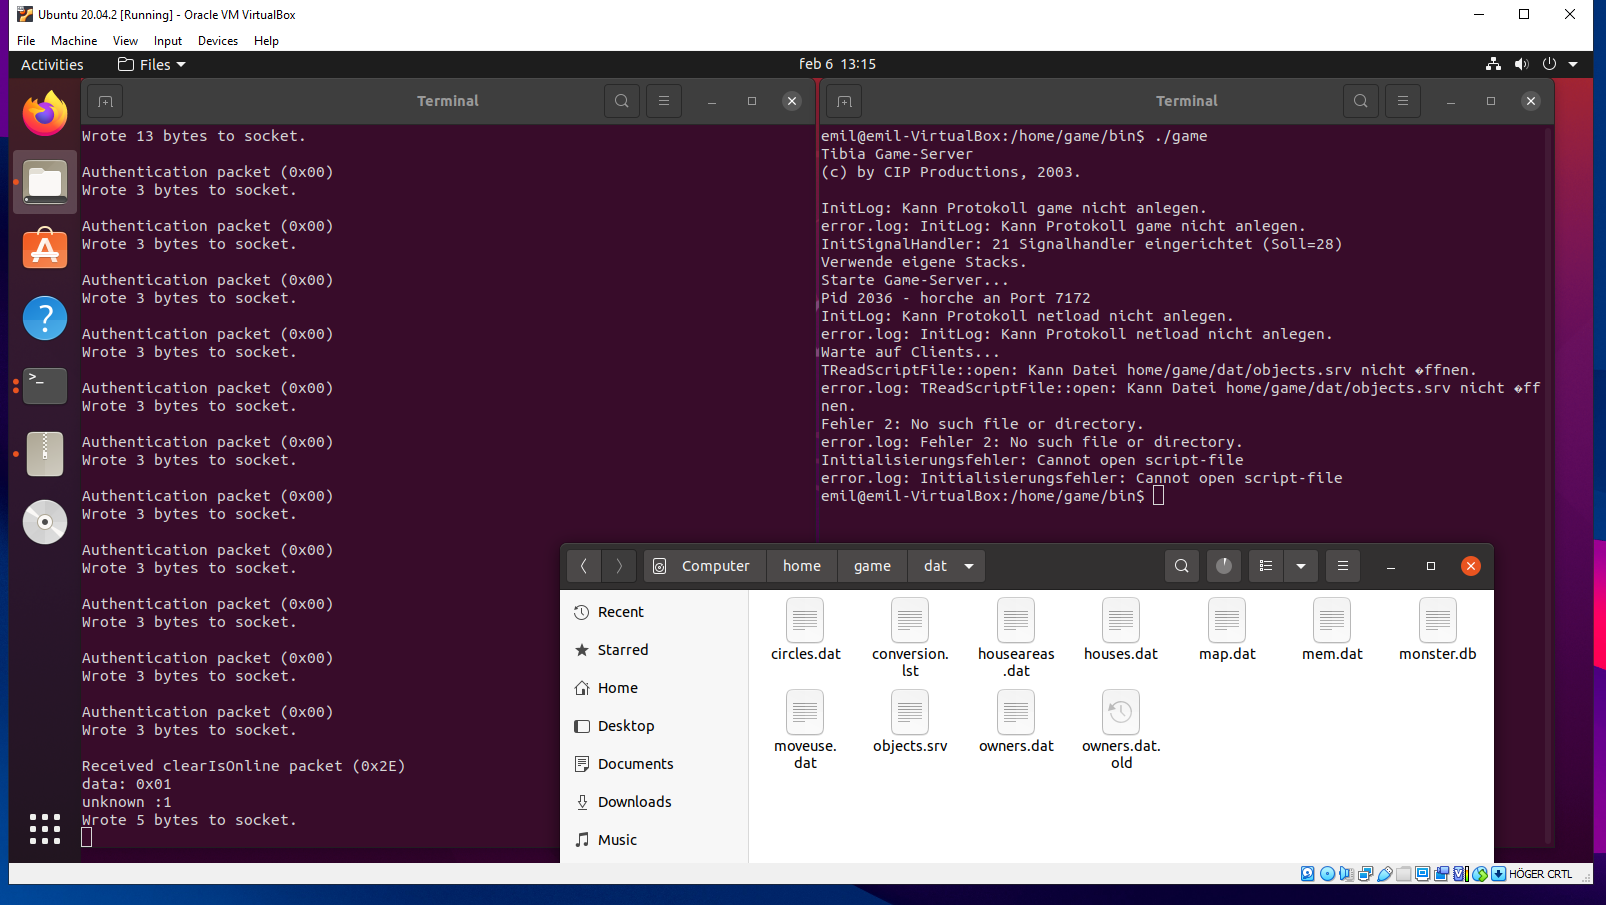
- If there was nothing in the “save” folder, you can back out and go into the “bin” folder. From here, right click and open a new instance of Terminal. Enter the command:
./game
You should see the terminal window will fill up with lines of results, indicating the map, monsters, NPCs, houses, etc. are loading. Once that has finished, the game is ready and we can move on to the next step.
- First, make sure you have downloaded and unpacked the “realotsloginserver-master” source files, and that they are located in Home with the Query Manager. These are just the source files, so we need to compile. Start by installing the necessary packages:
sudo apt-get update
sudo apt-get install cmake build-essential liblua5.2-dev libgmp3-dev libmysqlclient-dev libboost-system-dev libpugixml-dev
- Once that has finished installing, right-click inside the “realotsloginserver-master” folder and open an instance of Terminal. Enter the following command:
sudo mkdir build && cd build
This creates a new folder called “build” and moves you to it.
- Now, enter the commands:
sudo cmake ..
make
- There should now be a file inside of build called “tfls." Copy this up one level to the main “realotsloginserver-master” folder.
- Now, inside the main folder, open config.lua with Text Editor. The following lines must be changed:

“ip” must be changed to your VM’s IPV4 address, clientVersionMin/Max/Str must be changed to 770, 770 and 7.70, respectively. The MySQL Host must also be set to your IPV4 address, and the username, password and database name must be changed to reflect your “otserv” databse and “otserv” username and password. Once these lines have been changed, you can save and close config.lua.
- Finally, in the “realotsloginserver-master” there is a file called “gameservers.xml.” Open it with Text Editor, you’ll see there’s only a couple lines of code, enter your IP address where it says “ip=”. Save and close the file.
- From the “realotsloginserver-master” folder, right click and open a new instance of Terminal. Enter the command:
./tfls
You should get an output saying the login server is online.
The final step is creating a custom client using a hex editing tool. This can seem daunting, but it really isn’t that hard. There is already a great tutorial by Jester (lordkill references this in his tutorial as well) here. To clarify, you can skip the first step about replacing the RSA key and skip straight to the second half about changing the IP.
The only thing I would add is that the link in his tutorial is broken, if you want to use the same program he is, simply do a Google search for “XVI32 Hex Editor.” The “official” download site is the first result (I won’t post the link here, not sure if it’s allowed).
Once you’ve finished creating your custom 7.70 client, go ahead and grab an account number and password from the “Users” tab of the otserv database from the accordion menu in your phpMyAdmin page. If you followed all the steps, you should get a character list and be able to log in to the game.
Modified "game" file: 4.25 MB file on MEGA (https://mega.nz/file/i40RlSpA#cYXVIp3R_TmukO-FbrFSONmtH9k_TuRmlM4a9m2ljmU)
Tibia-game tarball: 290.61 MB file on MEGA (https://mega.nz/file/iksxxI6C#0WSSzeaRwmS-8FMtrWObe3ZA8kSQMNJTrPFn0Kac-LA)
Attachments
-
dennis-libraries.rar1.3 MB · Views: 1,151 · VirusTotal
-
otserv_schema_data.rar701.3 KB · Views: 1,088 · VirusTotal
-
realots-query-manager-master.zip21.6 KB · Views: 1,090 · VirusTotal
Last edited:


") Although validating is an issue too. For example buffer over-read is possible, if you send a packet shorter than what is expected for its header. That's from a quick glance.
Although validating is an issue too. For example buffer over-read is possible, if you send a packet shorter than what is expected for its header. That's from a quick glance.